Can You Grow Onions in a 5 Gallon Bucket? Yes, Here’s How in 2026
Onions have shallow roots and a small footprint, which makes them a good fit for tight spaces. Can you grow onions in a 5 gallon bucket and still pull real bulbs? Yes, but spacing and day length decide the size, not the gallons.
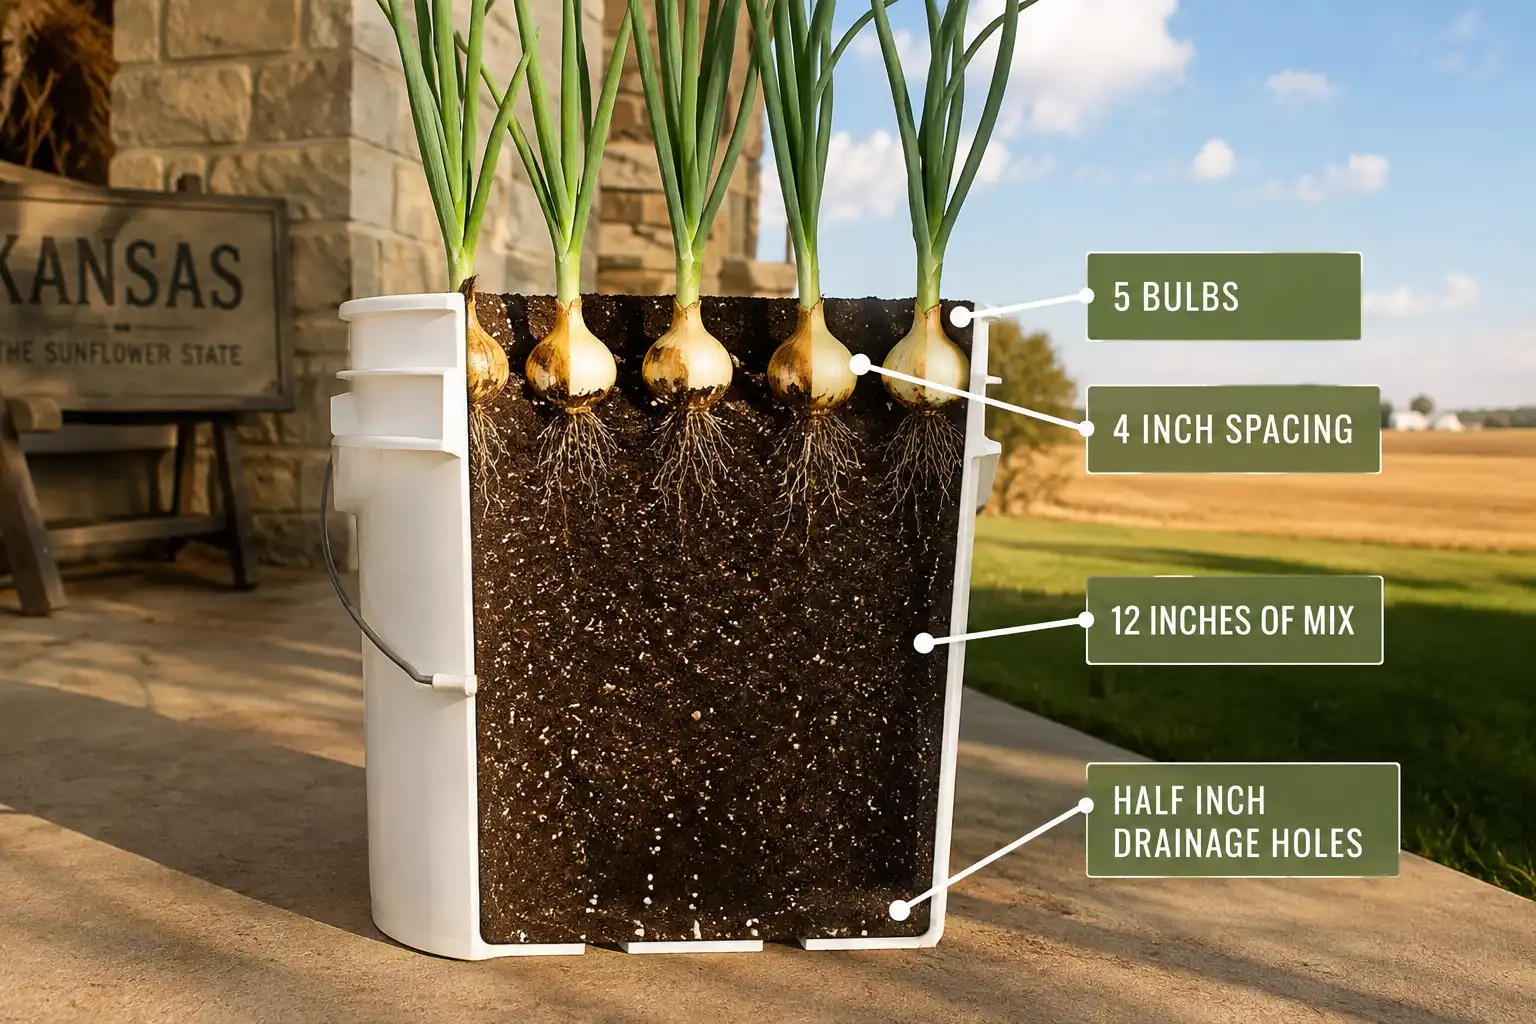
Yes, you can grow onions in a 5 gallon bucket. Plan on four to five full-size bulbs at 4 inch spacing, or seven medium ones at 3 inches. Fill 12 inches deep and drill drainage holes.
Why You Can Grow Onions in a 5 Gallon Bucket
Onions build a shallow, sparsely branched root system. Most feeder roots stay in the top 12 inches, and rooting density drops off fast below that. A tomato drives roots 3 feet down. An onion never does.
So depth is rarely the problem. A standard 5 gallon bucket stands 14.5 inches tall, with a top inside diameter near 11.75 inches. Fill it to 12 inches and you cover almost the entire onion root zone.
Surface area sets the real ceiling. Onions swell sideways, so every plant needs its own circle of ground. At a 12 inch fill line, a bucket gives you roughly 104 square inches at the surface. Leave an inch of margin along the wall and about 70 square inches stay usable. That number decides your plant count.
Shallow roots create a second catch. Onions cannot chase moisture downward once the surface dries, and bucket surfaces dry fast. Watering discipline therefore matters more here than with nearly any other container crop.
How Many Onions Fit in One Bucket
Four to five onions for full-size bulbs, or seven for medium ones. Green onions pack in far tighter.
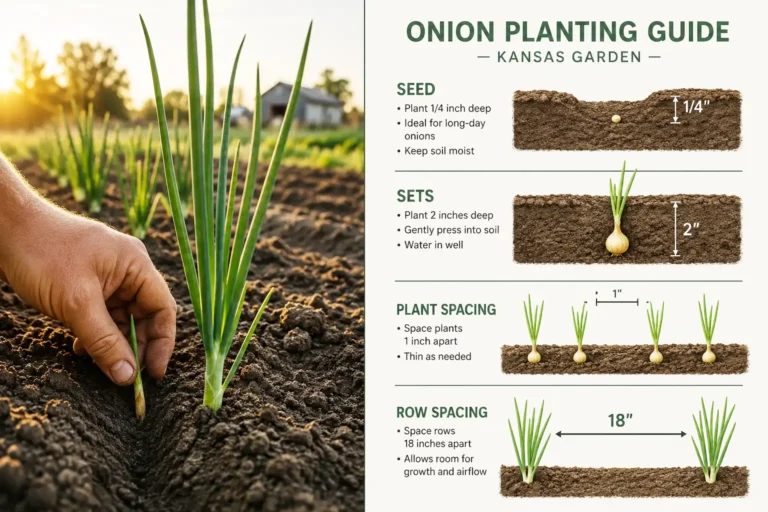
Bulb size tracks spacing almost directly. K-State Research and Extension puts 4 inches on jumbo bulbs and 2 to 4 inches on standard ones. Dixondale Farms, the largest onion plant grower in the country, tells container growers never to crowd closer than 3 inches.
Here is how that math works out across about 70 usable square inches:
| Spacing | Plants per bucket | Bulb size to expect | Best use |
|---|---|---|---|
| 4 inches | 4 to 5 | 3.5 to 4 inches across | Slicing and storage |
| 3 inches | 7 | 2.5 to 3 inches across | Cooking onions, best total yield |
| 2 inches | 12 to 14 | 1.5 to 2 inches across | Pickling and small boiler onions |
| 1 inch | 25 to 30 | No bulb forms | Green onions and scallions |
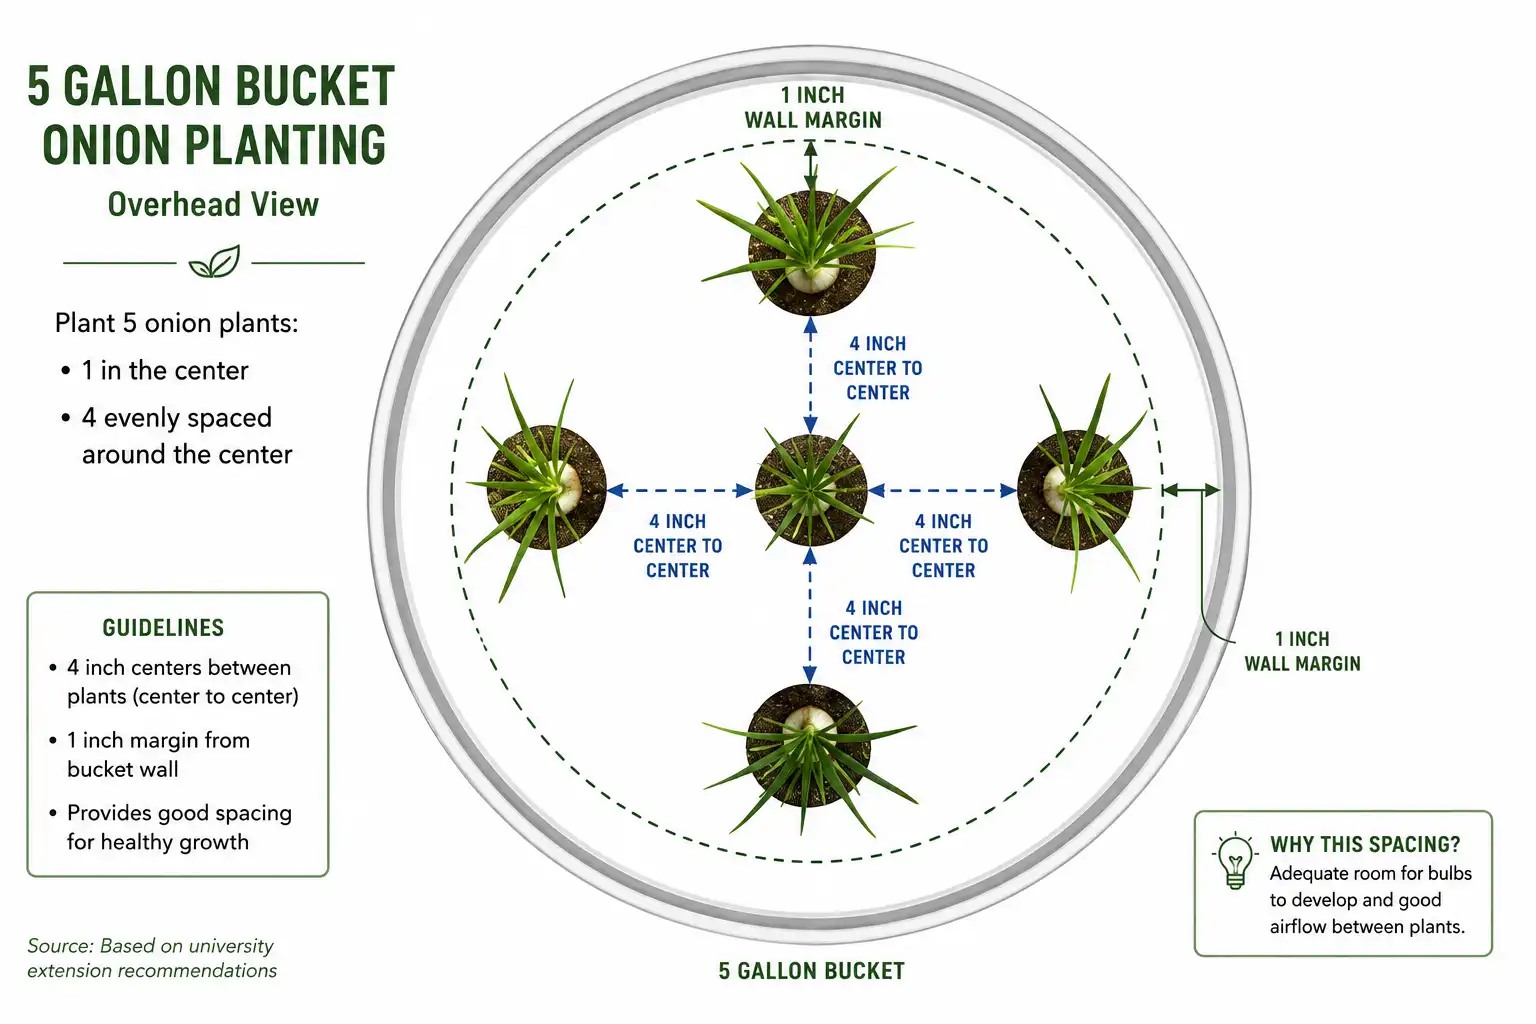
Own approach splits the difference. Set plants at 3 inches, then pull every other one young for scallions. That way one bucket gives green onions in June and full bulbs in July. Farmers who want uniform storage bulbs should stay at 4 inches instead.
Picking and Prepping the Bucket
Choose a food-grade HDPE bucket, marked with recycling code 2 and sold for food or drinking water. Skip anything that held paint, driveway sealer, herbicide, or motor oil. Plastic soaks up those residues, then releases them slowly into the mix.
Drill the drainage holes
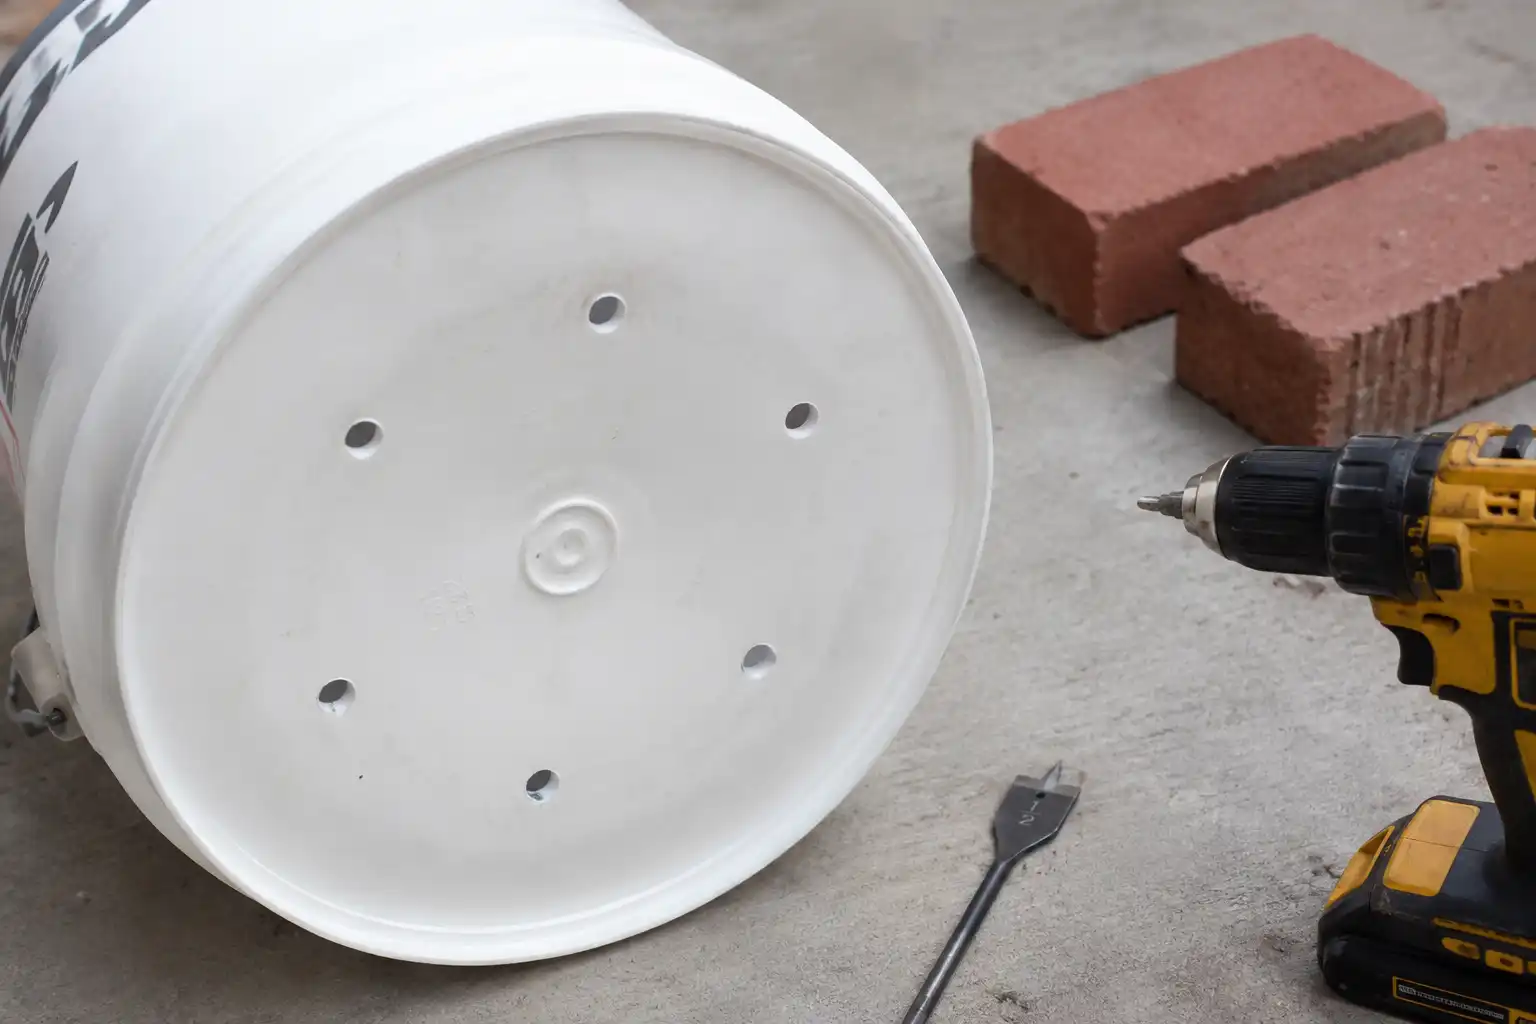
Nebraska Extension sets container drainage at three to four quarter-inch holes per gallon of volume. For a 5 gallon bucket, five or six half-inch holes across the bottom hits the same target. Space them evenly, then add two more about an inch up the sidewall.
Next, set the bucket on bricks or pot feet. A bucket flat on concrete seals its own drain holes.
Never add gravel underneath the mix. NC State Extension states plainly that gravel does not help. It raises the perched water table inside the container and steals root volume.
Deal with the bucket color
Black buckets soak up heat. A black wall in full Kansas sun runs much warmer than the surrounding air. Onions size up best between 55°F and 75°F. So paint the outside white, wrap it in light burlap, or nest it inside a second bucket. A pale bucket in the same spot stays noticeably cooler at the root zone.
The Soil Mix Bucket Onions Need
Leave garden soil out of it. Soil from the field compacts inside a container, drains poorly, and smothers the shallow roots onions rely on. Every extension container guide repeats that warning.
Mix your own instead.
- 2 parts commercial potting mix, peat or coir based
- 1 part finished compost
- 1 generous handful of perlite for extra air
- 1 tablespoon of a starter fertilizer carrying real phosphorus
NC State Extension puts the ideal onion pH between 6.0 and 6.5. The University of Minnesota stretches the workable range to 7.0. Bagged potting mixes usually land close, but a quick test still pays. Below 6.0, nutrient availability drops off sharply.
Phosphorus deserves special attention. Because onion roots stay sparse and shallow, they forage poorly for immobile nutrients like phosphorus, potassium, and zinc. So blend the starter fertilizer through the lower two-thirds of the mix. Those micronutrient shortfalls in plants usually show up as pale striping first.
One bucket filled to 12 inches takes roughly two-thirds of a cubic foot. A 1.5 cubic foot bag therefore fills two buckets with a little to spare.
Choosing a Variety That Will Actually Bulb
This step sinks more bucket onion crops than anything else. Onions bulb on day length, not on plant size or calendar date. Once daylight crosses a variety’s trigger, the plant quits making leaves. Then it fills a bulb at whatever size it has reached.
Three groups exist.
| Type | Bulbing trigger | Best latitude | Examples |
|---|---|---|---|
| Short-day | 11 to 12 hours | 25 to 35°N | Texas SuperSweet, Granex |
| Intermediate-day | 12 to 14 hours | 32 to 42°N | Candy, Super Star, Red Candy Apple |
| Long-day | 14 to 16 hours | 37 to 47°N | Walla Walla, Copra, Patterson |
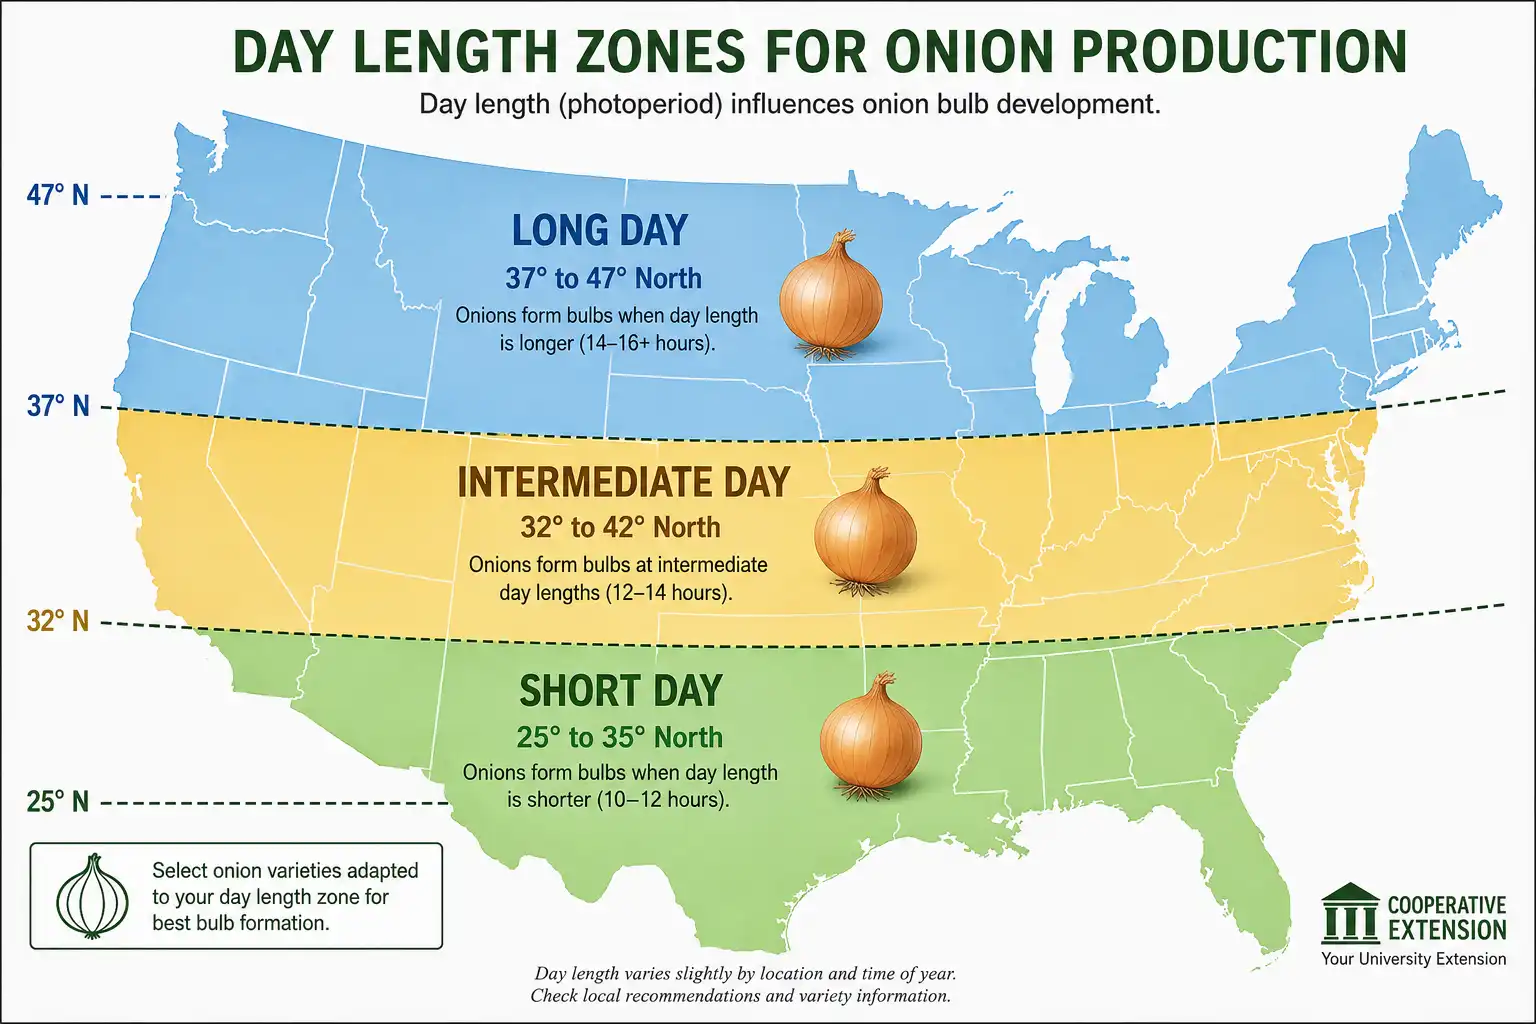
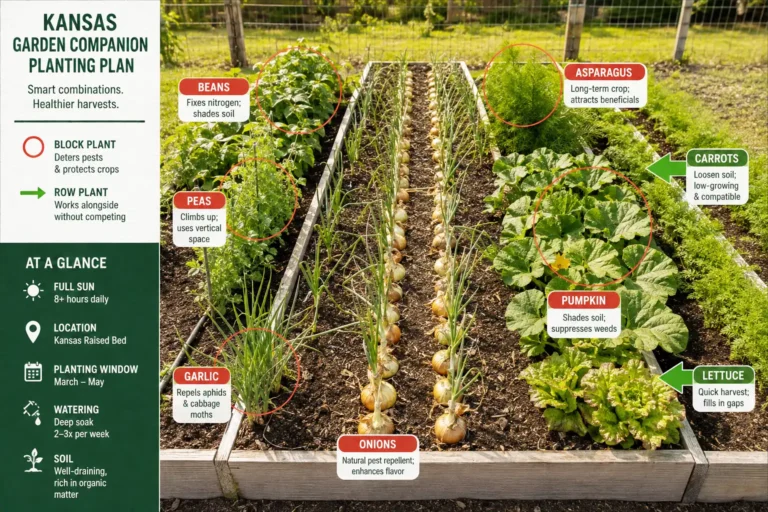
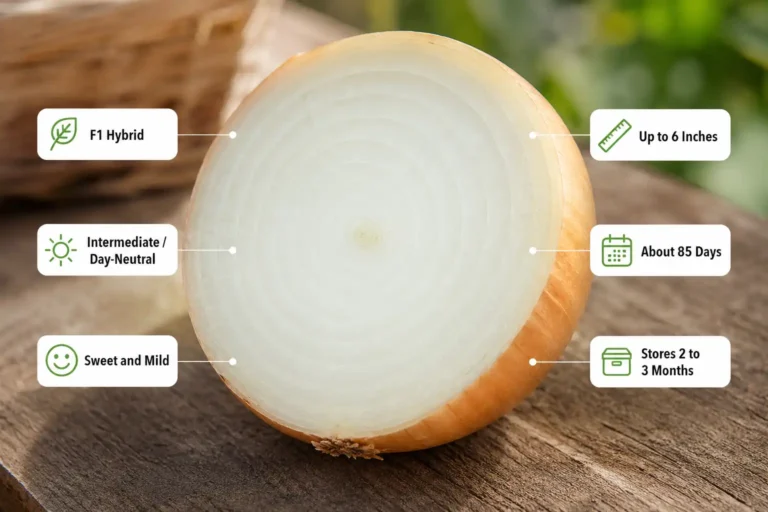
K-State Research and Extension recommends intermediate-day onions across all of Kansas. Long-day types also work in northern counties. Near 39°N, stick with intermediate-day plants. The Candy onion performs most reliably for me, mainly because it sizes up before real July heat arrives.
Get this wrong and the bucket cannot save you. A short-day variety grown in Minnesota gives you a golf ball. A long-day variety grown in Georgia gives you leaves and no bulb at all.
Sets, Transplants, or Seed
Transplants produce the most predictable bulbs in a bucket. Sets grow fastest yet bolt more often. Seed offers the widest variety choice along with the longest wait.
- Transplants: pencil-thin bare-root plants sold in bundles. Set them 1 inch deep. Best size potential and full variety selection.
- Sets: small dried bulbs. Pick ones under 1 inch across, because SDSU Extension notes that oversized sets throw flower stalks instead of bulbs. Most set varieties suit green onions anyway.
- Seed: start indoors 8 to 10 weeks before your last frost. Germination runs 7 to 14 days at 65°F to 77°F.
Buckets favor transplants for one practical reason. You control the exact spacing from day one, so nothing gets wasted. Transplanting onions into a container also beats thinning seedlings by hand in a tight circle.
Growers who want unusual varieties should still consider starting onions from seed under lights in January. Kansas transplant catalogs carry maybe a dozen options. Seed catalogs carry hundreds.
How to Plant Onions in a Bucket Step by Step
- Drill the drainage holes, then raise the bucket on bricks.
- Pre-moisten the mix in a wheelbarrow until it holds together in your fist. Dry peat repels water for days otherwise.
- Fill to 12 inches, firming lightly as you go. Leave 2 inches of bare rim for watering.
- Scratch a spacing grid into the surface at 3 or 4 inch centers.
- Set each plant 1 inch deep with roots pointing straight down. Point the tip up on sets.
- Firm the mix gently around every plant so the roots make contact.
- Water until it runs freely from the bottom holes.
- Spread a half inch of fine compost across the surface to slow evaporation.
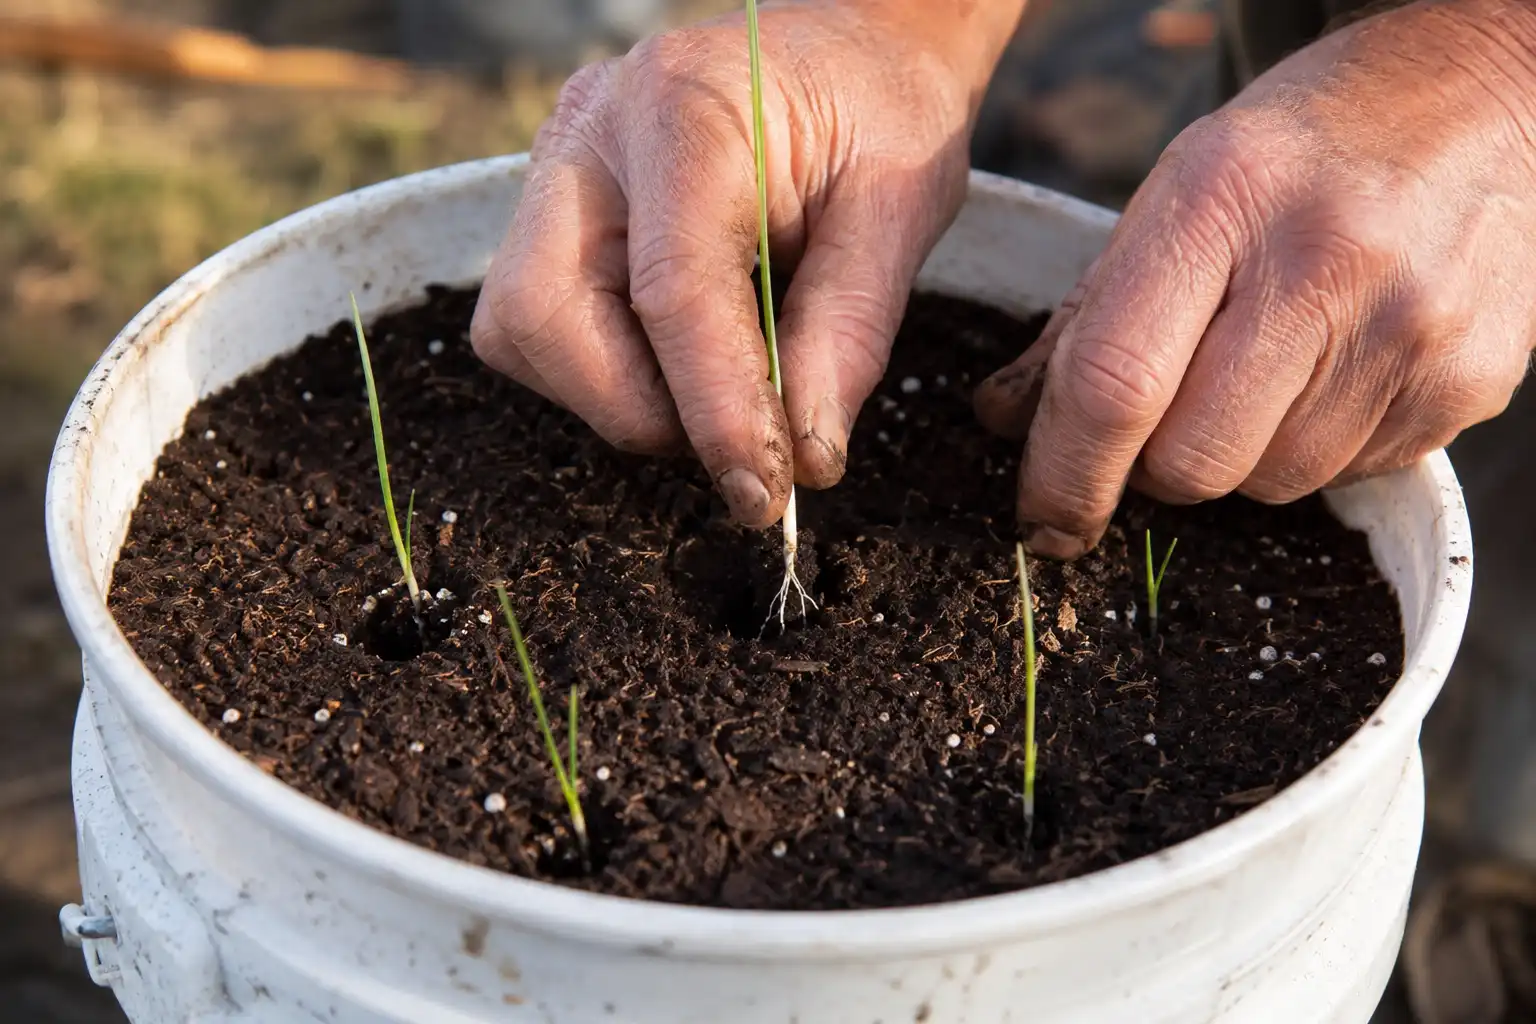
Timing matters as much as technique. K-State recommends planting onion plants or sets in mid to late March in Kansas. That way most growth happens before hot dry weather arrives. Adjust the window earlier or later based on your own last frost date.
One rule holds all season. Never mound mix against the bulbs. The University of Maryland and Virginia Cooperative Extension both warn against hilling onions. Soil piled on the neck invites stem and bulb rot.
How Often to Water Bucket Onions
Water whenever the top inch of mix feels dry. That is the whole rule, though the frequency still surprises most first-timers.
In the field, onions want about 1 inch of water per week. A bucket simply cannot bank a week of moisture in the root zone. So expect to water every day or two through spring. During a hot dry August stretch, twice daily becomes normal.
Always water until it drains out the bottom. Partial watering leaves a dry pocket beneath the roots. Moisture swings during bulbing then cause split or double bulbs. Virginia Cooperative Extension names dry soil during bulb formation as the direct cause.
Then quit entirely. Once half the tops fall over, cut water off completely. Bulbs need to finish in dry mix, otherwise they rot at the neck during curing.
A moisture meter earns its keep on a covered patio, where rain never reaches the mix. The dry surface tells you nothing about conditions 4 inches down.
Feeding Onions in a Container
Feed lightly and often. Every watering flushes nitrogen out the drain holes, so a single spring application will not carry the crop.
K-State side-dresses field onions once or twice with urea, 45-0-0. The rate runs a quarter to a half pound per 25 feet of row. Scale that far down for a bucket. Run a half-strength liquid feed every 10 to 14 days. Feeding starts three weeks after planting and stops when the necks soften.
Excess nitrogen does real damage late in the season. K-State lists the results: delayed maturity, thick necks, soft bulbs, green flesh, and poor storage life. So shut nitrogen off as soon as bulbing starts. After that point the plant needs water and sunlight, nothing else.
Growers who prefer a single blended product should look at fertilizer blended for onions rather than a generic formula. Onions carry unusual sulfur and phosphorus demands. General vegetable blends also run too heavy on nitrogen for the final six weeks.
Where to Put the Bucket
Give the bucket every hour of direct sun you can find. Six hours works as the floor, while eight or more builds noticeably bigger bulbs. The University of Minnesota notes that overcast skies and cool weather delay bulb formation. So a shady corner costs you twice.
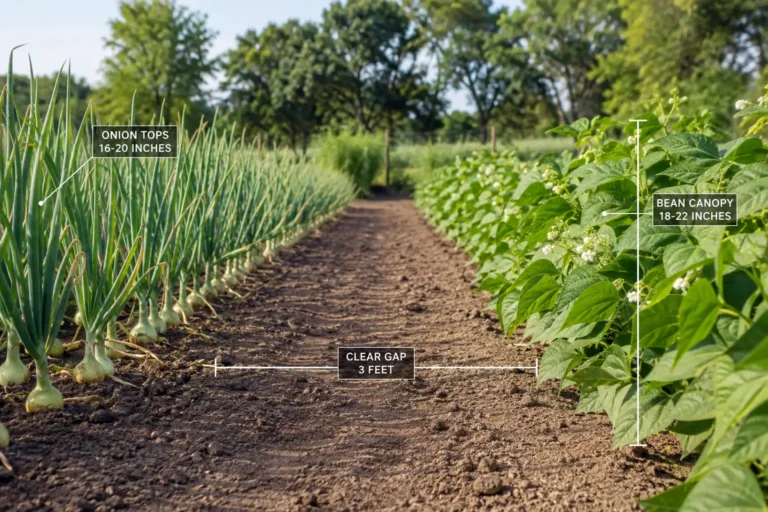
Wind causes a second problem people rarely anticipate. A bucket with 18 inches of onion tops catches wind like a sail. Then 5 gallons of mix cannot hold it down. K-State points out that onions stop growing once wind knocks the tops over. So wedge the bucket against a south wall, group several together, or drop a paving stone beside each one.
Mobility is the real advantage of a bucket, though. These can be slid into afternoon shade during a 100°F stretch, then rolled back out when temperatures ease. Field onions never get that option.
Common Bucket Onion Problems and Fixes
| Problem | Likely cause | Fix |
|---|---|---|
| Bulbs stay tiny | Late planting, or wrong day-length type | Plant on time and match variety to your latitude |
| Flower stalk appears | Sets over 1 inch, or a hard cold snap after planting | Use small sets or transplants, cover during freezes |
| Split or double bulbs | Moisture swing during bulbing | Water consistently, never let the mix go bone dry |
| Soft rot at the soil line | Mix hilled onto the neck, or wet mix at maturity | Never mound mix on bulbs, stop water at top-fall |
| Thick necks that will not cure | Too much nitrogen late in the season | Cut nitrogen at the first sign of bulbing |
| Silvery streaks on leaves | Onion thrips | Spray forcefully into the leaf axils, treat early |
| All leaves and no bulb | Long-day variety grown too far south | Switch to an intermediate or short-day type |
Two of those show up far more often in buckets than in fields. Frozen mix ranks first. A bucket holds only two-thirds of a cubic foot. So it freezes solid in a hard March cold snap. Field soil at the same depth never does. Wrap the sides or move the bucket into a garage when a hard freeze threatens.
Heat stress ranks second. Container root zones run hotter than field soil once summer arrives, which pushes early bolting and premature bulbing. Both problems trace back to the small thermal buffer inside a bucket.
Harvesting and Curing Onions From a Bucket
Pull the bulbs once about half the tops have fallen over and browned. Bulb onions generally need 100 to 120 days from transplant, so a mid-March planting in Kansas comes off in July.
Work through it in order:
- Stop watering when half the tops have fallen.
- Wait roughly one more week while the necks dry down.
- Lift each bulb by hand from the loose mix. Never yank the tops.
- Cure 2 to 3 weeks at 75°F to 85°F with steady airflow, out of direct sun.
- Check for papery skins, dry roots, and a tight neck.
- Trim tops to 1 inch, then store cool, dark, and dry.
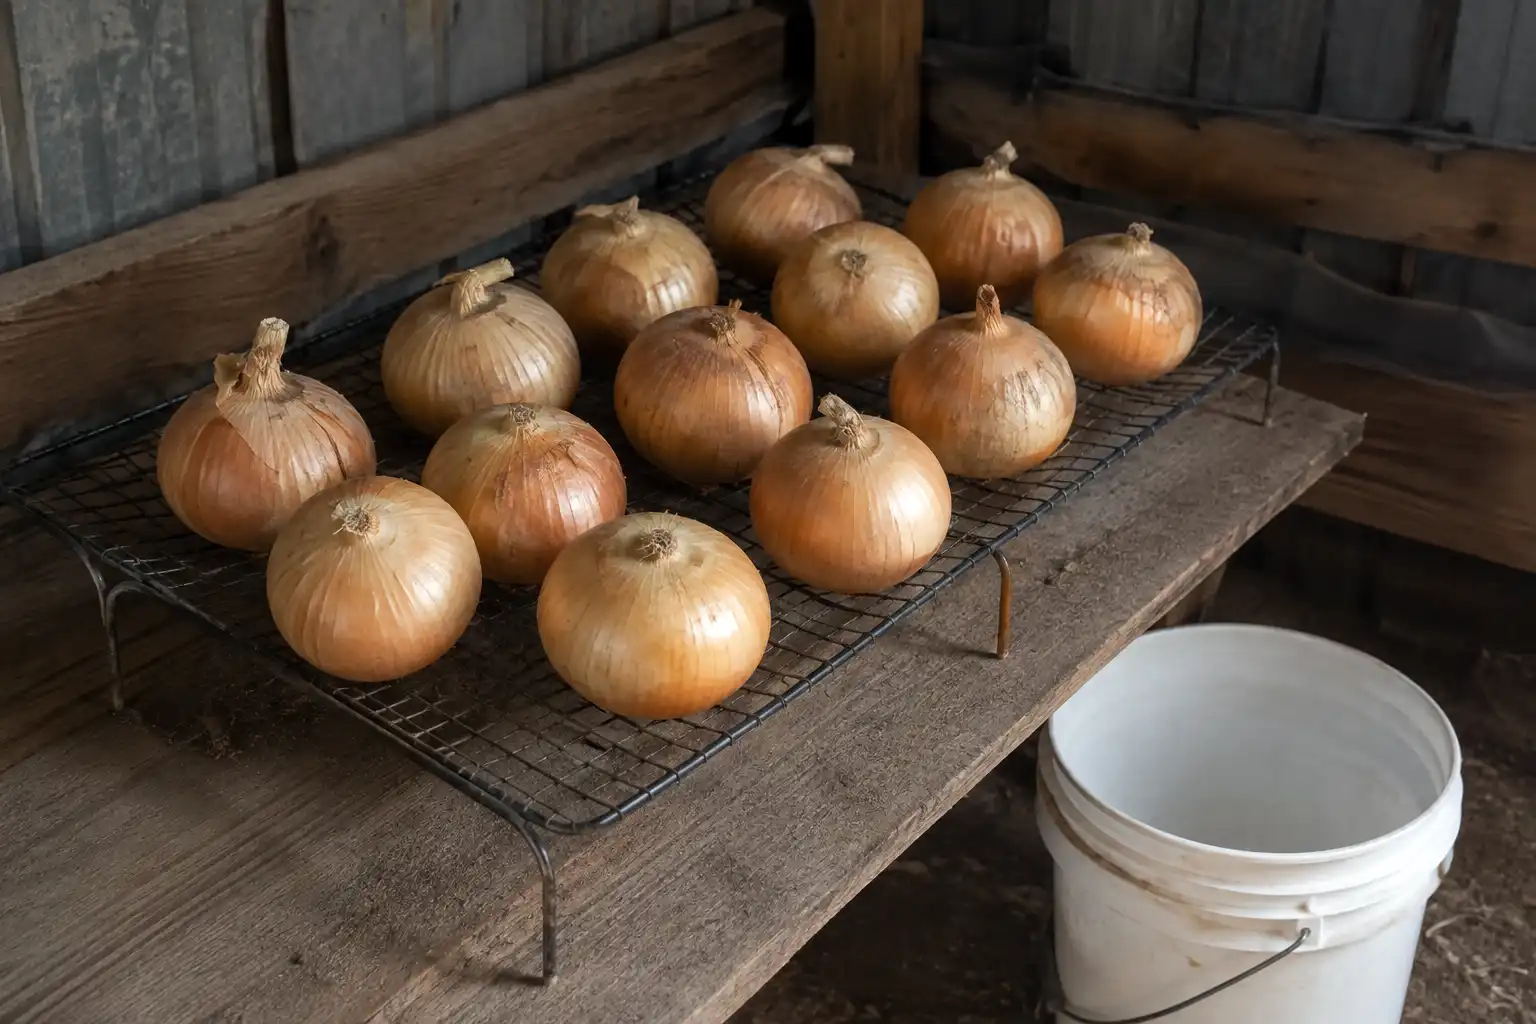
Curing is where buckets genuinely beat field rows. Rain during harvest week ruins a lot of field onions. Instead, the whole bucket should be carried into the shed, with bulbs pulled once the weather clears. That single option has saved the patio crop more than once.
The University of Maryland reports 6 to 7 months of storage near 32°F at 65 to 70 percent humidity. A cool basement or garage still holds them 2 months or more in mesh bags.
Growing Green Onions in a Bucket Instead
Switch to green onions and the whole calculation changes, because day length stops mattering. Bunching onions, Allium fistulosum, never form bulbs at all. So latitude, variety triggers, and bulbing dates drop out entirely.
Sow 25 to 30 seeds per bucket at roughly 1 inch spacing and a quarter inch deep. Keep the surface damp for the full two weeks germination can take. Harvest starts around day 50. Then a fresh sowing every three weeks keeps scallions coming until frost.
Blanching works well here too. About two weeks before you cut them, pile 2 inches of mix around the stems for long tender white shanks. SDSU Extension recommends exactly that, and it does not contradict the earlier warning. Hilling harms bulb onions because it rots the neck. Green onions carry no bulb to rot.
Anyone short on patio space should start here. Green onions in a bucket succeed almost every time. Bulb onions instead demand correct variety selection and correct timing.
What to Do With Your First Bucket
Start with intermediate-day transplants at 3 inch spacing. Plant in mid to late March at similar latitudes. That combination forgives the most mistakes. You get seven onions plus an early scallion harvest from thinning. Timing also carries enough margin that a late cold snap will not cost the crop.
Then focus your attention on two things only. Water before the top inch dries out, and stop feeding nitrogen the day bulbing starts. Almost every disappointing bucket onion traces back to one of those two, not to the bucket itself.