Soil Blocker Guide 2026: Best Picks, Sizes, and How to Use One
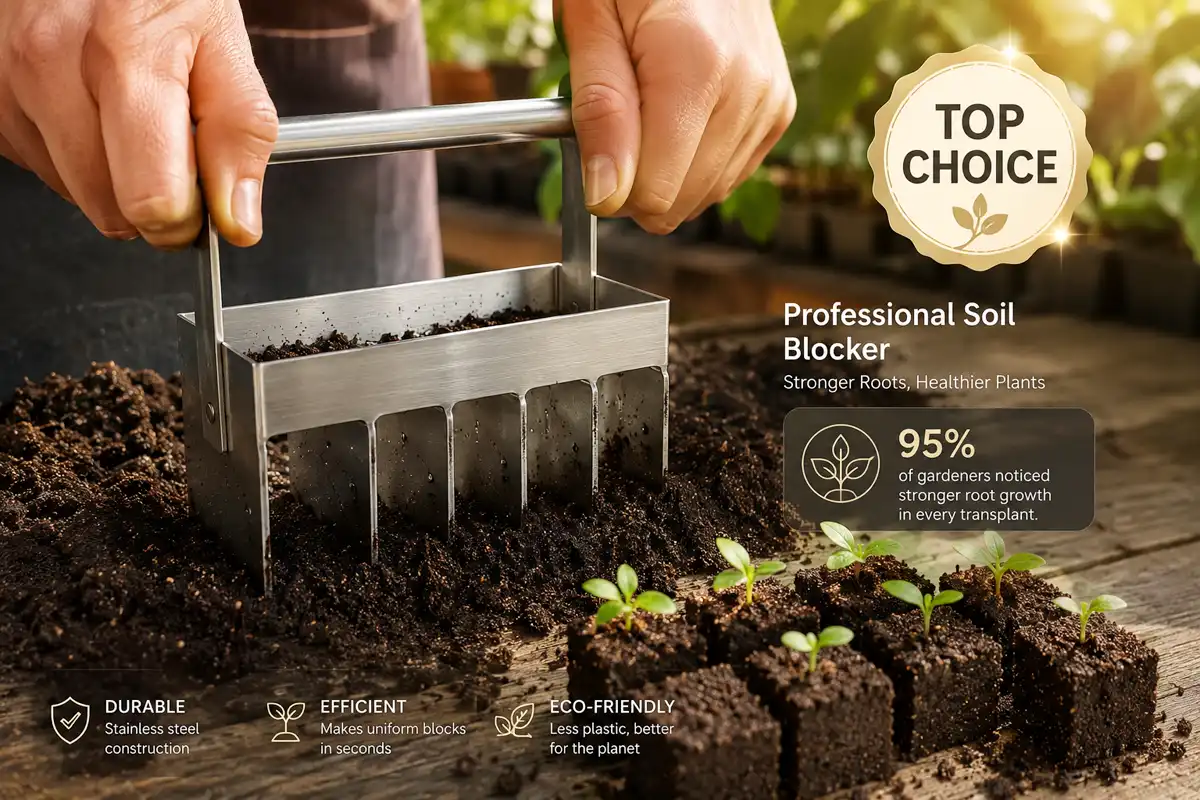
Tangled roots, transplant shock, and a garage full of cracked plastic trays. That is the seed-starting cycle a soil blocker breaks. It presses your mix into firm, standing cubes that grow the plant and hold it. Below are my top picks and how to use a soil block maker.
The best soil blocker is the Ladbrooke Mini 4, because it makes four 2-inch blocks for most crops. The BlumWay 8-Cell presses eight at once, which suits bigger batches. For fine seeds, try the Ladbrooke Micro 20.
A Quick Comparison: Top 7 Soil Blockers at a Glance
| Pick | Block size | Cells per press | Material | Best use | Quality |
|---|---|---|---|---|---|
| Ladbrooke Mini 4 | 2 in | 4 | EP-coated steel | Most vegetables, herbs, flowers | Premium |
| BlumWay 8-Cell | 2 in | 8 | Heavy-gauge stainless steel | Large seed-starting batches | Great value |
| Ladbrooke Micro 20 | 3/4 in | 20 | EP-coated steel | Fine seeds (lettuce, basil, celery) | Premium |
| Ladbrooke 5-Pc Essentials | 3/4 in + 2 in | 20 + 4 | EP-coated steel | Full nesting, 50+ seedlings | Premium |
| Ladbrooke Maxi | 4 in | 1 | EP-coated steel | Big transplants (tomatoes, peppers) | Premium |
| TILLERMAN Bundle | 3/4 in + 2 in | 1 per tool | Zinc-coated stainless steel | Herbs to seedlings, small farms | Heavy-duty |
| Jownupp Bundle | 0.67 in + 2 in | 28 + 6 | Metal | Budget all-in-one, mixed seeds | Budget |
What Is a Soil Blocker?
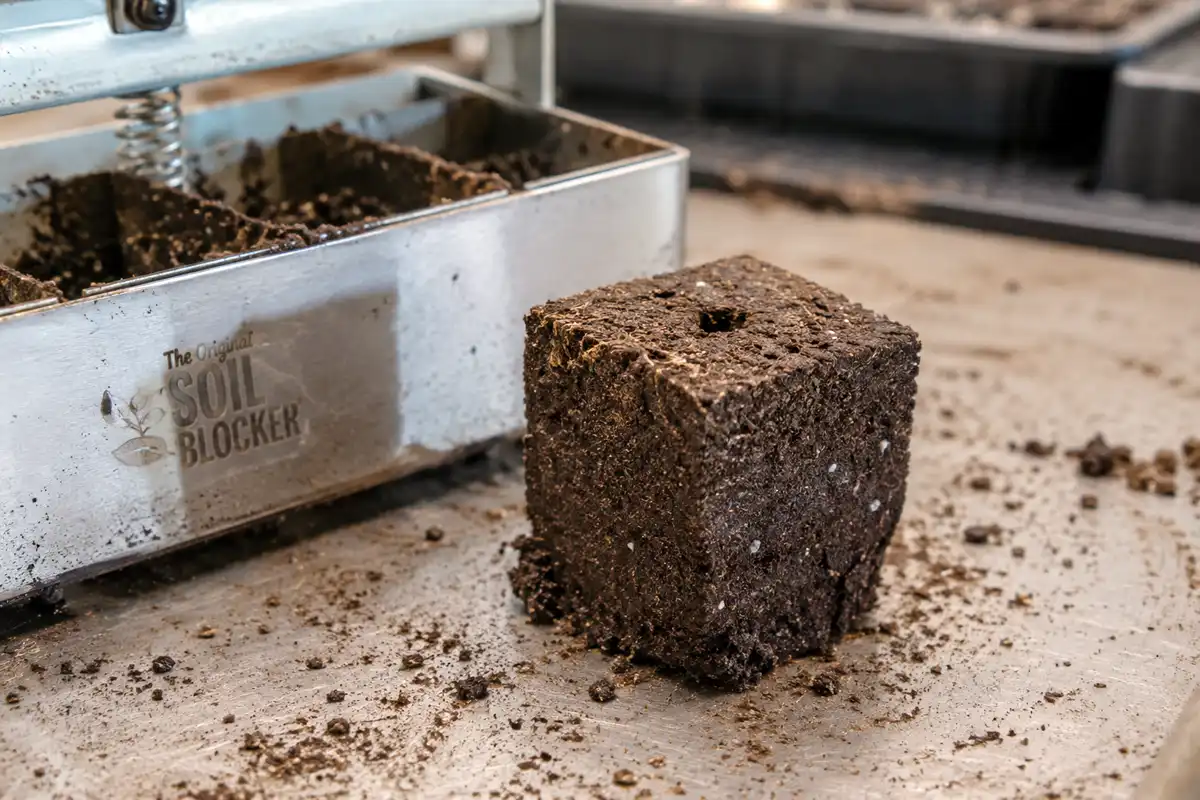
A soil blocker is a small hand tool that presses moist seed-starting mix into compact cubes instead of plastic trays or pots. Each block holds its shape on its own, so seeds germinate and grow without a container.
Each cube works as both the pot and the growing medium, so you plant the whole block, roots and all. You will also see it called a soil block maker. The method, often just called soil blocking, goes back decades. Eliot Coleman popularized it in North America in his book The New Organic Grower. It is one of the cleanest ways I know to handle seed starting, and it fits farms and windowsills alike.
How Does a Soil Blocker Work?
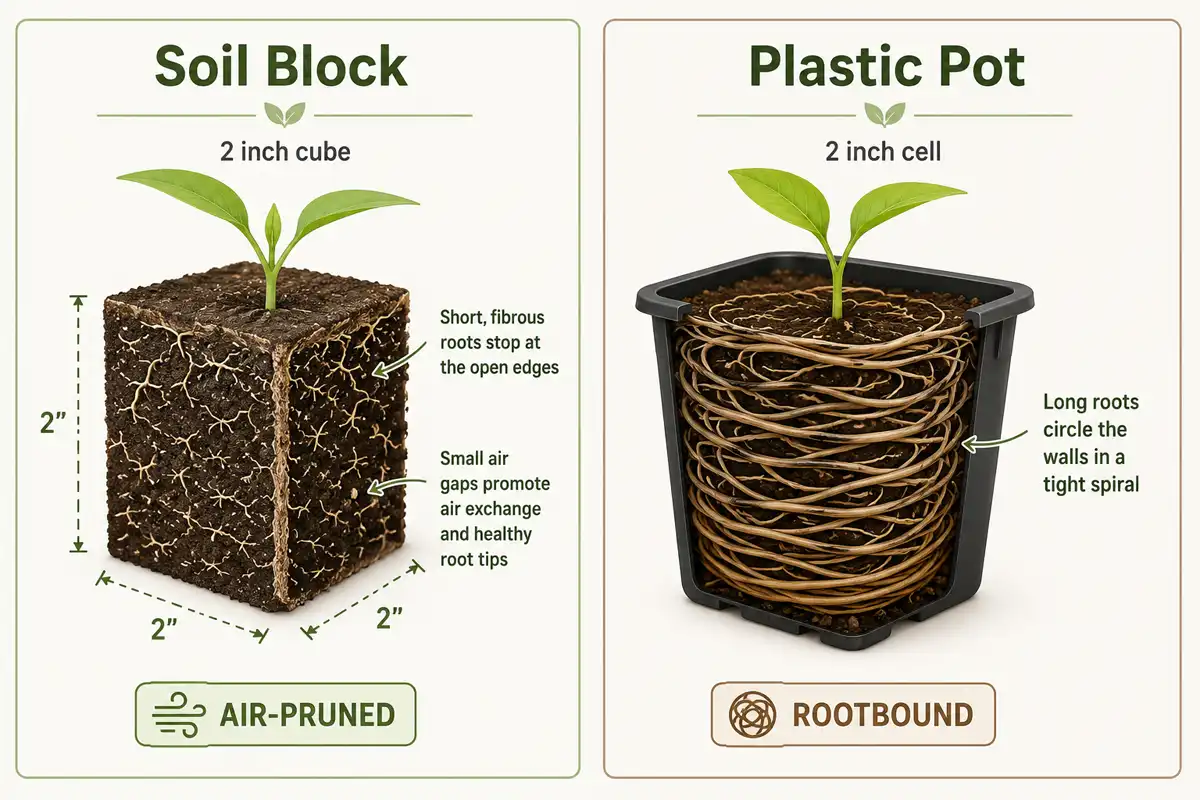
Roots grow out to the open edge of the block, hit air, and stop pushing instead of circling. That is air pruning. In a plastic cell, roots hit a wall and wrap around it, so the plant turns root bound. Once a seedling is rootbound, it sulks after planting and you get transplant shock. Air-pruned roots behave differently. Each tip that stops sends the plant a signal to branch. The block then fills with a dense fibrous root system of fine feeder roots. That is the same air-pruned versus rootbound comparison Johnny’s Selected Seeds uses in its guides. More working roots means faster establishment in field soil.
Soil Blocker Benefits (Why Growers Switch)
The payoff is simple: stronger starts that hit the ground running. Here is what changes when you switch.
- Seedling vigor goes up. Air-pruned roots pack the block with feeder roots, so plants come out stockier and greener.
- Transplant shock nearly disappears. There is no pot to slide off and no root ball to tear, so the plant barely notices the move.
- Less plastic. You skip the no plastic pots to buy each spring, and there is nothing to crack and toss. This is the eco-friendly seed starting angle that organic growers under MOFGA care about.
- Nothing to store or sanitize. Blocks go straight in the ground, so no trays stack up in the shed.
- Faster establishment. Roots are already reaching out, so they push into field soil right away.
Growers like Niki Jabbour highlight that quick, clean transplanting. I see it every spring when I’m starting tomatoes from seed and onions.
The Downsides of Soil Blocking (Be Honest)
Soil blocking is not perfect, and pretending otherwise would not help you. There is a real learning curve. Your first blocks may crumble or slump until your hands learn the feel. Because air reaches every side, blocks dry out faster than plastic cells. So watering becomes a daily check, not a weekly one. You have to nail the water-to-mix ratio too. Too dry and blocks fall apart; too wet and they slump. The up-front cost is higher than a pack of cell trays, as well. Joe Lamp’l at joegardener stays honest about all of this. That candor is exactly why growers trust the method after week one.
What Size Soil Blocker Do You Need?
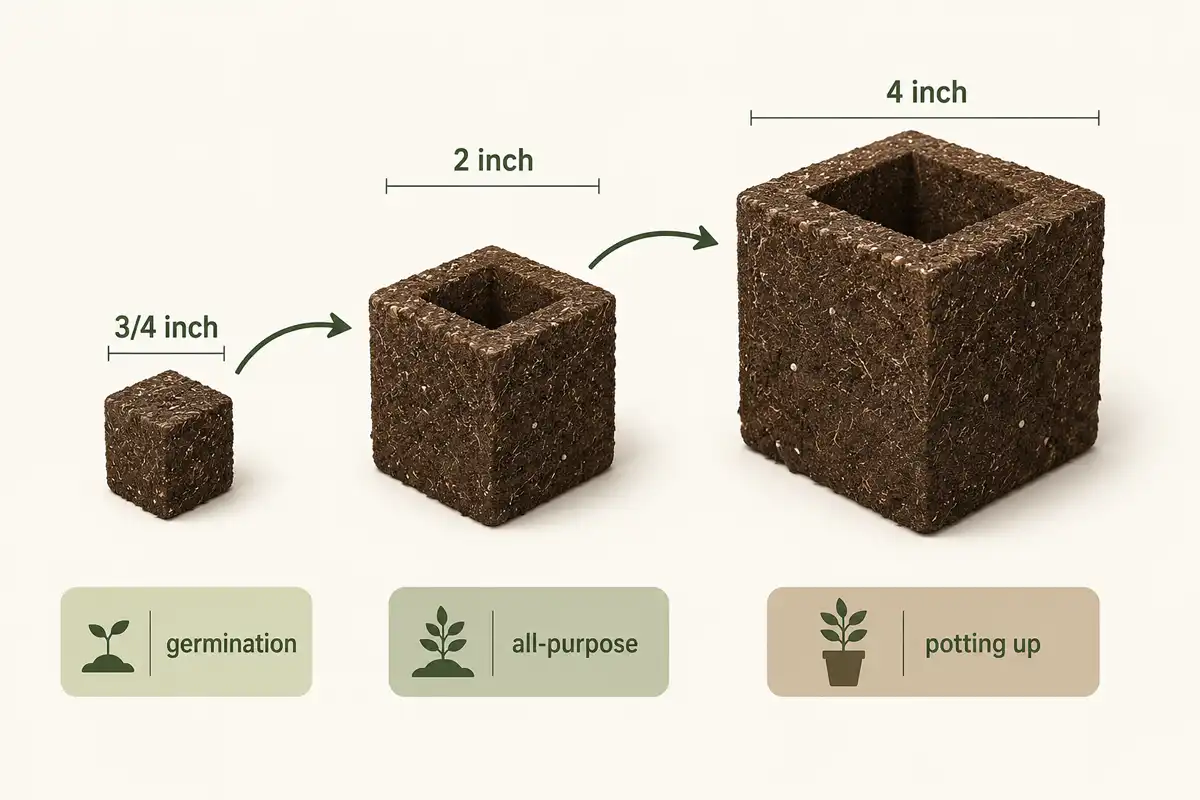
A 2 inch soil blocker is the all-purpose size, and it handles most vegetables, herbs, and flowers. Start there if you buy one tool. From there the sizes map to jobs. A 3/4 inch soil block is for tiny seeds and germination. You can start dozens in a small tray and skip thinning. The 4 inch block is for potting up big seeds and vigorous starts that outgrow a 2 inch cube. The clever part is the nesting system. A small block drops into a matching square recess in the next size up. That handles potting up, or potting on, with no repotting stress. In the Ladbrooke line, the Micro 20 makes 3/4 inch blocks. The Mini 4 makes the 2 inch size, and the Maxi makes one 4 inch block. Seed pins press a small dibble in each block for the seed.
How to Choose a Soil Blocker (Buying Criteria)
Four things decide whether a soil blocker earns its price: build material, block size, handle comfort, and blocks per press. Get those right and the rest is detail.
Build material comes first. Look for heavy-duty steel, either stainless or a quality EP coating. That coating is a tough epoxy layer that shrugs off moisture and soil chemicals. Cheaper tools use thin galvanized metal that can flex or rust at the seams. A bent mold makes bad blocks. A solid steel tool lasts decades, so the price spreads over a lot of seasons.
Block size is next, and it ties straight back to what you seed. Most growers want a 2 inch model first, then add a micro tool for germination later.
Handle comfort matters more than people expect. You press and eject hundreds of times in a session. A smooth handle and clean ejection save your hands real strain.
Last is blocks per press. More cells per push means faster trays, though very high counts can crowd your seeding. Buying guides like the one at Gardenary circle back to these same points. Check that the tool takes dibber pins, too, so you can set the right seed depth.
The 7 Best Soil Blockers: Reviews
Here are the seven soil blockers I’d trust on my own bench, ordered by what each one does best. My Best Overall is up first.
1. Ladbrooke Mini 4 Soil Blocker
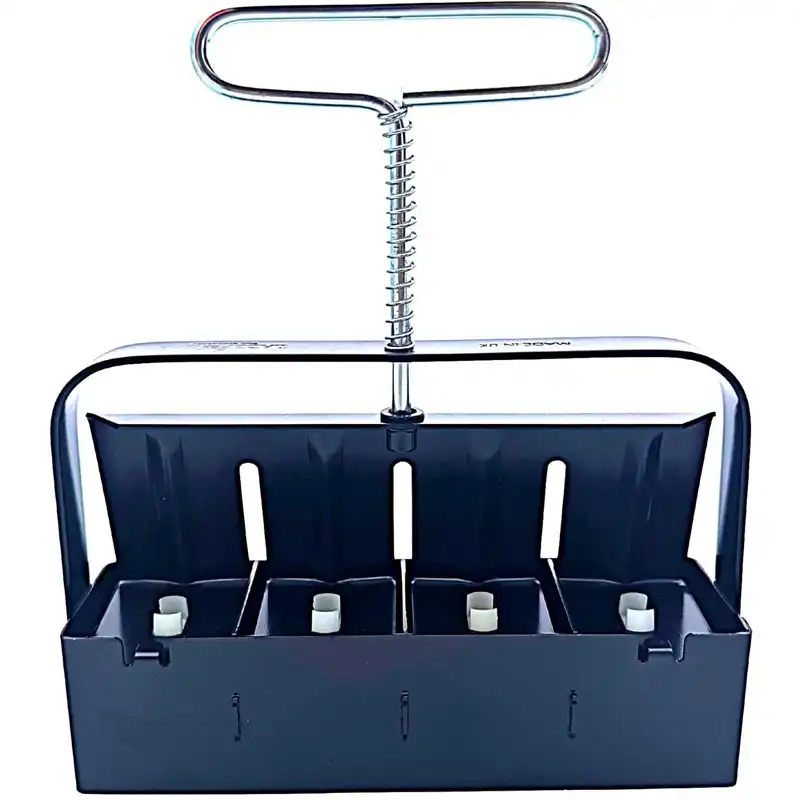
The Ladbrooke Mini 4 is the tool I’d hand any grower just starting out. Ladbrooke has made these in England since the 1960s, and the EP-coated steel shrugs off rust and soil chemicals. It presses four 2-inch blocks at once, the right size for most vegetables, herbs, and flowers.
PROS
- Makes four blocks fast.
- Lasts a lifetime.
- Roots air-prune cleanly.
- Fits the nesting system.
CONS
- Size Limitation
Specifications:
- EP-coated steel body.
- Weighs 1.5 lbs.
- Six 3/8″ seed pins.
- Makes 2-inch blocks.
2. BlumWay 8-Cell Soil Blocker
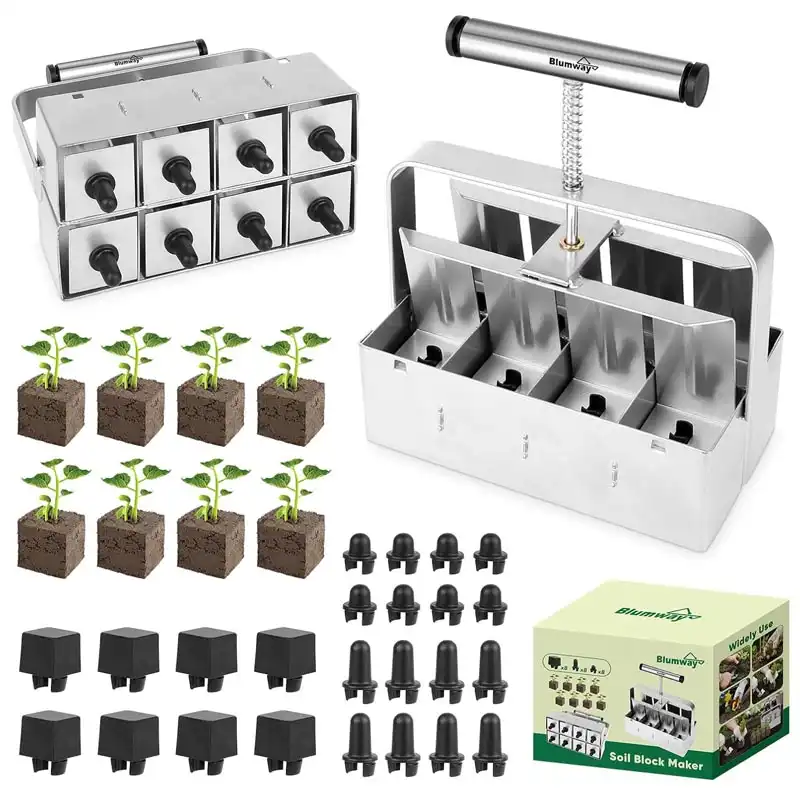
Need speed? The BlumWay 8-Cell doubles your output, pressing eight 2-inch blocks in one push instead of four. That’s real time saved when you’re filling trays every spring. It’s built from heavy-gauge stainless steel and ships with three seed pins (square, short, and long) for different seed depths.
PROS
- Eight blocks per press.
- Sturdy stainless steel.
- Three seed pins included.
- Cuts transplant shock.
CONS
- Technique takes practice.
Specifications:
- Heavy-gauge stainless steel.
- Weighs about 1.5 lbs.
- Makes 2-inch blocks.
- Three interchangeable seed pins.
3. Ladbrooke Micro 20 Soil Blocker
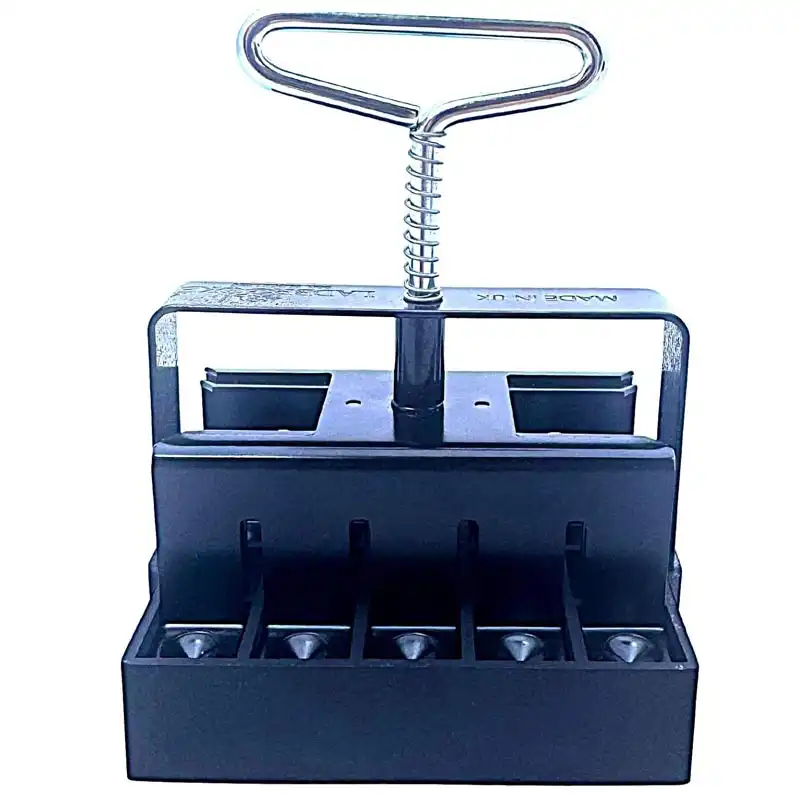
The Ladbrooke Micro 20 is the specialist in the lineup. It stamps out twenty tiny 3/4-inch blocks per press. Each one is sized for fine seeds like lettuce started from seed, basil, celery, and parsley. Same England-made EP-coated steel as the Mini 4. The little blocks nest straight into 2-inch blocks with no root disturbance.
PROS
- Twenty blocks per press.
- Saves bench space.
- Nests into Mini 4.
- Great on fine seeds.
CONS
- Needs a fine mix.
Specifications:
- EP-coated steel build.
- Makes 3/4-inch blocks.
- Weighs 0.28 kg.
- Nests with Mini 4.
4. Ladbrooke 5-Pc Essentials Nesting System
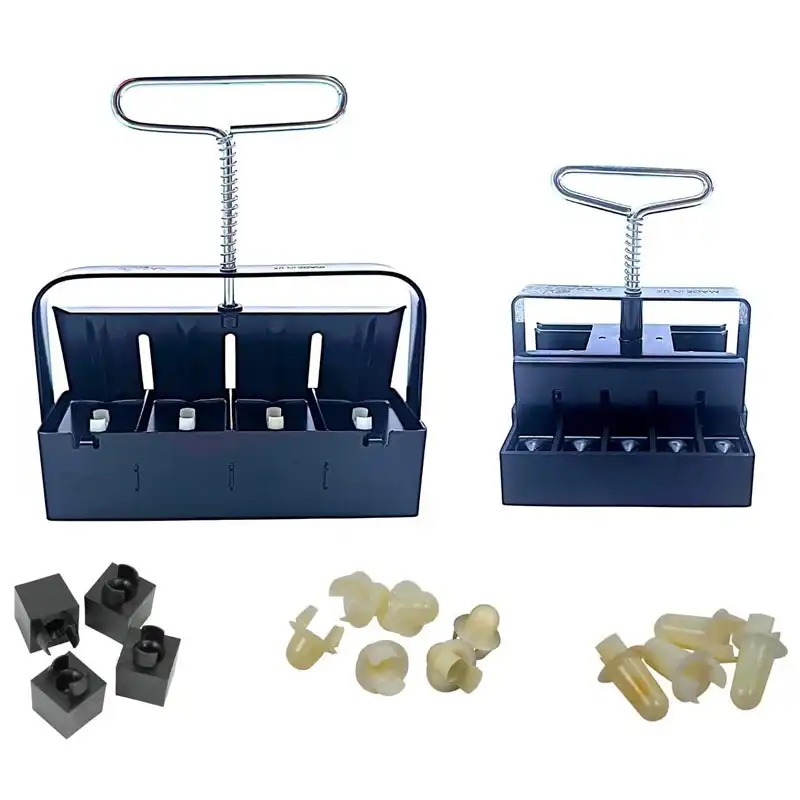
Want the whole setup in one box? The Ladbrooke 5-Pc Essentials pairs the Mini 4 and Micro 20. You also get Cubic Inserts, 3/8″ seed pins, and 7/8″ dowel pins. The inserts let tiny Micro blocks sit inside the 2-inch blocks, so seedlings move up sizes with zero repotting. Best for anyone starting fifty-plus seedlings a season.
PROS
- Two block sizes included.
- Full nesting system.
- Dowel pins for big seeds.
- Made in England.
CONS
- Overkill for small gardens.
Specifications:
- EP-coated steel tools.
- Weighs 2.5 lbs.
- Two sizes (3/4″, 2″).
- Seed and dowel pins.
5. Ladbrooke Maxi Soil Blocker
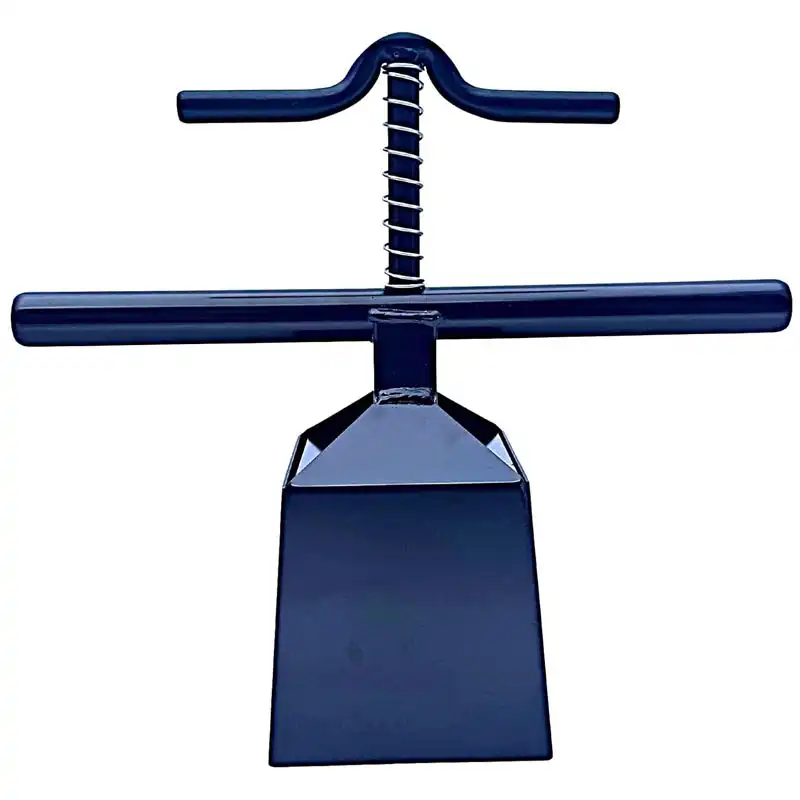
The Ladbrooke Maxi is the muscle of the family. It presses one big 4-inch block. That’s room for crops like tomatoes, peppers, eggplant, and melons that outgrow smaller cells. A built-in 2-inch pocket takes a Mini 4 block directly, so you pot up without touching the roots. Same England-made EP-coated steel that lasts for decades.
PROS
- Big 4-inch blocks.
- Takes Mini 4 blocks.
- Strong transplant survival.
- No plastic pots.
CONS
- High Price
Specifications:
- EP-coated steel body.
- Weighs 3 lbs.
- Makes 4-inch blocks.
- Eight blocks per tray.
6. TILLERMAN Heavy Duty Soil Blocker Bundle
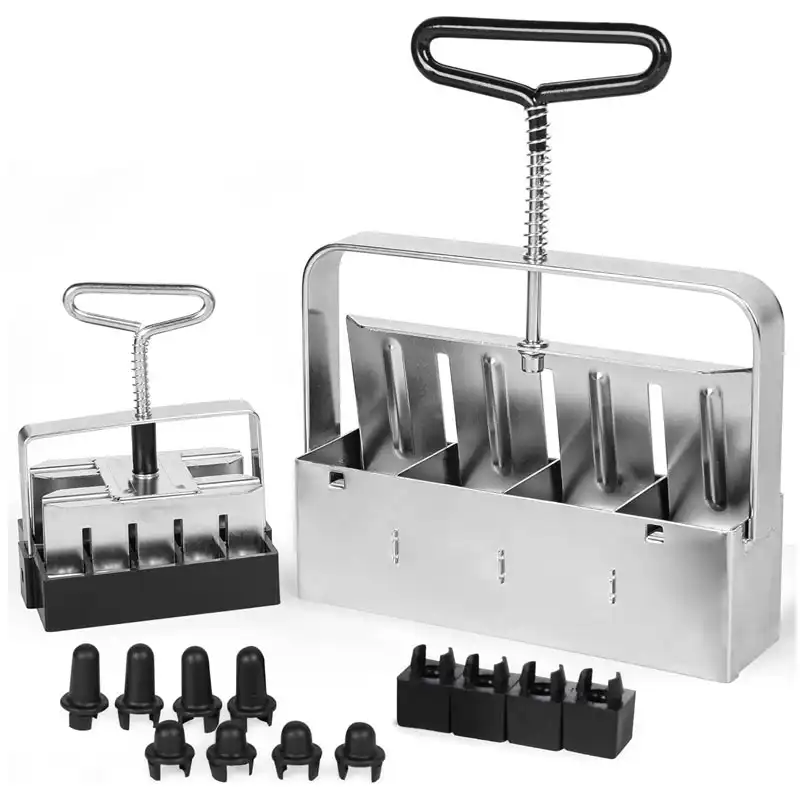
The TILLERMAN Heavy Duty Bundle is a smart two-tool combo from Garlump. You get a small 3/4-inch blocker and a large 2-inch blocker. Twelve interchangeable tips cover herbs, vegetables, and bigger seedlings. The zinc-coated stainless steel is rust-proof. Its rubber-sealed handle stops the spring from slipping, a common gripe with cheaper tools.
PROS
- Two blockers, one kit.
- Twelve interchangeable tips.
- No-slip rubber handle.
- Rust-proof steel build.
CONS
- Needs a crumbly mix.
Specifications:
- Zinc-coated stainless steel.
- Two sizes (3/4″, 2″).
- Twelve interchangeable tips.
- Sealed rubber handles.
7. Jownupp Soil Block Maker Bundle
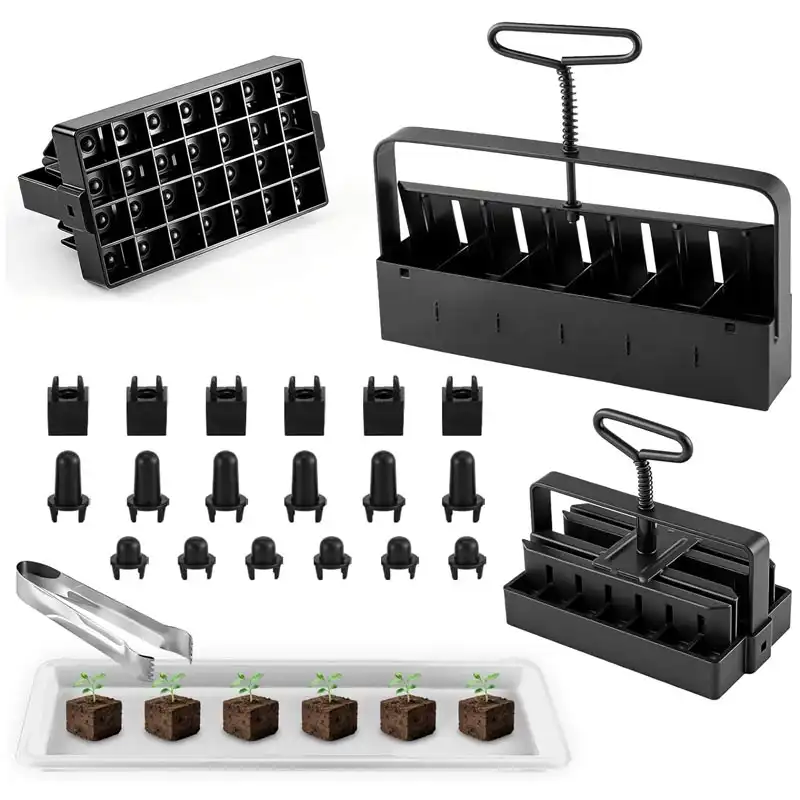
The Jownupp Soil Block Maker Bundle is the wallet-friendly all-in-one. Jownupp packs in a 6-block maker for big seeds like tomatoes and peppers, plus a 28-block maker for fine seeds. You also get three seed pins, a tray, and six grow tweezers. The metal build holds its shape and breaks down fast for cleaning and storage.
PROS
- Complete kit included.
- Covers big and fine seeds.
- Tray and tweezers included.
- Easy to clean.
CONS
- Less sturdy than Ladbrooke.
Specifications:
- Advanced metal construction.
- Two sizes (0.67″, 2″).
- Three seed pins included.
- Breaks down for storage.
How to Use a Soil Blocker (Step by Step)
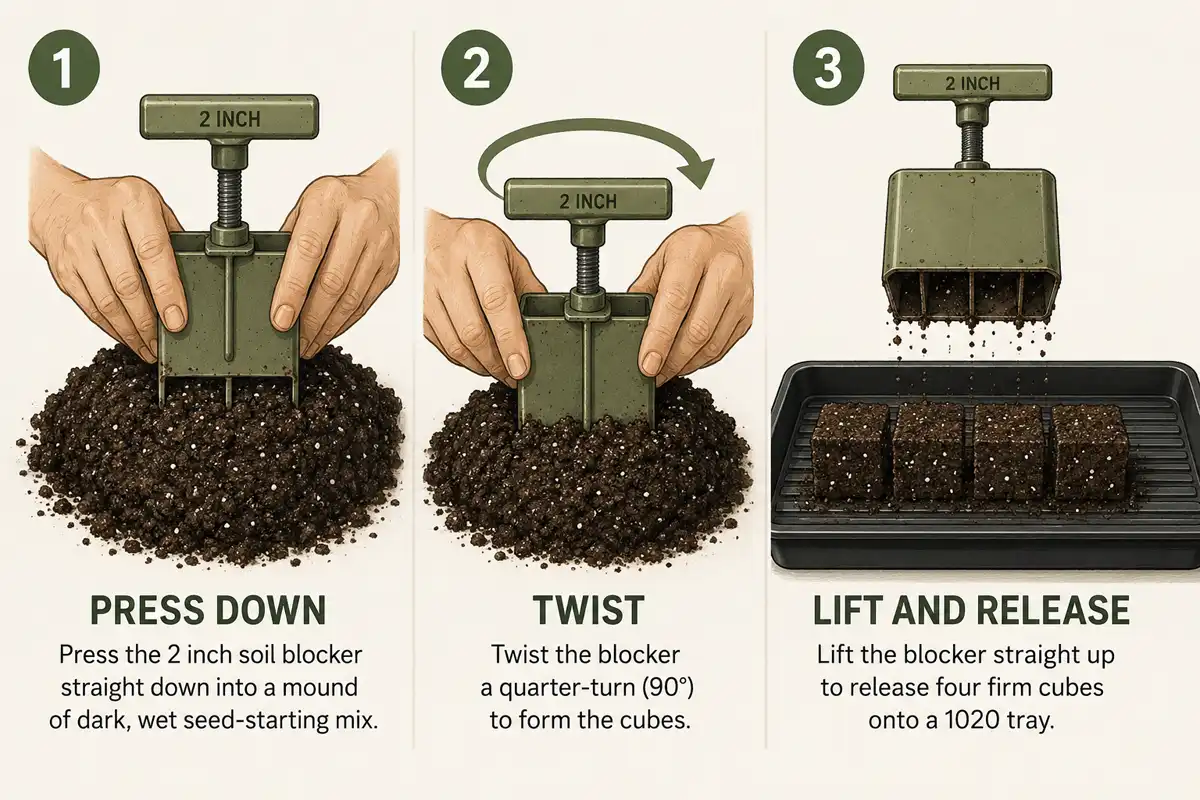
Mix wet, press hard, twist, and eject. That is the whole method, and here it is step by step, the way Eliot Coleman laid it out.
- Mix your blocking soil to a wet cement consistency, like thick brownie batter.
- Build a deep pile of that wet mix on a tray or bench, an inch or two deeper than your tool.
- Press the blocker straight down into the pile until it strikes the bottom, then twist a quarter turn so the cells pack full.
- Scrape the excess off against the edge of your tub.
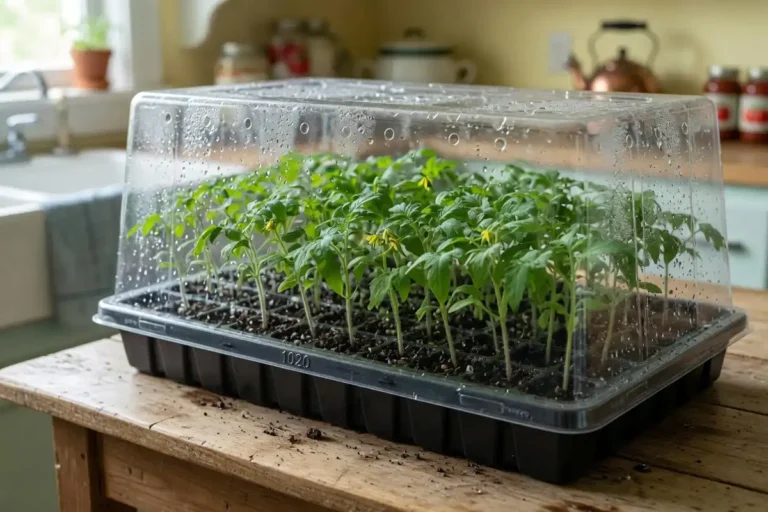
- Set the tool on a 1020 tray and push the handle to eject the blocks in one clean row.
- Drop one seed into each dibble, the little dimple the pins leave on top.
- Label the tray right away, since blocks all look alike within a week.
- Cover lightly if the seed needs darkness, then set the tray on a heat mat for even germination.
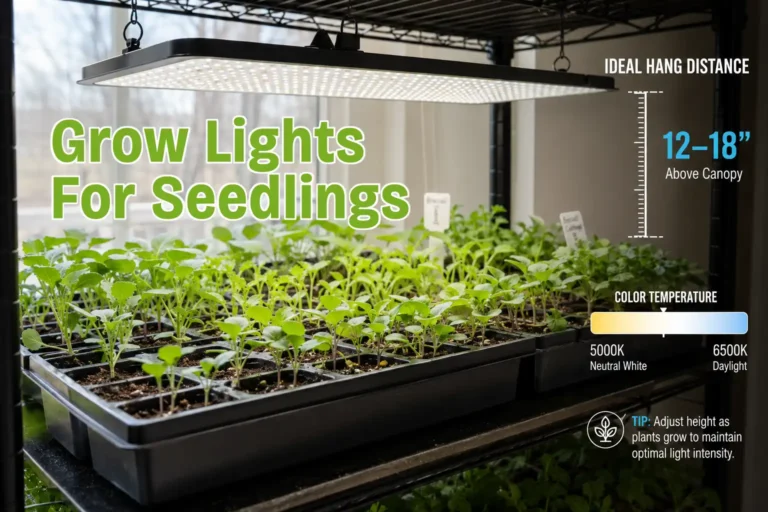
Once up, I move seedlings under grow lights for young seedlings until the weather turns.
What Soil Mix Works in a Soil Blocker?
Plain potting soil will not hold a block; it slumps or falls apart. You need a binding soil block mix, one built to grip itself when squeezed. The base is peat moss or coco coir plus compost. Screen it all fine so no chunks break the cube.
Here is the classic soil blocking recipe from Eliot Coleman in The New Organic Grower, measured by the bucket.
- 3 buckets brown peat moss.
- 1/2 cup lime, to balance the peat’s acidity.
- 2 buckets coarse sand or perlite.
- 3 cups base fertilizer (equal parts blood meal, rock phosphate, and greensand).
- 1 bucket garden soil.
- 2 buckets mature compost.
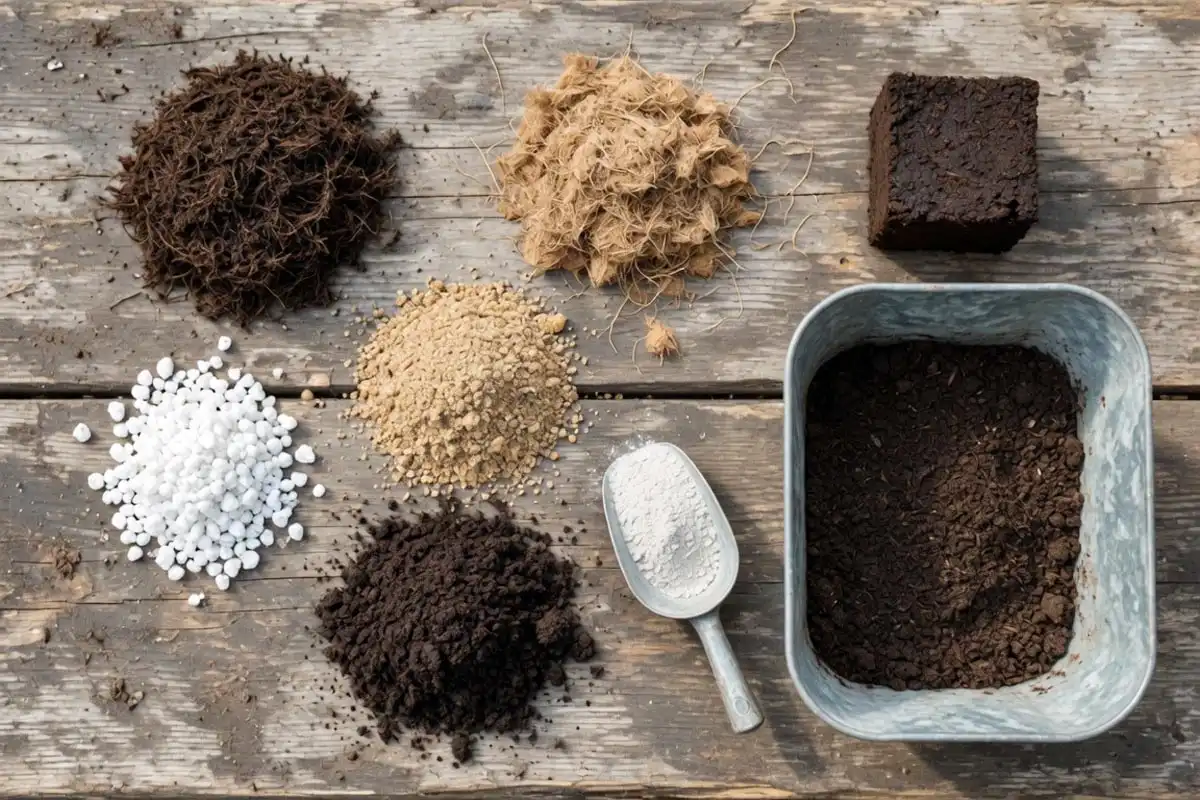
Mix it dry, then wet it down before you press. For a peat-free start, swap in coco coir for the peat. Use a mature, screened compost you make yourself as the backbone. Prefer to buy it ready-made? Johnny’s 512 Mix is a compost-based blend built for blocking right out of the bag.
One honest note on peat. The peat sustainability question is real. The UK is phasing peat out of horticulture in 2026. Most peat sold here is Canadian, marketed as responsibly harvested. Coir is renewable but ships a long way and needs rinsing for salt. Both make fine blocks, so pick what fits your values.
How to Water Soil Blocks Without Crumbling
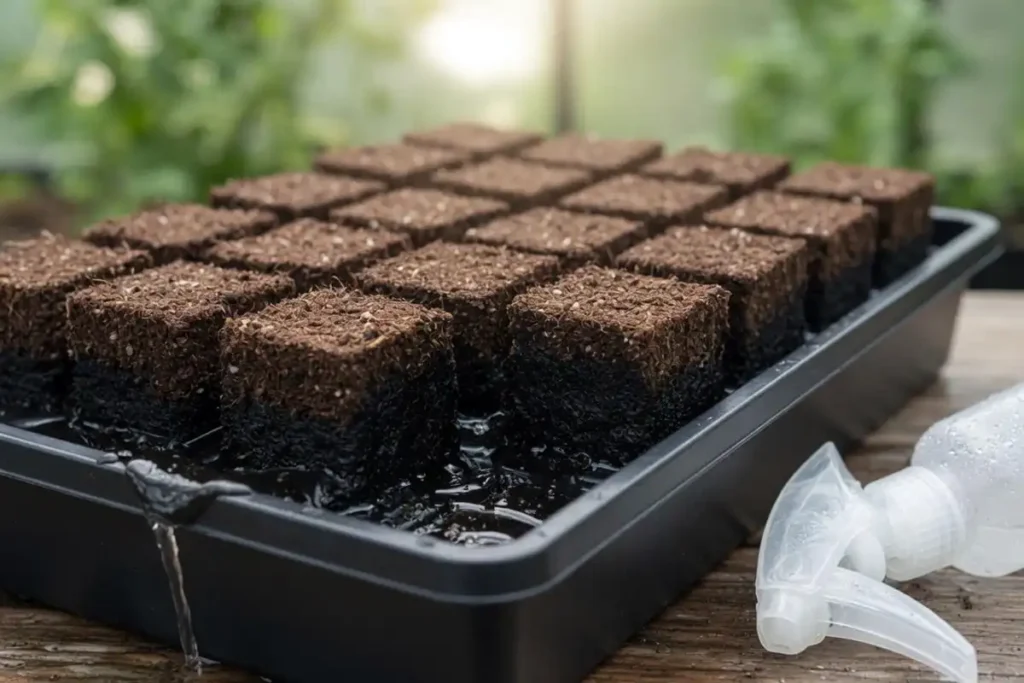
Water from the bottom or mist from above; never blast a block with a hose or heavy can. Top-down water erodes the cube and washes out the seed. For bottom watering, pour into a gap between rows or a solid no-hole bottom tray. The block wicks moisture up through its base. A mesh tray set inside that solid tray makes this easy. A spray bottle and light misting keep the surface damp without damage. Check daily, because open sides mean fast evaporation and blocks dry quicker than plastic cells. Gentle, steady moisture also keeps seedlings clear of damping off. Watch the color, as well. A dark block is fine, but a gray-brown, pale block is telling you it is thirsty.
Is a Soil Blocker Worth It?
Yes, a soil blocker is worth it if you start seeds in any real volume. You get healthier transplants with less plastic. For a dozen seedlings a year, it is harder to justify, and a few cell trays will do. But if you fill trays every spring, the math shifts fast. A good steel tool costs more than plastic once, then reuses for a decade or longer. Set that cost against years of use plus healthier seedlings that transplant clean, and it pays back. It also settles the old question of whether to transplant or sow direct by making strong transplants easy.
FAQs about Soil Block Maker

What is soil blocking?
Are soil blockers worth it?
How to water soil blocks?
How often do you water soil blocks?
How to make soil blocks?
Can you use regular potting soil in a soil blocker?
What size soil blocker should I buy first?
Why do my soil blocks fall apart?
Are soil blocks better than plastic trays or pots?
Final Words on Soil Block Maker
Keep it simple to start. Buy one 2 inch Ladbrooke Mini 4. Get your mix right before you scale up; that is where most first-timers stumble. Once you are hooked, add the Micro 20 for germinating small seeds and nesting them up. If you take one thing from this, make it the Mini 4 as your best overall soil blocker. Your transplants will thank you.