How Does Sugarcane Irrigation Scheduling Work for New Growers
Sugarcane irrigation scheduling works by matching irrigation timing and depth to the crop’s daily water use, your soil’s water storage, and your irrigation system’s delivery rate. This guide shows you how to estimate crop water use with evapotranspiration, verify it with soil checks, and turn it into a simple weekly plan. You will also learn what changes across growth stages, how rainfall shifts decisions, and how to troubleshoot common problems before they cut cane growth.
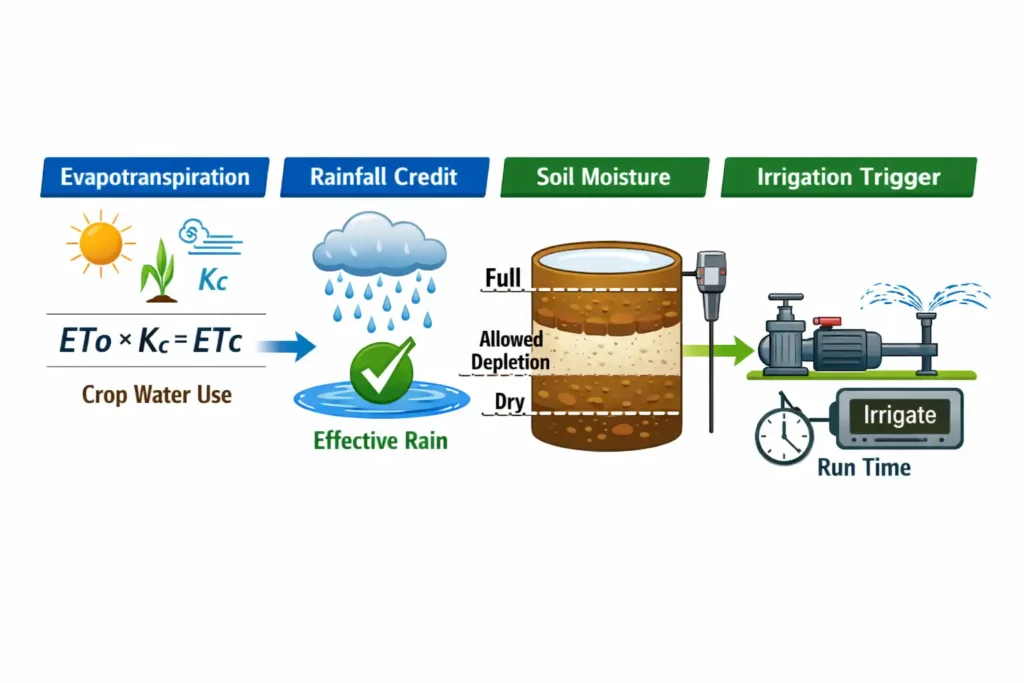
Track daily ETo (weather demand), multiply by a sugarcane Kc (crop stage factor), subtract effective rainfall, then irrigate when the root zone approaches your allowed depletion. Apply enough water to refill the root zone, then confirm with a soil check or sensor reading. Adjust weekly as canopy, heat, wind, and rainfall change.
What is sugarcane irrigation scheduling?
Sugarcane irrigation scheduling is a field plan that decides when to irrigate and how much water to apply. The plan uses crop water use (evapotranspiration), soil water storage, and irrigation system performance. A good schedule prevents water stress and reduces waterlogging.
If you’re brand new to field planning, these crop farming steps will help you set a solid routine for scouting, recordkeeping, and timing irrigations before you fine-tune your sugarcane schedule.
What sets the right irrigation schedule on your farm?
Weather demand drives water loss (ETo)
Reference evapotranspiration (ETo) measures how strongly weather pulls water from soil and leaves. Higher heat, wind, and sun raise ETo, so the crop uses water faster. FAO describes ETo as the climate part of crop water need, and it anchors most scheduling methods.
New grower move: pull daily ETo from a local weather station, irrigation district report, or a trusted farm weather app, then keep it in a simple notebook or spreadsheet.
If you want the full math framework, read this guide on how to calculate crop water needs.
Growth stage changes crop waterdoes not use the same water amount all season. As leaf area grows, transpiration rises, then it levels off, then it drops near ripening.
A common FAO-56 based approach uses crop coefficients (Kc) for three phases, with ETc = ETo × Kc. One extension estimate lists Kc values as 0.4 (initial), 1.25 (mid), 0.75 (final) and uses the FAO-56 method for ETc.
New grower move: treat Kc as your “crop stage dial.” You change the dial as the canopy changes.
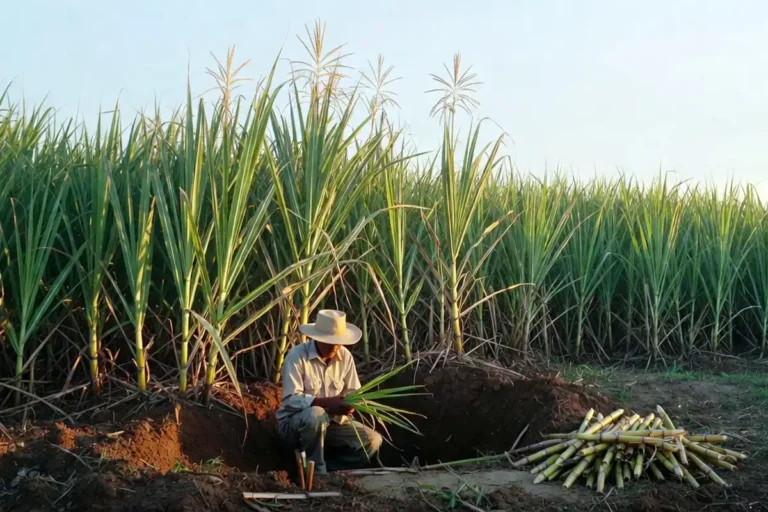
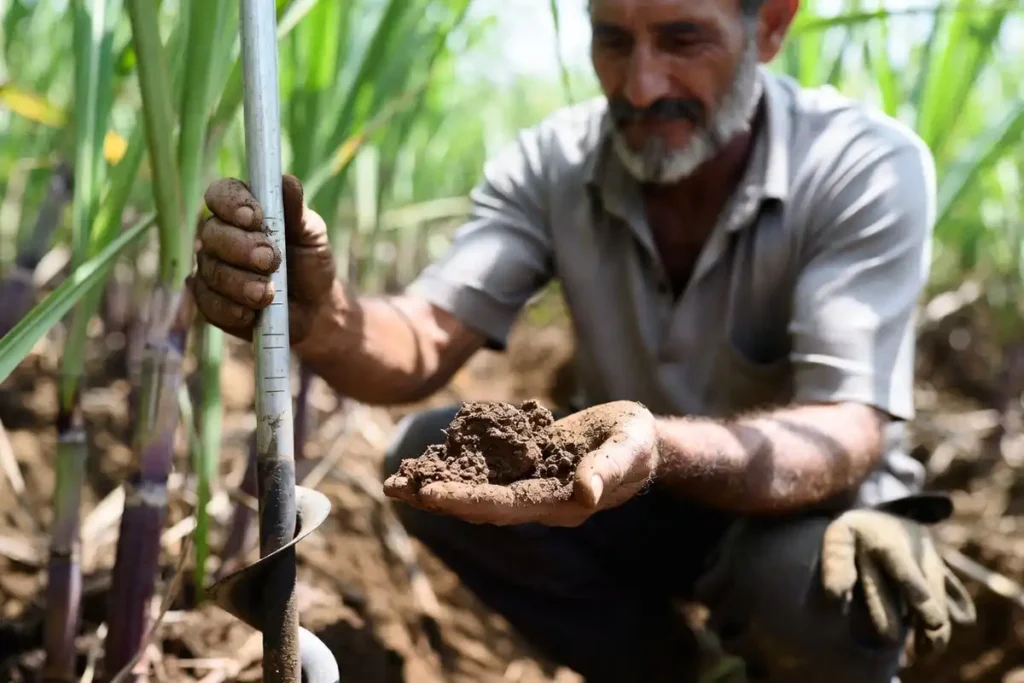
Before you lock in irrigation intervals, use soil sampling equipment to pull consistent cores from the root zone so you can see texture, compaction, and moisture patterns that affect how fast your sugarcane field dries out.
Soil sets your “water tank” size
Soil texture and structure control how much water the root zone stores between irrigations. Sandy soil holds less plant available water per foot of depth than loam or clay loam. Compaction, poor aggregation, and shallow hard layers shrink the usable tank.
A soil test does not measure water holding capacity directly, but it helps you spot texture, salinity risk, and constraints that affect rooting and infiltration. This is a good place to start: soil testing basics for farms.
Rooting pattern controls where water matters
Sugarcane can develop a deep root system in the right soil. FAO notes ro up to 5 m, but the active water uptake zone stays in the upper layers and shifts with soil and irrigation regime.
New grower move: schedule around the active root zone, not the deepest root that might exist.
Irrigation method and uniformity control what reaches the plant
A schedule only works if the system applies water evenly. Furrow systems depend on field slope, intake rate, and cutoff timing. Sprinklers depend on pressure, nozzle wear, wind, and spacing. Drip depends on filtration, pressure regulation, and emitter uniformity.
If you are choosing equipment or fine-tuning delivery, compare drip and sprinkler setups before you lock in a plan.
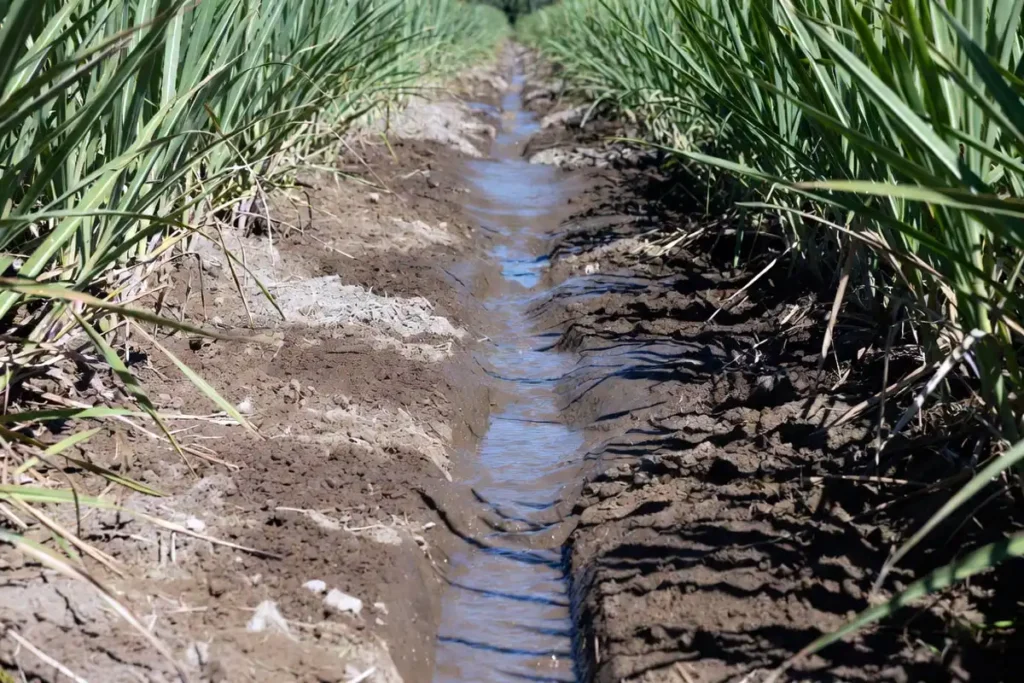
Rainfall and drainage change the schedule fast
Rain is “free irrigation” only when it enters the root zone and stays there. Heavy storms can run off, pond, or drain below the active roots. After rain, the schedule reseof that water became effective rainfall in the root zone.
When does sugarcane need more water, and when does it need less?
Sugarcane peaks in water use during full canopy and rapid stalk growth. It eases off near ripening when vegetative growth slows.
A practical, stage-based view looks like this (timing varies by variety and climate):
| Crop phase | What the plant does | Scheduling focus |
|---|---|---|
| Establishment | Buds sprout and roots start | Keep the seed zone moist, avoid crusting and waterlogging |
| Canopy build | Tillers and leaves expand | Shorten intervals as leaf area increases |
| Grand growth | Rapid stalk elongation | Prevent depletion swings, keep uniform moisture |
| Ripening | Sugar accumulation rises | Avoid stress that stops photosynthesis, avoid excess water that delays ripening |
The exact dates change by region, but the pattern stays consistent because canopy size and weather demand drive ETc.
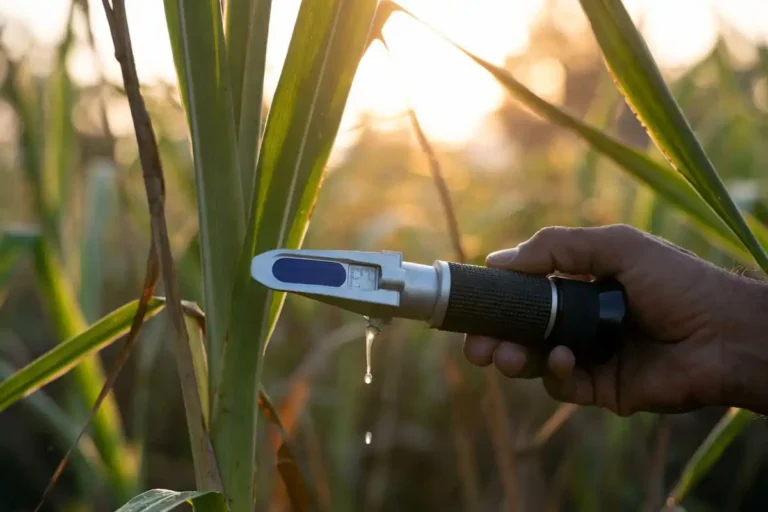
Where do you check soil moisture for scheduling decisions?
Sugarcane scheduling improves when you measure the same part of the field the plant uses.
Best places to monitor:
- A representative area (average soil, average stand, average slope)
- A second “risk” area (sandy spot, shallow soil, tail-end of furrow, windy edge)
- At least two depths that cover the active root zone (a shallow check and a deeper check)
If you use sensors, remember one sensor location represents a small zone. Sugar Research Australia warns that sensors alone do not represent an entire irrigation set, and it recommends combining ET calculations, soil moisture monitoring, and plant observations.
How to schedule sugarcane irrigation step by step
This workflow fits new growers because it starts simple and adds accuracy as you learn your fields.
Step 1: Pick your scheduling “engine”
Choose one of these as your primary driver:
- ET-based water balance (best all-around for new growers)
- Soil moisture target (good when you have reliable sensors)
- Calendar intervals (works only when you verify with soil checks)
Most farms blend ET plus soil verification because it catches weather shifts and field variation.
Step 2: Gather three field numbers
You need:
- Daily ETo source
- A starting Kc by stage (use a published value, then adjust carefully)
- Your irrigation system delivery rate and typical uniformity (from a test or installer spec)
Step 3: Estimate daily crop water use (ETc)
Use the standard relationship:
ETc = ETo × Kc
If ETo rises with heat and wind, ETc rises. If canopy expands, Kc rises, so ETc rises again.
Step 4: Track rainfall as “credits,” not headlines
Record rainfall, then judge how much infiltrated and stayed in the root zone. Treat runoff and ponding as losses, not credits.
Step 5: Set your allowed depletion trigger
Your trigger is a depletion level that you do not cross before irrigating.
A simple way to think about it:
- Soil water storage sets the tank size.
- Allowed depletion sets how low you let the tank drop.
- Root zone depth sets how much soil that tank includes.
If you do not know your soil’s available water capacity, start conservative and lean harder on soil checks until you learn the field behavior.
Step 6: Convert the net need into irrigation run time
Your schedule needs a gross application that accounts for losses.
- Net depth replaces ET losses in the root zone.
- Gross depth accounts for system efficiency, non-uniformity, and deep percolation risk.
This step is where many new growers overwater. Overwatering often comes from assuming 100% efficiency.
Step 7: Irrigate, then verify with a soil check
Verification keeps scheduling honest.
Good verification signals include:
- Soil feels moist through the active root zone after irrigation.
- Soil drains to a “field capacity feel” in a day or two, not a sticky ponded feel.
- Plant stays upright and green during peak afternoon demand.
If you use tension sensors, Sugar Research Australia reports sugarcane struggles to extract water at tensions greater than -100 kPa in a range of soils. Treat that threshold as a red flag for stress, not a target.
Step 8: Adjust once per week, not once per hour
Weekly adjustment is enough for most new growers:
- Update ETo totals.
- Update Kc if canopy changes.
- Reset after meaningful rain.
- Note any weak zones that need a separate set time.
Step 9: Keep one simple record
A small log beats a perfect plan you never repeat.
Record:
- Date, ETo, Kc stage, irrigation hours, rainfall, and a short soil note.
A quick worked example
Say your local ETo averages 5 mm/day this week and your cane sits in peak growth with Kc = 1.2. Your estimated ETc equals 6 mm/day.
If you irrigate every 4 days, the net refill target equals 24 mm. If your system delivers about 80% to the root zone, the gross target equals 30 mm.
Then you verify with a soil check. If water pushes below the active root zone, shorten runtime and tighten intervals.
Solutions: three scheduling approaches that work for beginners
Option 1: Calendar schedule plus soil verification
This method sets a repeating interval, then checks soil before each irrigation. It fits small acreage and simple systems.
It fails when heat spikes or wind shifts because the calendar does not react fast enough.
Option 2: ET-based scheduling plus a weekly field walk
This method uses ETo and Kc to estimate ETc, then confirms with soil checks. It reacts to weather and canopy changes and stays affordable.
Option 3: Sensors plus ET for high confidence
Sensors show when the root zone dries and how deep water moves after irrigation. ET adds the “weather why” behind the sensor trend. Sugar Research Australia supports this combined approach because each tool covers the other’s blind spots.
Troubleshooting: what problems look like and how to fix them
Leaves roll in the afternoon and stay rolled the next morning
This pattern signals sustained stress, not normal midday response.
Fix: shorten intervals first, then check if the system applies enough depth to wet the active root zone.
Patches stay pale or stunted after irrigation
This pattern points to uneven delivery, compaction, or infiltration issues.
Fix: check pressure, clogged emitters, nozzle wear, and furrow cutoff timing. Then probe the soil for hard layers.
Standing water after irrigation
This pattern signals intake mismatch, excess runtime, or drainage limits.
Fix: reduce set time, improve field leveling, and split irrigations if soil seals on the surface.
Weeds explode after frequent irrigation
Water feeds weeds fast, especially on wet soil surfaces.
Fix: tighten irrigation placement and reduce surface wetting where your system allows it. Mulch also reduces surface evaporation and weed emergence pressure. See this guide on mulching for row crops.
For more irrigation system and water management help across crops, use the site’s irrigation and water practice hub.
Mistakes that waste water and reduce cane growth
- Scheduling by the calendar while ignoring ETo shifts
- Using one field corner as the “whole farm” moisture check
- Running long sets to “be safe,” then leaching nutrients below roots
- Ignoring uniformity problems (pressure loss, clogs, nozzle wear)
- Treating rainfall totals as effective rainfall without infiltration checks
- Letting sensors replace field walks instead of supporting them
Safety and maintenance notes for irrigation work
Irrigation work mixes electricity, pressure, heat, and moving equipment.
Focus on these habits:
- Lock out power before pump or panel service.
- Release pressure before opening filters, fittings, or valves.
- Keep hands clear of rotating shafts and belts.
- Hydrate andrly in the day during heat waves.
- Wear eye protection when flushing lines and cleaning screens.
Conclusion
Sugarcane irrigation scheduling becomes manageable when you track ETo, apply a stage-based Kc, and confirm results in the root zone. Start with an ET-based plan, verify with a soil check, and adjust weekly. That routine protects growth during peak demand and prevents the slow losses that come from overwatering, under-watering, or uneven application.