Soil Testing for Farming: 9 Fast Steps to Smarter Fertilizer
Soil testing for farming turns a handful of dirt into numbers you can manage: pH, nutrient levels, and lime requirement. A good test tells you what the crop root zone holds, what it lacks, and what it holds in excess. That keeps fertilizer dollars on the acres that respond. It also keeps you from chasing problems with guesswork. In this guide I walk through sampling, lab choices, and how to read a report so you can plan lime and fertilizer with confidence.
What does a farm soil test measure?
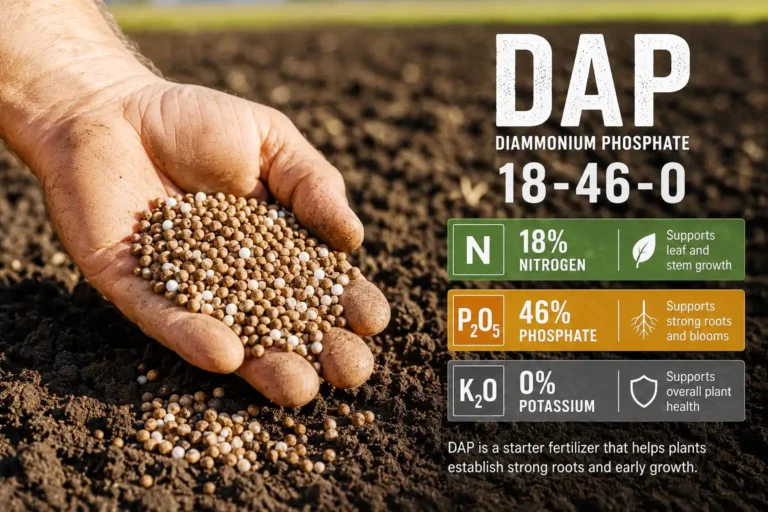
A farm soil test measures soil chemistry that drives crop nutrition and root function. The core report usually covers soil pH and plant-available nutrients. Many labs also report organic matter, cation exchange capacity, and salts when you request them. Those numbers guide lime, fertilizer, and manure placement decisions.
Most routine “fertility” tests include:
- Soil pH (active acidity) and often buffer pH or a lime index (lime requirement).
- Phosphorus and potassium (reported in ppm or lb/acre, based on the lab method).
- Calcium and magnesium, sometimes sulfur.
- Micronutrients (often Zn, Mn, Cu, Fe, B), depending on region and lab package.
- Organic matter (requested often; used for nutrient supply context and some herbicide guidance).
- CEC and base saturation (common in some lab systems; more context than prescription).
- Optional: nitrate-N (deeper sampling), electrical conductivity (EC) for salts, and soil texture for management context.
Crop farming soil fertility improves when you match lime and nutrients to soil-test results and keep organic matter trending the right direction.
Learn more: Guide to Improve Soil Fertility Naturally
Why do farmers soil test before fertilizing?
Farmers soil test before fertilizing because the sample is the biggest driver of recommendation accuracy. The lab only analyzes a small amount of soil, so you are scaling that result to whole acres. Better sampling reduces the odds of over-applying nutrients, wasting money, or missing a yield response.
Purdue Extension ties reliable soil sampling to nutrient efficiency and return on fertilizer and lime investment, and it also connects sampling quality to lower risk of off-site nutrient movement.
If your soil test shows low organic matter, beginner cover crops like oats or crimson clover help feed the ground and steady your fertilizer plan.
When is the best time to take soil samples?
The best time to take soil samples is when the field condition lets you pull consistent cores and gives you time to act on results. Many farms sample after harvest so lime and base fertility decisions are ready ahead of planting. Sampling before tillage also helps you hit an accurate depth, especially for a 0–6 inch core.
Avoid sampling right after a lime or fertilizer application because fresh bands and surface granules skew results. Several extension guides recommend delaying sampling at least 6 to 8 weeks after lime or fertilizer, and sampling at the same time of year for trend tracking.
How often should you soil test on a farm?
Most farms soil test on a repeating cycle, then tighten the schedule when fields change fast. A common working range is every 2 to 4 years for routine fertility in established fields. Some operations keep a three-year rotation because it balances cost with decision value.
Illinois Extension suggests testing every 2 to 4 years when soils sit at an “optimum” fertility level and base applications are set. Michigan State’s sampling guide notes that sampling and testing each field at least once every 3 years is adequate in many situations.
You get more value from shorter intervals when:
- You rent new ground and lack history.
- You switch to high-value crops or change rotations.
- You apply manure heavily or change application strategy.
- You are correcting pH with lime and want to confirm trend.
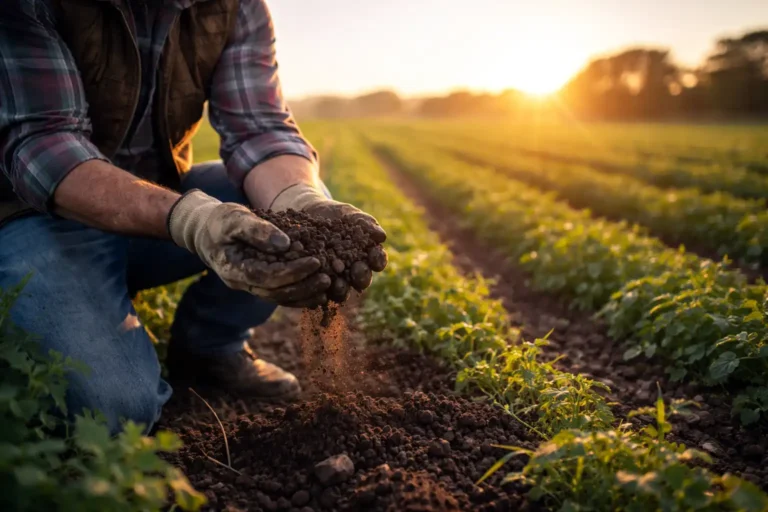
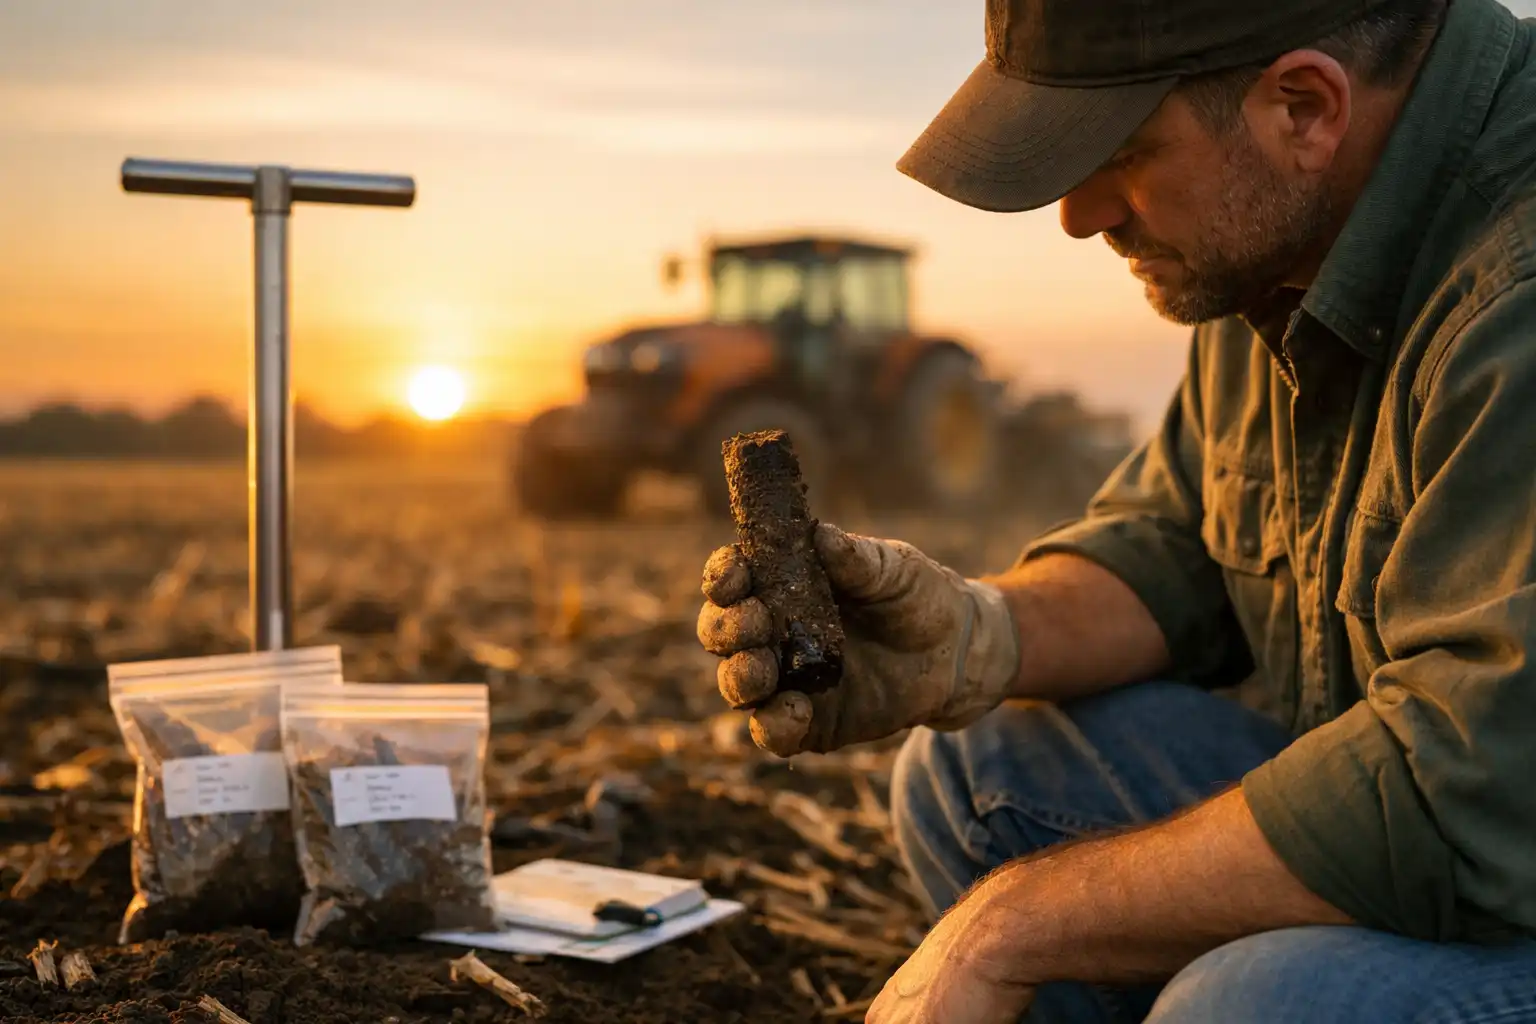
How do you collect a representative composite soil sample?
A representative composite soil sample comes from many small cores that match one management area. You mix those cores into one sample so the lab sees the “average” soil the crop roots will hit. The goal is consistency across years and a clean chain from field to bag to lab.
If you want a practical gear rundown first, see my page on soil testing and measuring tools and keep basic sampling safety in mind.
A field-ready sampling procedure
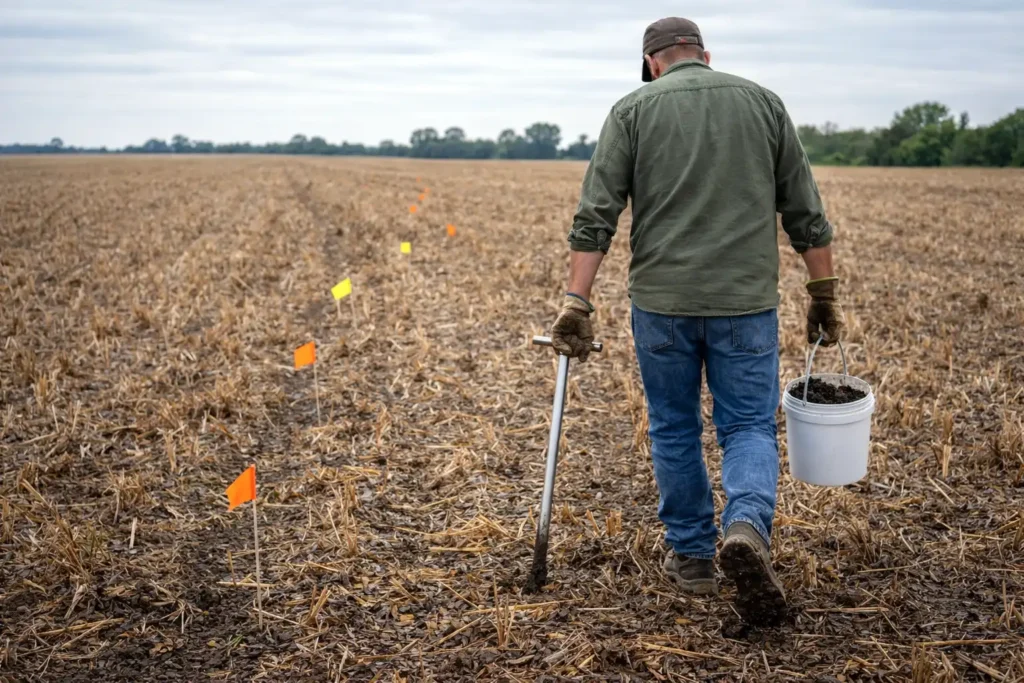
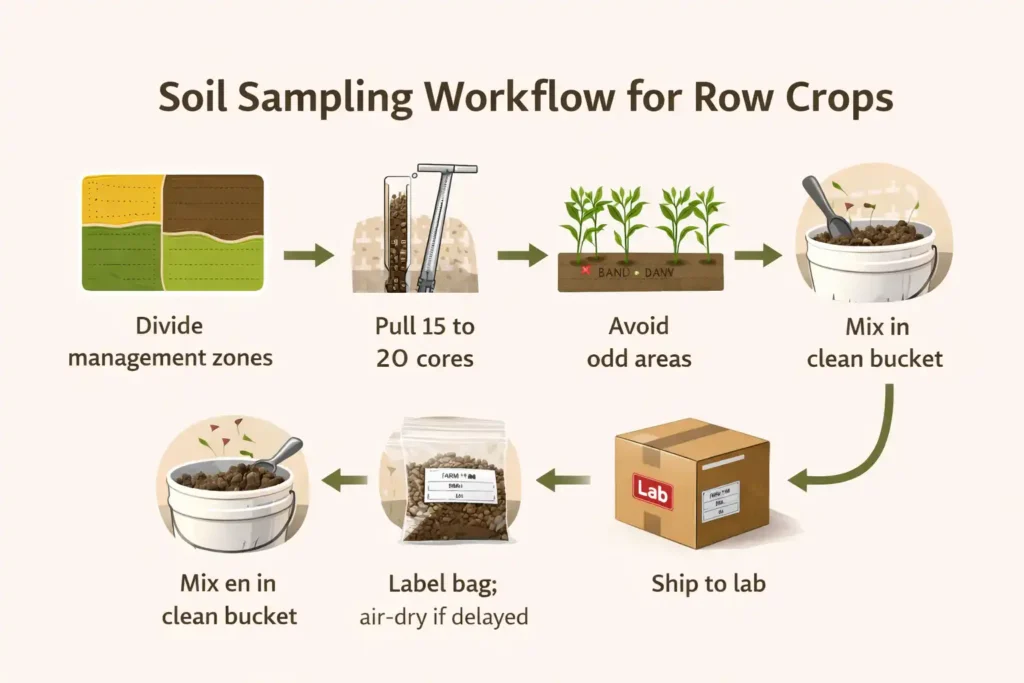
- Define your sampling unit: Split the farm into fields or management units that share soil type, slope, drainage, and history. Virginia Tech notes that many farms benefit from breaking fields into smaller areas such as 5 to 10 acres when variability shows up.
- Pick a consistent timing window: Sample the same season each cycle so you can compare trends. Fall sampling often avoids spring lab backlogs and leaves time for lime planning.
- Use a probe and keep depth consistent: A soil probe or auger helps maintain an even core. Depth consistency is the backbone of meaningful comparisons across years.
- Walk a zigzag and pull enough cores: Michigan State’s guide calls for 20 cores in a zigzag pattern for each composite sample. Illinois Extension describes composites of 10 to 15 cores, and notes that 15 to 20 improves representation. Colorado State also uses 15 to 20 subsamples in its guidance.
- Avoid the “known wrong” spots: Skip field edges, odd fill areas, old feed sites, burn piles, wet holes, and headlands unless you manage them separately. UMass also warns against sampling edges and other nonrepresentative areas.
- Mix in a clean bucket and fill the bag correctly: Break clods, remove residue, and mix thoroughly. Then fill the sample bag to the lab’s fill line. Illinois Extension mentions filling to the indicated line (often about a quart) on common soil sample bags.
- Label like you mean it: Write the sample ID on the bag and match that ID on the submission form. Mislabeling ruins good sampling work.
- Ship fast or air-dry if needed: If shipping is delayed, air-dry the soil on clean paper at room temperature. UMass advises against applying heat.
A quick safety note
Soil sampling looks harmless until you are stepping over residue, pushing a probe, and working near equipment lanes. Wear gloves and sturdy boots, and keep high-visibility gear handy when sampling near traffic. If you need a refresher, my farm safety PPE guide covers the basics.
What sampling depth fits common farm tests?
Sampling depth depends on the test and the calibration your lab uses. Many fertility programs target the top 0 to 6 inches because that zone aligns with standard recommendations for pH, phosphorus, potassium, and several micronutrients. Some regions calibrate to different depths, so matching your lab’s instruction keeps your results meaningful.
University of Missouri states that 0 to 6 inches is the standard depth for many crop systems. NDSU also ties pH, P, K, and several micronutrients to a 0 to 6 inch core in its region, while Illinois notes its system calibrates to the top 7 inches.
Common depth targets by goal:
- Routine fertility (pH, P, K): often 0–6 inches, or the lab’s calibrated depth.
- Nitrate-N and leaching risk: deeper cores matter. NDSU describes a 0–2 foot core for nitrate-N and chloride, and Missouri discusses collecting 6–24 inches for mobile nutrients like nitrate-N.
- No-till or long-term surface applications: stratification becomes real. Oregon State explains that nutrients like P and K often remain concentrated in the top 1 to 2 inches without incorporation, and it outlines split-depth sampling to evaluate surface and subsurface conditions.
Bottom line: use one depth system per field history, then stick with it so trends are real.
How do you handle and store samples before shipping?
Good handling keeps the sample “field honest” from bucket to lab. Moist, hot, or contaminated samples grow errors fast. Your goal is a clean, well-mixed sample with clear labeling and stable moisture.
Practical handling rules:
- Use a clean plastic bucket, not a fertilizer pail and not a galvanized container.
- Keep diesel, grease, starter fertilizer, and lime dust away from the mixing area.
- Air-dry only if shipping is delayed, and skip heat sources.
- Submit separate samples for areas you plan to manage separately.
Which soil test package fits your goal?
The right soil test package matches your crop decision, not a generic checklist. Routine fertility tests guide lime and base nutrients. Add-ons target special risks like salts, nitrate carryover, or micronutrient issues. A lab package that matches the problem saves money compared to blanket testing.
Common packages that fit farm decisions:
- Routine fertility: pH, buffer pH or lime index, P, K, and often Ca, Mg, and organic matter.
- Pre-sidedress nitrate or residual nitrate: deeper sampling and nitrate analysis for N planning.
- Salinity / salts (EC): useful for irrigated ground, sandy ground with fertilizer concentration, or poor drainage zones.
- Soil health panels: useful for tracking management effects, but only when you keep depth and timing consistent.
If you are building a full fertility plan, it helps to pair your testing plan with a broader soil fertility management approach so the numbers turn into field actions.
How do you choose a soil lab and fill out the submission form?
A strong soil lab uses methods calibrated to your region and turns results into recommendations you can act on. The same lab over time also makes trend lines cleaner because extraction methods and interpretation categories stay consistent. If you switch labs, you are often switching methods.
When you fill out the form, give the lab the context it needs to produce a usable recommendation:
- Crop you plan to grow (some labs require a crop code to generate lime and nutrient guidance).
- Expected yield level or management intensity.
- Past lime timing and recent fertilizer or manure applications.
- Tillage system and whether nutrients are banded or broadcast.
How do you read a soil test report without guessing?
You read a soil test report by separating measurements, ratings, and recommendations. The measurement is the lab number. The rating places that number into a response category. The recommendation ties that category to a crop response model for your region. One report can hold all three, but they are not the same job.
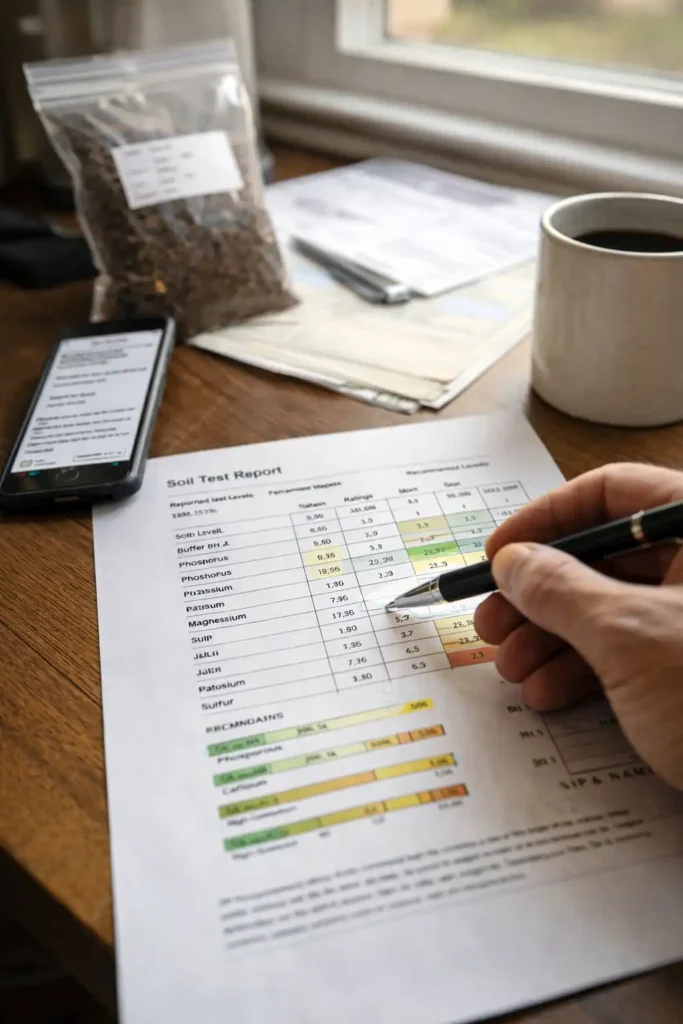
A few high-value lines to understand:
Soil pH: Soil pH is the key chemical control knob in most systems because it shifts nutrient availability and microbial activity. A university training guide from Maryland calls soil pH a fundamental property that influences nutrient availability.
Buffer pH or lime requirement: Buffer pH estimates how resistant your soil is to pH change, which drives lime rate guidance. That is why two fields with the same pH can get different lime recommendations.
Phosphorus and potassium methods: The extraction method matters. Mehlich-3, Bray, and Olsen do not behave the same across soil types. Iowa State notes that Bray-1 is not recommended for some high-pH soils, and it discusses how different tests fit different conditions.
If the report lists an extractant name (Mehlich-3, Bray-1, Olsen), treat that as part of the “units.” Avoid comparing raw ppm across different extractants unless the lab provides a conversion approach.
Categories like Low, Optimum, High: Many systems group results into response likelihood categories. Oregon State describes categories that map to “likely response,” “unlikely response,” and “intermediate” zones to help frame fertilizer decisions.
How do you turn soil test results into lime and fertilizer decisions?

You turn soil test results into decisions by following the lab’s calibrated recommendation system, then adjusting the plan to match your placement method and crop economics. The soil test does not “pick a yield.” It estimates response probability and guides rates that fit your region’s field research base.
A simple decision flow that stays practical:
- Set the crop target: Crop choice drives nutrient removal and target pH. Grain systems and legume systems do not pull nutrients in the same pattern. If you want crop-specific context, my guides on corn production and soybean production help connect fertility planning to crop needs.
- Fix pH first when it limits availability: Lime neutralizes acidity and raises soil pH. That improves nutrient availability efficiency.
- Build or maintain P and K based on the rating: Low-testing ground gets “build” rates where response is likely. Optimum ground usually shifts toward maintenance based on crop removal and realistic yield.
- Match placement to the system: No-till and banded fertilizer systems stratify nutrients. Sampling strategy and recommendation interpretation need to match that field reality. Oregon State describes how surface applications often stay in the top 1 to 2 inches without tillage, which affects what a deep composite sample reports.
- Document, then re-test on schedule: Soil test trends are only useful when timing and depth stay consistent. Illinois Extension stresses consistent depth and time of year for meaningful results.
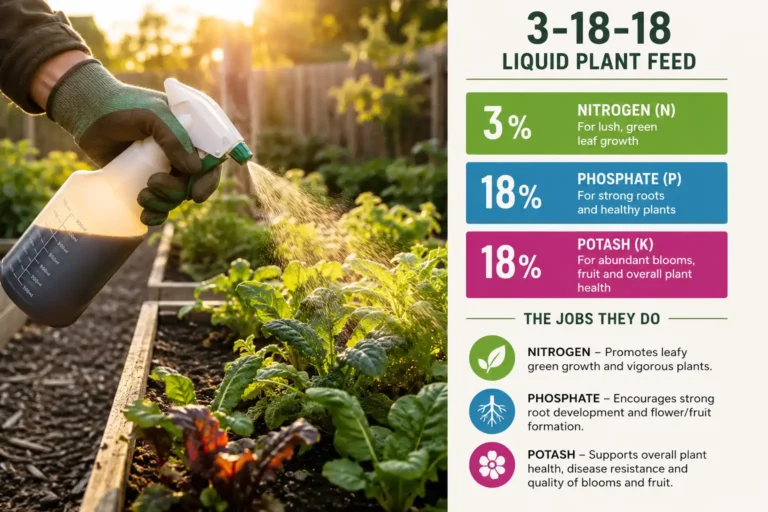
If you want to connect soil test results to the products farmers use, my explainer on understanding what farmers sow to make plants grow helps put “P and K on paper” into real inputs and application styles.
What sampling mistakes distort soil test results?
Most bad soil test recommendations start with a bad sample, not a bad lab. Errors usually come from mixing unlike areas, sampling the wrong depth, or contaminating the composite with fertilizer or lime. Fixing those basics often improves decision quality more than adding extra tests.
High-impact mistakes to avoid:
- Pulling cores from field edges, headlands, or nonrepresentative zones and mixing them into one bag.
- Sampling within 6 to 8 weeks after lime or fertilizer applications.
- Hitting fertilizer bands or sampling in old row zones that concentrate nutrients. Michigan State flags band avoidance in its guide.
- Mixing cores at different depths across the same composite sample. Missouri notes that inconsistent depth makes trend comparisons unreliable.
- Forgetting to list the crop on the submission form. UMass notes the lab cannot provide recommendations without a crop code in its system.
Do at-home kits and soil sensors help on farms?
At-home kits help as a quick screen, but lab testing drives fertilizer decisions because it ties numbers to calibrated recommendations. University of Maryland Extension states that soil testing labs provide more complete and accurate results than do-it-yourself kits. That is the reason most serious nutrient plans still start with a lab report.
Sensors and on-the-go mapping tools add value when you calibrate them against lab samples and treat them as spatial tools, not stand-alone truth. Lab soil tests still anchor the recommendation side.
How does soil testing support precision agriculture?
Soil testing supports precision agriculture by giving you a mapable layer for pH and nutrient variability. Composite sampling works well for uniform ground. Grid or zone sampling shines when yield maps, terrain, or soil electrical conductivity show repeatable patterns.
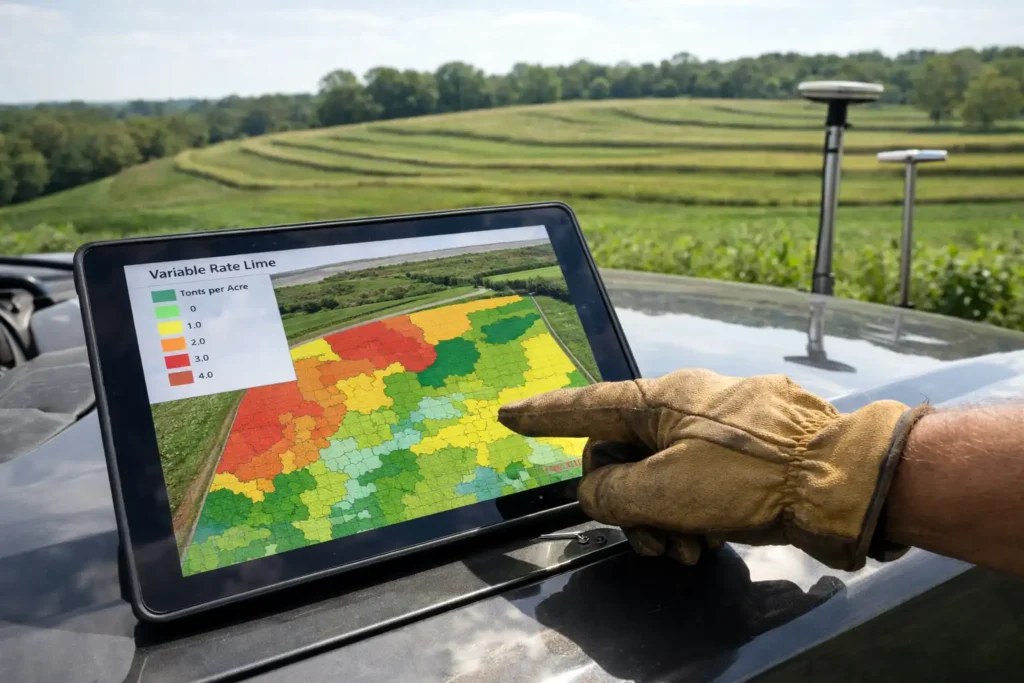
A Maryland Extension training guide highlights that the largest source of error is still a nonrepresentative sample, and it also illustrates how tiny lab sample weights represent huge soil masses at field scale. That is the reason precision approaches still lean hard on disciplined sampling rules.
Practical ways farmers tie soil tests into variable-rate work:
- Use soil tests to build lime and P/K prescription maps.
- Re-sample on a rotation, then check whether variability patterns hold.
- Keep application records so you can explain changes in the trend line.
FAQs about Soil Testing for Farming
How to test soil quality for farming?
How to test soil for farming?
What is the importance of soil testing for a farmer?
How many cores go into one soil sample?
What is one soil sample “worth” in the field?
Bottom line
Soil testing pays off when the sample matches the field you manage. Keep your sampling units consistent, pull enough cores, and hold depth steady year after year. Pick a lab that calibrates recommendations to your region and give it the crop context it needs. When you do that, the soil test stops being a sheet of numbers and starts being a dependable guide for lime and fertilizer decisions.