How to Grow Small Potatoes in 60 Days: 7 Easy Steps
Small potatoes are young tubers harvested early, before they reach full maturity size. This guide walks through the complete process from seed selection to early harvest, so you can produce tender, flavorful spuds in a garden bed, raised row, or container within about 60 to 90 days after planting.
To grow small potatoes, plant certified seed potato pieces 3 inches deep and 8 to 10 inches apart in loose, well-drained soil with a pH between 5.5 and 6.5. Water steadily, hill the stems twice, then harvest the baby tubers 7 to 8 weeks after planting.
What Are Small Potatoes?
Small potatoes are immature tubers dug before the plant finishes its full growth cycle. Farmers call them new potatoes, baby potatoes, or creamer potatoes, depending on their size. Most measure 1 to 2 inches across, with thin, papery skin and a sweet, creamy texture.
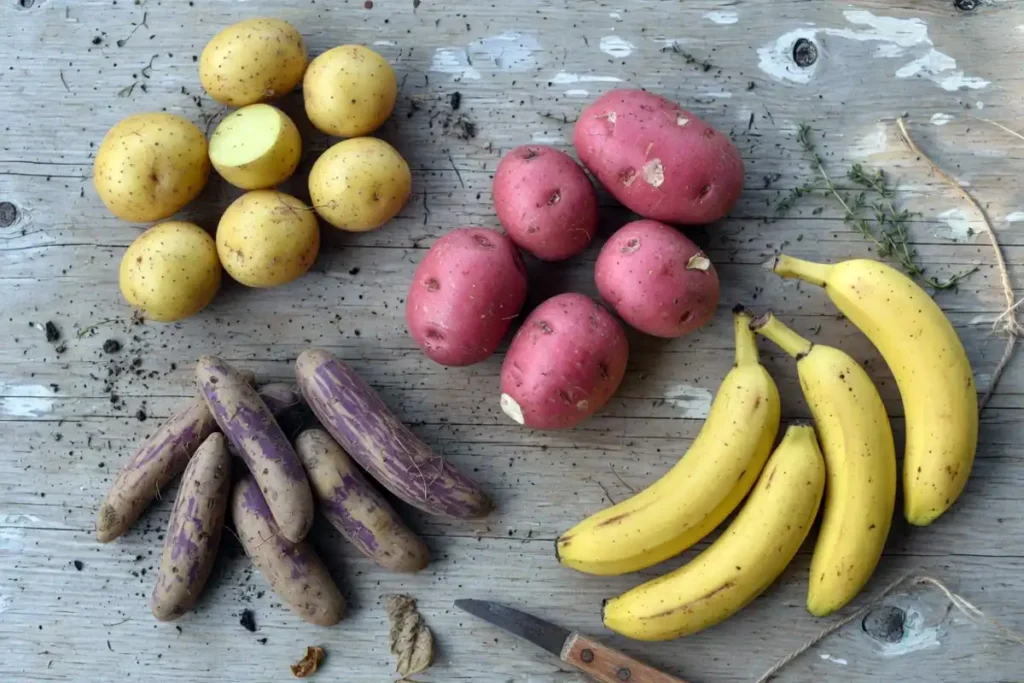
Varieties like Yukon Gold, Red Norland, French Fingerling, and Russian Banana stay naturally small when harvested early. I pull mine 7 to 8 weeks after planting, well before the vines die back.
When to Plant for Small Potatoes
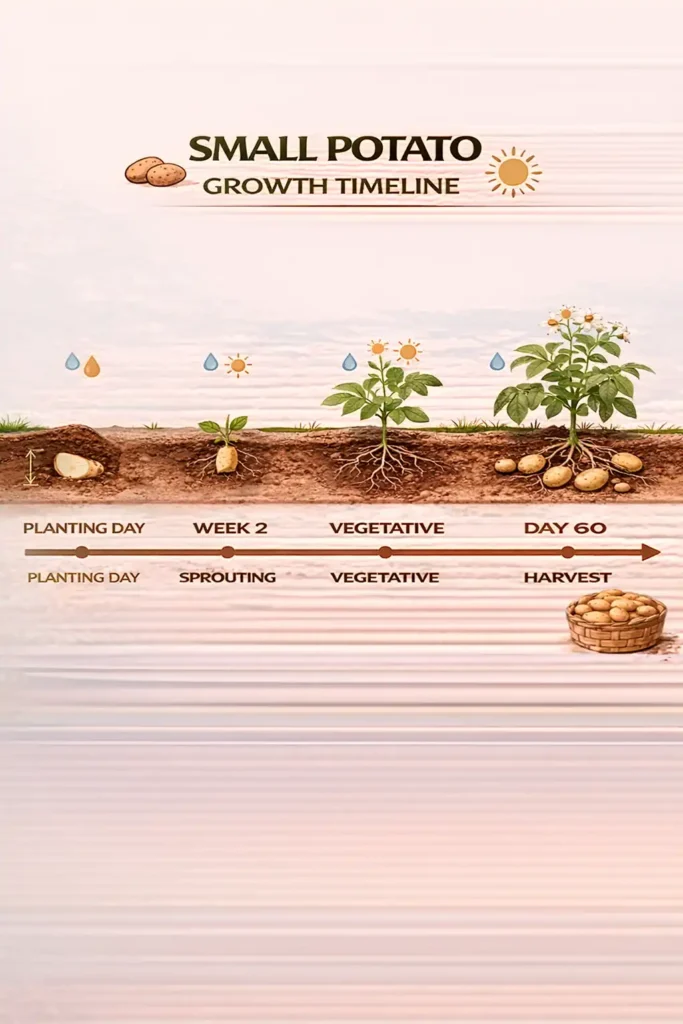
Plant seed potatoes 2 to 3 weeks before your last spring frost, once soil temperature reaches 45°F. In Topeka, I plant mine around late March. A second crop can go in by mid-July for a fall harvest. The full planting window for potatoes breaks down timing by region.
Small potatoes mature fast. You pull them early, so the planting window is more forgiving than with full-size spuds.
Where to Grow Small Potatoes
Pick a site with full sun, at least 6 hours of direct light daily. Loose, sandy loam gives the best results. Avoid heavy clay, which stunts tubers and creates odd shapes.
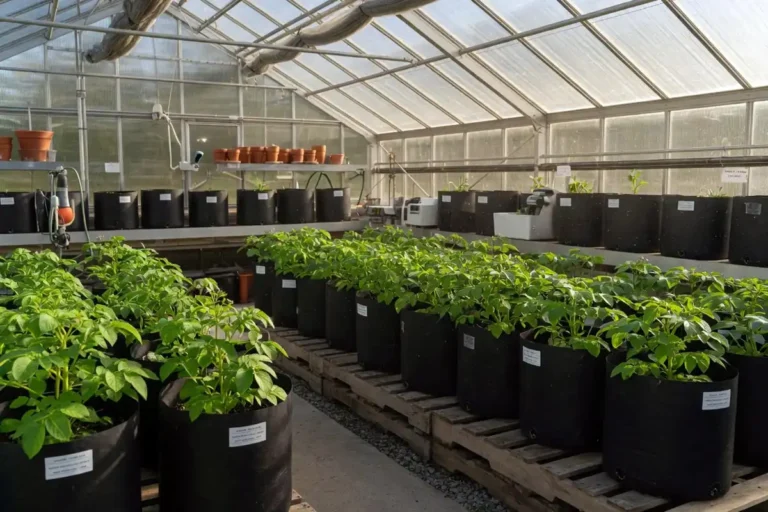
If your soil is tight or shallow, raised beds or grow bags work well. I walked through container methods in my guide on growing potatoes in bags, a solid option for small-tuber varieties.
How to Grow Small Potatoes Step by Step
Here is how to grow small potatoes from start to finish. These 7 steps cover seed prep, planting, care, and harvest.
Step 1: Pick a Small-Tuber Variety
Choose early-season or fingerling varieties. Good options include Yukon Gold, Red La Soda, French Fingerling, and Austrian Crescent. Early varieties mature in 60 to 75 days, ideal for baby-sized harvests.
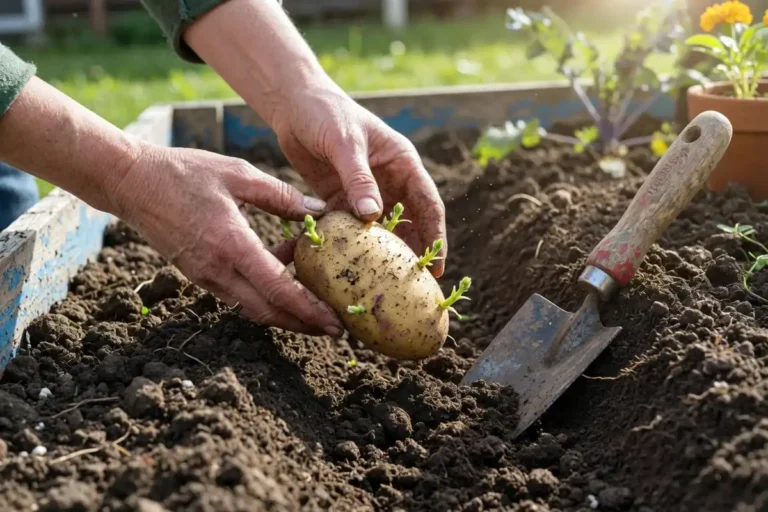
Step 2: Prepare Certified Seed Potatoes
Use certified seed potato stock to avoid disease. Cut larger seed pieces into 1.5-ounce chunks, each with 1 or 2 eyes. Cure them at 65°F for 2 days so the cuts heal. I covered the full process in cutting and curing seed pieces.
Step 3: Prepare the Soil
Work the bed to a depth of 10 inches. Mix in 2 inches of finished compost. Test your soil; potatoes need a pH between 5.5 and 6.5. Apply a balanced 10-10-10 fertilizer at 2 pounds per 100 square feet.
Step 4: Plant at the Right Depth
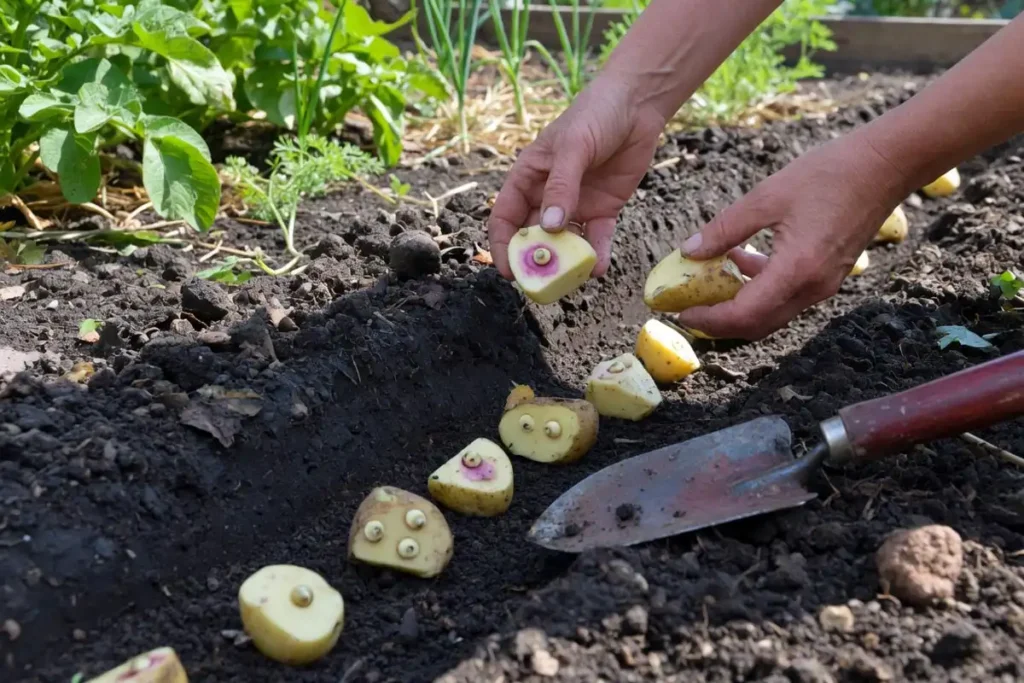
Dig a 3-inch trench. Place seed pieces eye-side up, 8 to 10 inches apart. Cover with 3 inches of soil. Closer spacing (around 6 inches) produces smaller tubers, which suits this goal.
Step 5: Water Consistently
Potatoes need 1 to 2 inches of water per week. Keep the soil evenly moist, especially during flowering, when tubers form. Uneven watering causes cracks and hollow centers.
Step 6: Hill the Plants
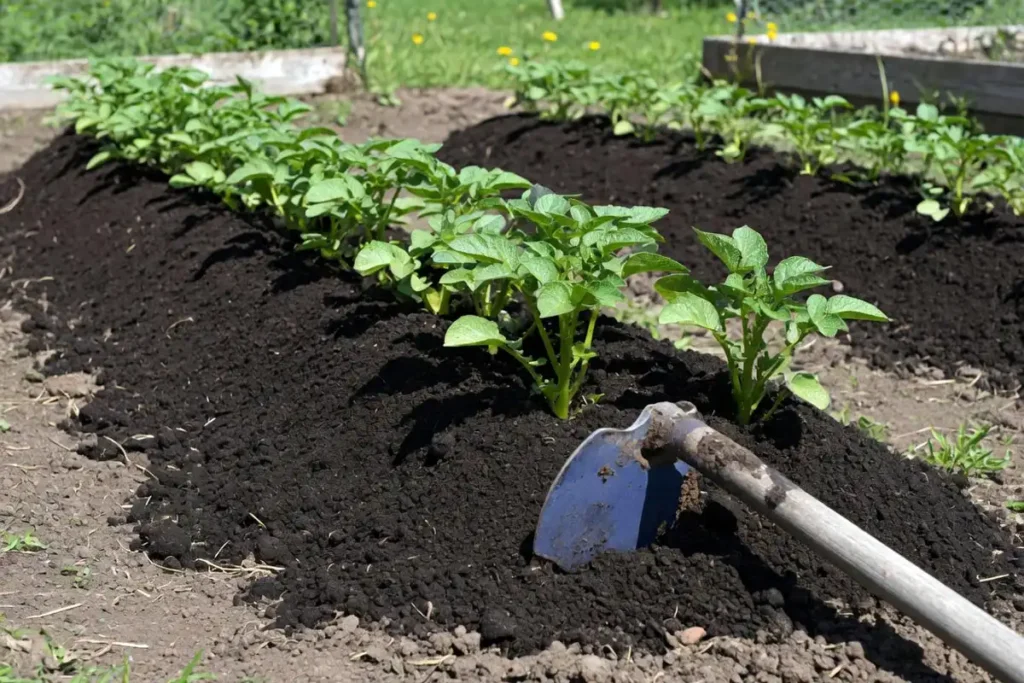
When stems reach 6 inches tall, mound soil around them, leaving the top 3 inches exposed. Hill again 2 weeks later. The hilling technique for potatoes keeps tubers covered, prevents greening, and encourages more small spuds along the stem.
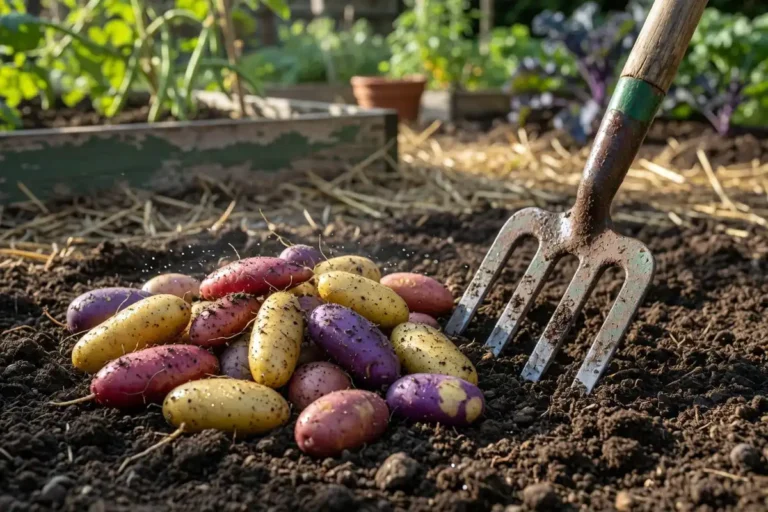
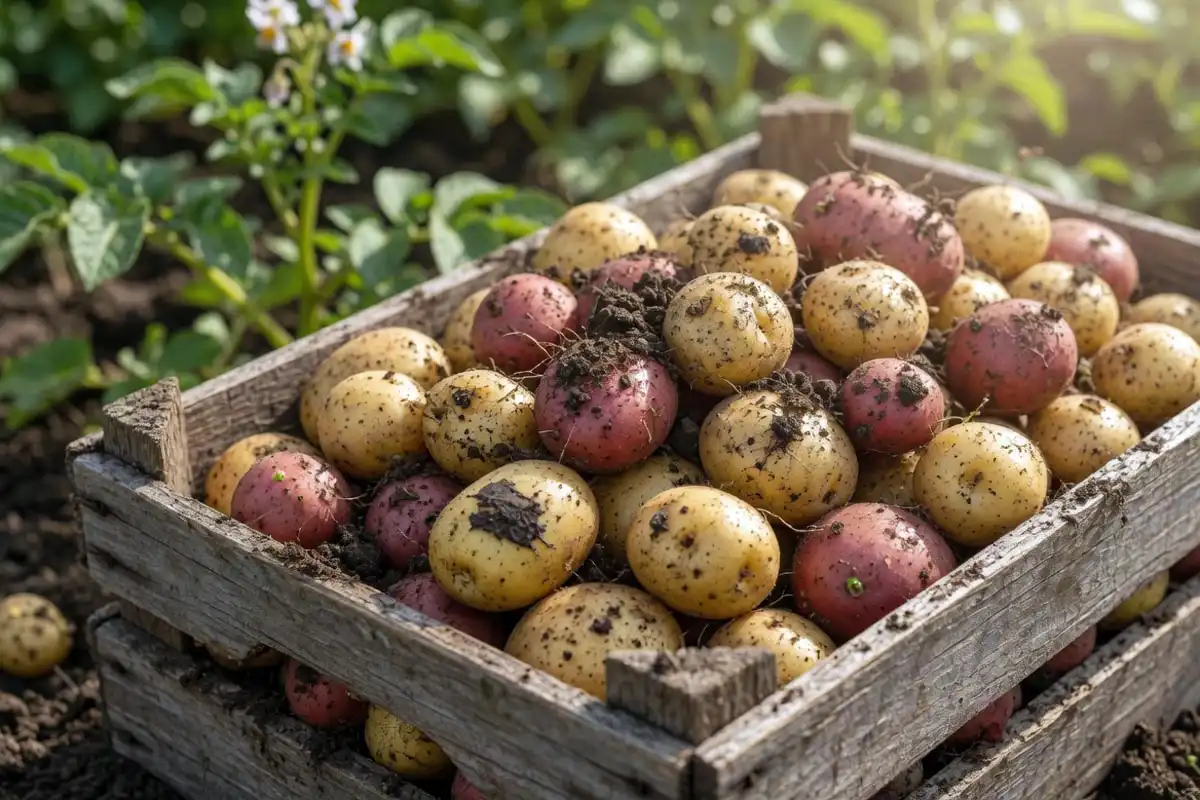
Step 7: Harvest Early for Small Size
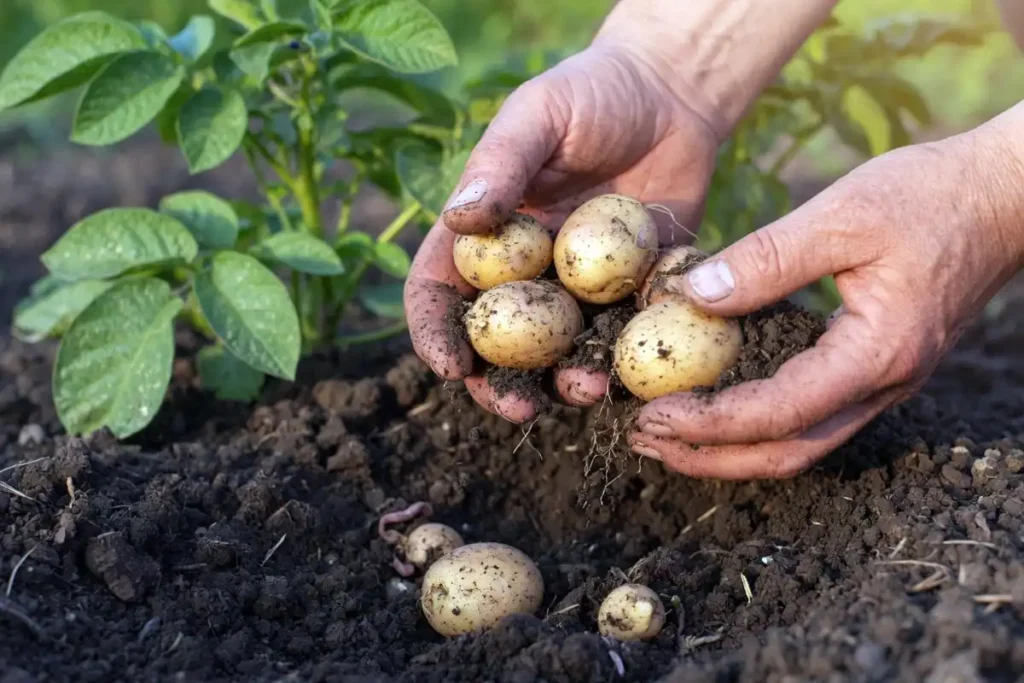
Start checking 7 to 8 weeks after planting, right after the plants flower. Dig gently with your hands or a garden fork. Pull only what you need; leave the rest to size up if you want a mix. My harvest timing guide covers the signs of readiness.
Best Soil and Fertilizer for Small Potatoes
Potatoes thrive in rich, slightly acidic soil. Aim for a pH of 5.5 to 6.5, which also reduces scab disease. Mix 2 to 3 inches of compost before planting.
At planting, apply 10-10-10 fertilizer. When stems reach 6 inches, side-dress with a nitrogen source like blood meal at 0.5 pounds per 10 feet of row. University of Minnesota Extension recommends steady soil moisture during tuber formation for consistent size.
Common Problems and Solutions
Pests and diseases can cut your yield fast. Here are the 3 most common issues and fixes.
Colorado potato beetle. Hand-pick adults and crush the orange egg clusters under the leaves. Spinosad spray controls heavy infestations.
Early blight. Yellow spots with rings signal this fungal disease. Rotate crops every 3 years and water at the soil level, not over the leaves.
Scab. Rough, corky patches appear in alkaline soil. Keep pH below 6.0 and maintain even moisture. USDA research supports acidic soil for scab prevention.
Mistakes to Avoid When Growing Small Potatoes
New growers often lose tubers to these 5 errors.
- Planting grocery-store potatoes. They carry disease and often fail to sprout. Use certified seed.
- Skipping the hill. Exposed tubers turn green and develop solanine, which is toxic.
- Overwatering. Soggy soil causes rot and scab.
- Planting too early. Cold, wet soil rots seed pieces before they sprout.
- Feeding too much nitrogen. It grows leaves, not tubers.
Safety and Storage Tips
Never eat green potatoes or sprouted tubers with soft spots. Green patches contain solanine, which causes nausea. Hill thoroughly to block sunlight from reaching tubers.
After harvest, brush off dirt (do not wash). Store in a dark, ventilated space at 45 to 50°F. Small potatoes keep 2 to 3 weeks fresh; use them quickly for best flavor. Skip the fridge, which turns starch to sugar and affects taste.
FAQs about Grow Small Potatoes
How long does it take to grow small potatoes?
Can I grow small potatoes in containers?
Do small potatoes need full sun?
What is the best fertilizer for small potatoes?
Can I plant small potatoes from the store?
Final Words
Growing small potatoes rewards a little planning with a big payoff. Start with certified seed, plant in loose acidic soil, water steadily, hill twice, and harvest 7 to 8 weeks after planting. Stick with early varieties, keep pests in check, and you will pull tender baby spuds from your own patch every season.