How to Cut and Cure Seed Potatoes to Reduce Rot Risk: 5 Rules for Clean Starts
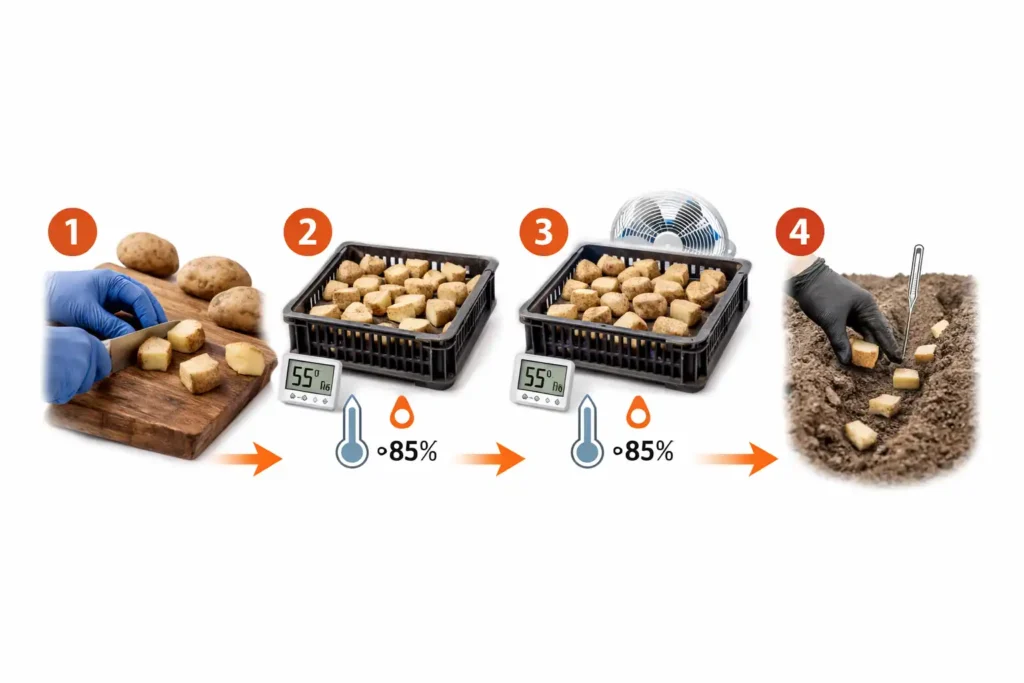
To cut and cure seed potatoes to reduce rot risk, cut clean blocky pieces with 1–2 eyes using a sanitized knife, then air-cure them in ventilated crates at about 50–60°F with high humidity for 3–4 days until the cut faces feel dry and corky before planting into workable soil. This guide walks you through selecting tubers, sizing cuts, curing (suberizing) seed pieces, and timing planting so the seed does not sit wet and cold.
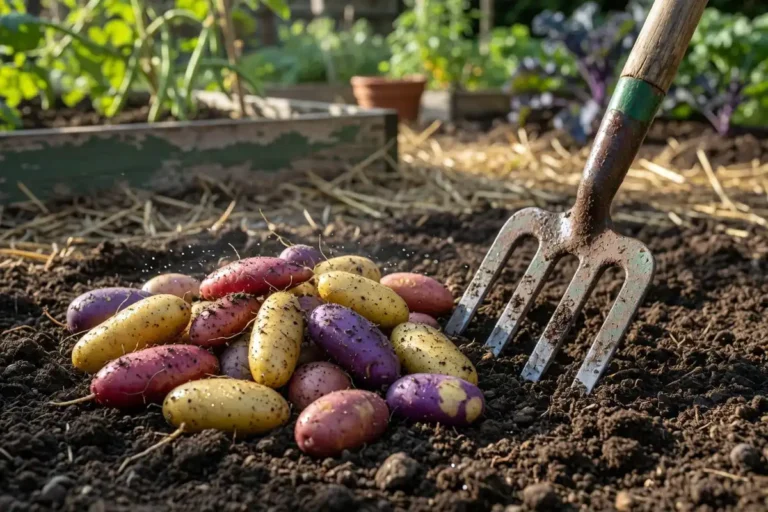
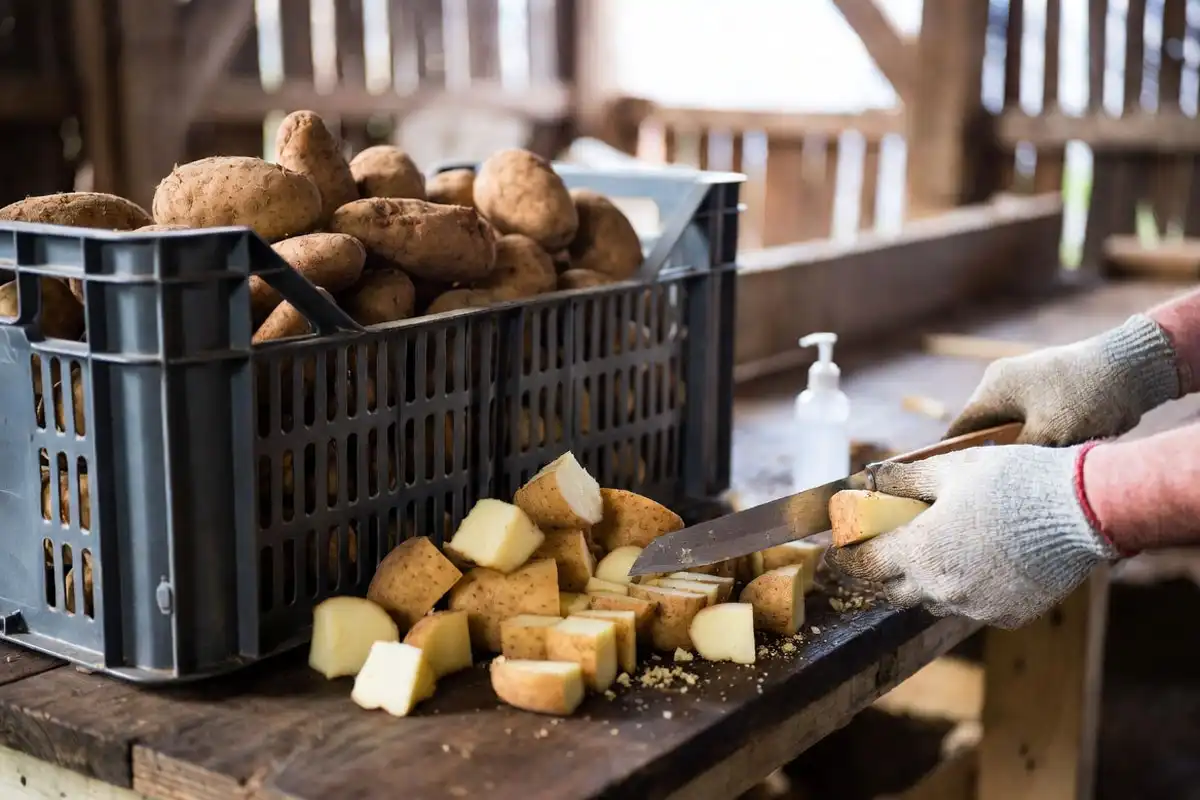
Cut seed potatoes into blocky 1.5 to 2 oz pieces with 1 to 2 eyes, disinfecting knives between lots. Cure the cut pieces in open crates with airflow at 50 to 60°F and high humidity for 3 to 4 days, until the cut faces feel dry and corky. Plant soon after curing into soil at least 45°F and avoid watering before emergence when seed piece decay risk is high.
What does “cutting and curing” seed potatoes mean?
Cutting divides one seed tuber into multiple seed pieces for planting. Curing gives each cut surface time to suberize, which forms a protective barrier that limits pathogen entry and moisture loss. Fusarium fungi infect through wounds, and they do not infect intact skin or suberized cut surfaces.
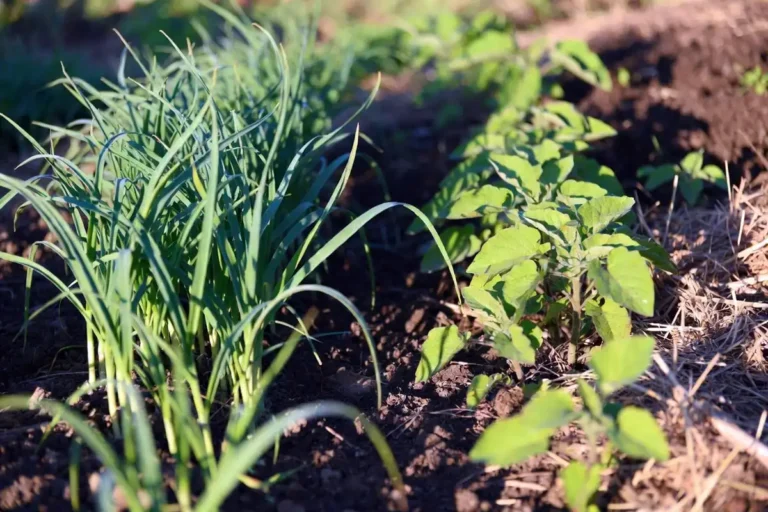
If you want a quick refresher on what qualifies as planting stock, read this guide on seed potato basics before you cut.
When do you cut seed potatoes?
Cut timing depends on soil conditions and the physiological age of the seed.
Cut and plant right away when planting conditions look good
Planting soon after cutting reduces the time seed pieces sit in a pile where bacteria can spread. The Pacific Northwest handbook lists “plant as soon as possible after cutting” as a key cultural step to reduce seed piece decay.
Cut ahead and cure when cold, wet, or delayed planting is likely
Precutting helps seed pieces heal under controlled conditions instead of healing in cold soil. University of Maine notes that freshly cut seed planted into cold, wet, or dry soil often fails to heal and can dehydrate or become infected.
Use seed age to set a safe precut window
University of Maine gives a clear rule set:
- Young seed can be precut up to one month before planting.
- Sprouted seed is cut only two weeks ahead.
- Physiologically old seed is not precut, and it is cut only a few days ahead of planting.
If you do not know seed age, use a conservative approach. Cut close to planting, cure for a few days, then plant.
Where do you cure cut seed potatoes?
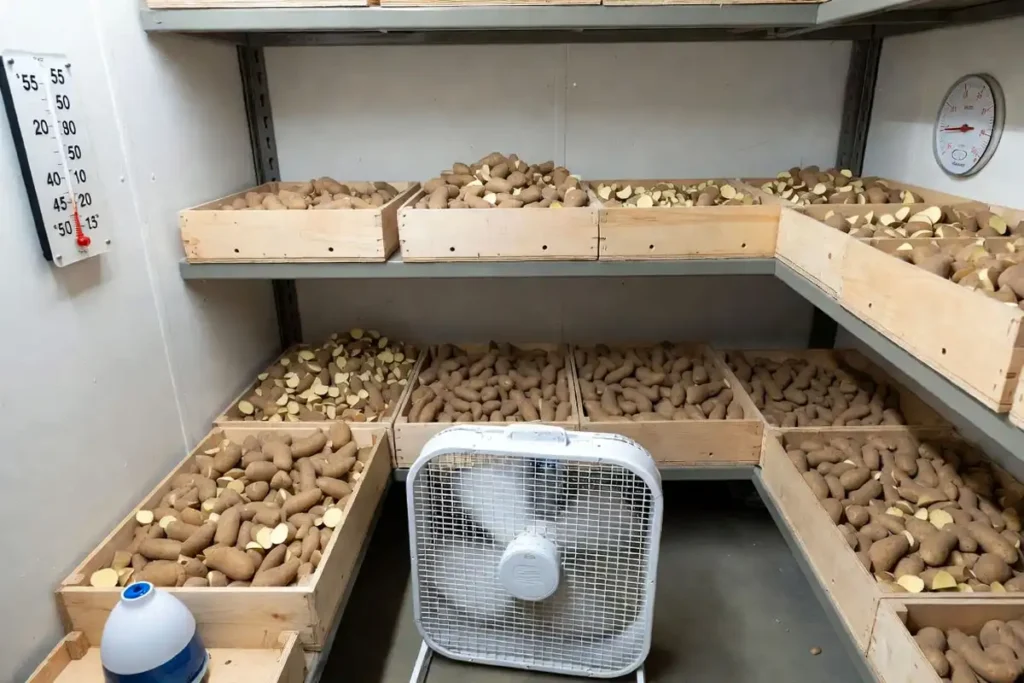
Curing works best in a space that controls temperature, humidity, and airflow.
A good curing area has three features
- Air movement that keeps the pile from heating and removes carbon dioxide.
- High humidity that limits dehydration while the wound barrier forms.
- Shallow depth so air reaches the center of the pile.
University of Maine advises keeping cut seed no more than six feet deep during curing and keeping humidity 85% to 95% to promote healing and prevent dehydration.
For growers who want more storage and airflow guidance, these basics overlap with basic crop storage methods and general post-harvest handling practices.
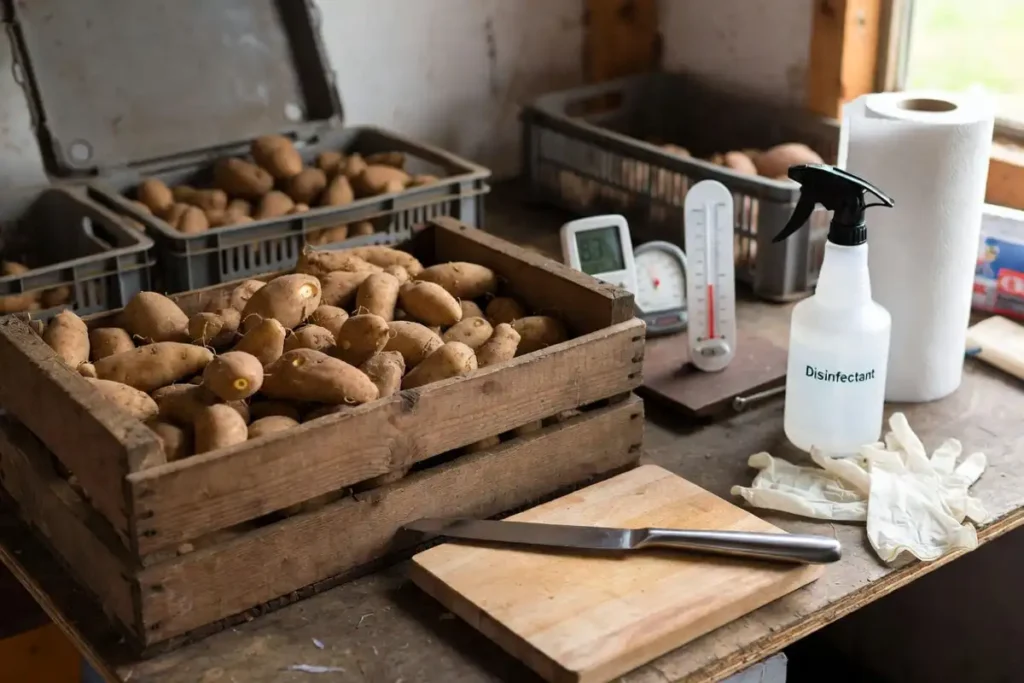
Prep checklist before you cut
Seed selection checks
- Reject tubers that already break down.
- Do not try to salvage diseased tubers.
- Do not wash seed tubers before cutting.
When you are unsure what you see on the tuber skin, compare symptoms in this overview of common crop disease signs.
Tool and space checklist
- Sharp knife or seed cutter with straight blades.
- Clean bins or crates that allow ventilation.
- Thermometer and a way to estimate humidity.
- Disinfectant plan for tools and surfaces.
- Gloves and cut-resistant habits.
University of Maine emphasizes sharp knives because ripped tissue creates an entry point for disease organisms. It also calls out disinfecting equipment before cutting and between seed lots.
How to cut and cure seed potatoes step by step
Use this workflow in order. Each step supports the next.
1) Warm seed tubers before cutting
Warm seed cuts cleaner and heals faster than cold seed. Oregon State’s seed certification guidance and multiple IPM sources recommend warming seed to about 50°F before cutting.
Keep sprouting in mind. University of Maine notes that older or sprouted seed is held at lower temperatures than young seed.
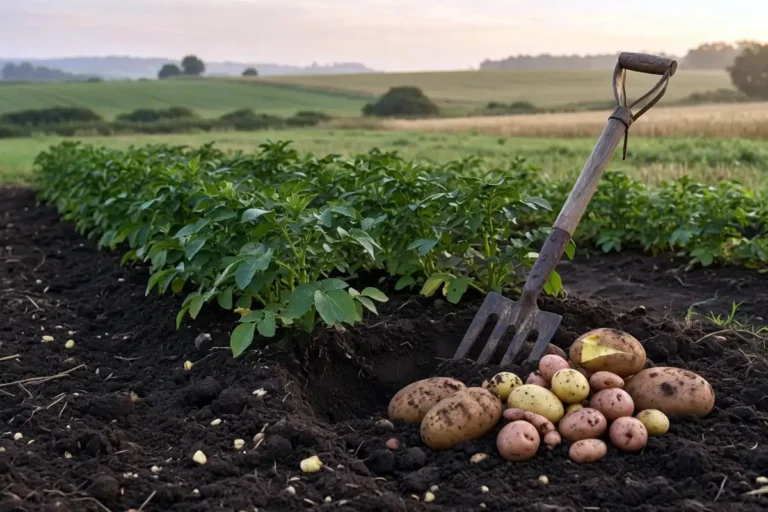
2) Sort by tuber size and decide “whole vs cut”
Size sorting prevents mixed seed piece size and uneven emergence.
University of Maine provides clear size rules for whole planting vs cutting:
- Tubers under 1.5 oz are not planted.
- Tubers 1.5 to under 3 oz are planted whole.
- Tubers 3 to 5 oz are cut into two pieces.
- Tubers 5 to 7 oz are cut into three pieces.
If conditions favor rot, planting whole seed reduces cut surface exposure.
3) Set up the curing area before you start cutting
Lay out clean crates or bins in a way that keeps seed pieces in shallow layers.
The Pacific Northwest handbook recommends storing cut seed in open containers or crates for ventilation. It even notes that burlap bags get filled only halfway and stacked for airflow.
4) Disinfect knives and cutting surfaces, then keep them clean
Sanitation reduces the chance of spreading bacteria or fungal spores across the lot.
University of Maine tells growers to disinfect equipment before each cutting session and between seed lots.
The Pacific Northwest handbook repeats the same point for seed piece decay management.
Practical tip: clean off sap and debris first. Disinfectants work poorly on dirty steel.
5) Cut into blocky seed pieces with the right weight and eyes
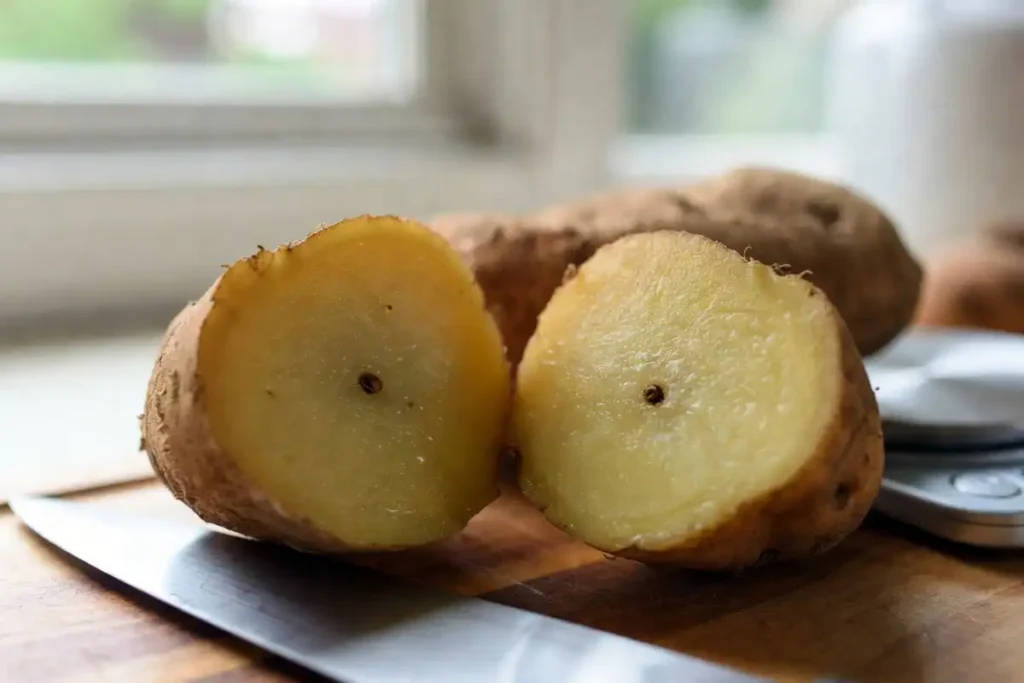
A blocky seed piece reduces exposed cut area. A sliver dries fast and rots fast.
Use these targets:
- 1.5 to 2 oz per piece is a common standard for planting pieces.
- Each piece carries at least one eye. Many guides aim for one to two eyes per piece.
University of Maine also flags variety differences. Some varieties need slightly larger pieces because of eye distribution.
6) Handle cut seed gently
Edges of cut surfaces bruise easily. Bruised edges create infection sites that do not always heal.
University of Maine describes handling as an underrated risk area and notes that seed pieces bruise more easily than whole tubers.
7) Cure the cut seed pieces using one of these proven curing options
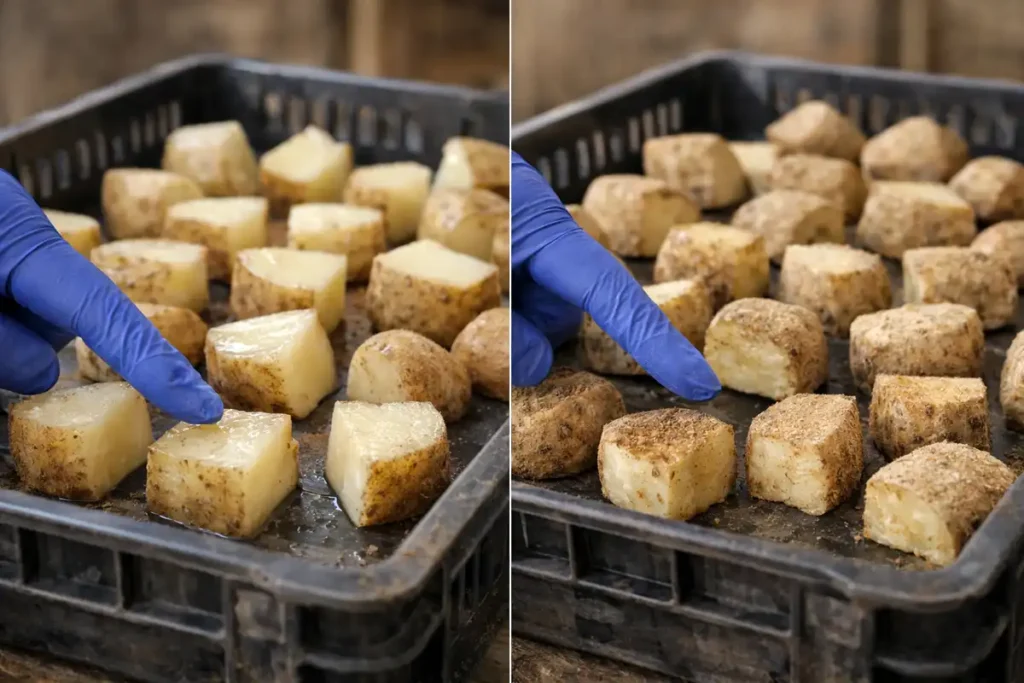
Pick the option that fits your planting schedule and your storage control.
Option A: Short cure before planting
Hold cut seed 3 to 4 days at 50 to 60°F and 85% to 90% humidity, with ventilation.
This plan fits growers who cut and plant within the week.
Option B: Warm cure with strong airflow management
University of Maine’s 2024 seed treatment bulletin describes storing cut seed at 50 to 55°F for a minimum of three days with good air circulation and humidity to promote wound healing. It also links good airflow and limited pile height to reduced spread of bacterial pathogens on cut surfaces.
This plan fits growers who want active healing but still plan to plant soon.
Option C: Cool cure for longer holding
University of Maine’s seed bulletin also describes cooling cut seed to 38 to 40°F (below 45°F), keeping piles under six feet, and holding humidity at 85% to 95%. It states that six to 10 days at these conditions completes curing.
This plan fits precut seed that needs a longer holding period.
Watch the airflow. University of Maine warns that excessive airflow without enough humidity can create a thin skin that sloughs off during handling.
8) Re-warm before planting when you cure or hold seed cold
Cold seed planted into warmer soil pulls moisture from the air and forms condensation. That water film favors bacteria and restricts oxygen.
University of Maine recommends re-warming seed for two days before planting to get sprouts active and avoid condensation on the seed.
9) Plant into conditions that favor fast emergence

Fast emergence lowers time in the danger zone where rot pathogens win.
UC IPM gives two clear points tied to seed piece decay:
- Plant when soil temperature is at least 45°F.
- Avoid irrigation before emergence when conditions favor seed piece decay.
Oregon State’s seed handling guidance also calls out planting into warm soil above 45°F and soil that is moist but not wet.
Solutions that lower rot risk when conditions stay wet or cold
Use these decision tools when spring weather drags on.
Choose whole seed more often
University of Maine recommends planting seed 1.5 to under 3 oz whole. Whole seed reduces cut surface area in cold, wet soil.
Cut closer to planting
The longer cut seed sits, the more time bacteria have to spread in a pile. The Pacific Northwest handbook prioritizes planting soon after cutting or curing under controlled conditions for only a few days.
Prioritize airflow and shallow piles
Both University of Maine and other potato disease guidance limit pile depth to maintain oxygen and reduce heating. University of Maine sets the maximum depth at six feet during curing.
Treat fungal decay risk with labeled products only
Some regions recommend fungicide seed piece treatments when conditions favor seed piece decay. UC IPM and the Pacific Northwest handbook both list fungicide treatment as an option in those conditions.
If you choose this route, use the label as the operating manual. For a plain-language refresher on label-first decisions, see this guide on when pesticide use makes sense in farming.
Important limitation: University of Maine’s 2024 bulletin states that fungicides do not control seed piece decay caused by bacteria. It also advises against dip treatments because dips can spread pathogens across pieces.
Troubleshooting: what went wrong and how to fix it
The cut faces stay wet and slick after curing
Wet surfaces signal low airflow, high condensation, or piles stacked too deep.
Fix: spread pieces thinner, increase ventilation, and match seed temperature to room temperature before piling. Keep depth under six feet during curing.
Seed pieces shrivel and lose weight
Shrivel points to low humidity or excessive air movement.
Fix: raise humidity, reduce fan speed, and keep pieces in crates that slow drying while staying ventilated. University of Maine warns that too much airflow without enough humidity creates weak skin.
Pieces turn soft and smell foul
Soft rot bacteria move fast in wet, oxygen-poor conditions.
Fix: discard affected pieces, disinfect tools, and improve pile drying and airflow. University of Maine’s 2024 bulletin stresses airflow and limited pile height to reduce bacterial surface spread.
Emergence is patchy even after curing
Patchy stands often trace back to poor seed quality, wrong piece size, or planting into cold wet soil.
Fix: tighten seed piece sizing, avoid slivers, and plant when soil conditions favor rapid suberization and growth. UC IPM ties reduced seed piece decay to conditions that favor rapid suberization, including warmer soil.
Avoid these common mistakes
- Cutting seed pieces too small and expecting them to perform. University of Maine rejects seed pieces under 1.5 oz.
- Making slivers or slabs that maximize cut surface area. Maine and Oregon both prefer blocky pieces with minimal cut surface.
- Cutting with dull blades that rip tissue. Maine links ripping to higher disease attack risk.
- Washing seed tubers before cutting. University of Maine advises against washing seed tubers.
- Piling cut seed deep and hoping it heals. University of Maine sets a six-foot depth limit during curing.
- Using dip treatments as a shortcut. University of Maine’s 2024 bulletin states dips can spread pathogens and does not recommend them.
Safety notes for cutting and curing seed potatoes
- Use sharp knives and a stable cutting surface. Dull blades slip and bruise seed pieces.
- Wear gloves that protect your hands without reducing grip. This PPE guide helps you pick the right basics: farm safety gear and PPE.
- Keep disinfectants and treated seed away from food areas. University of Maine’s 2024 bulletin states treated seed is not used for food, feed, or fodder.
- Ventilate curing spaces. Oxygen and carbon dioxide management matters for wound healing in piles.
Conclusion
Cutting seed potatoes reduces seed cost per acre, but it also creates wounds that invite rot when handling and curing slip. Clean cuts, blocky seed pieces, steady humidity, and real airflow produce a corky cut face that holds up in the ground. Keep the curing plan tied to seed age and planting conditions, and you will see more uniform emergence with fewer missing hills.