When to Use Pesticides in Farming: Timing, and Mistakes to Avoid
Pesticides fit best when scouting confirms a pest problem and the crop faces real yield or quality loss that other controls will not stop fast enough. This guide explains the full timing workflow, from scouting and thresholds to choosing a product, picking the right spray window, and protecting people, pollinators, and water. You will also learn how preharvest and re-entry intervals control your schedule, how to avoid drift and resistance, and which timing mistakes cause most failures on real farms.
What does “use pesticides at the right time” mean on a working farm?
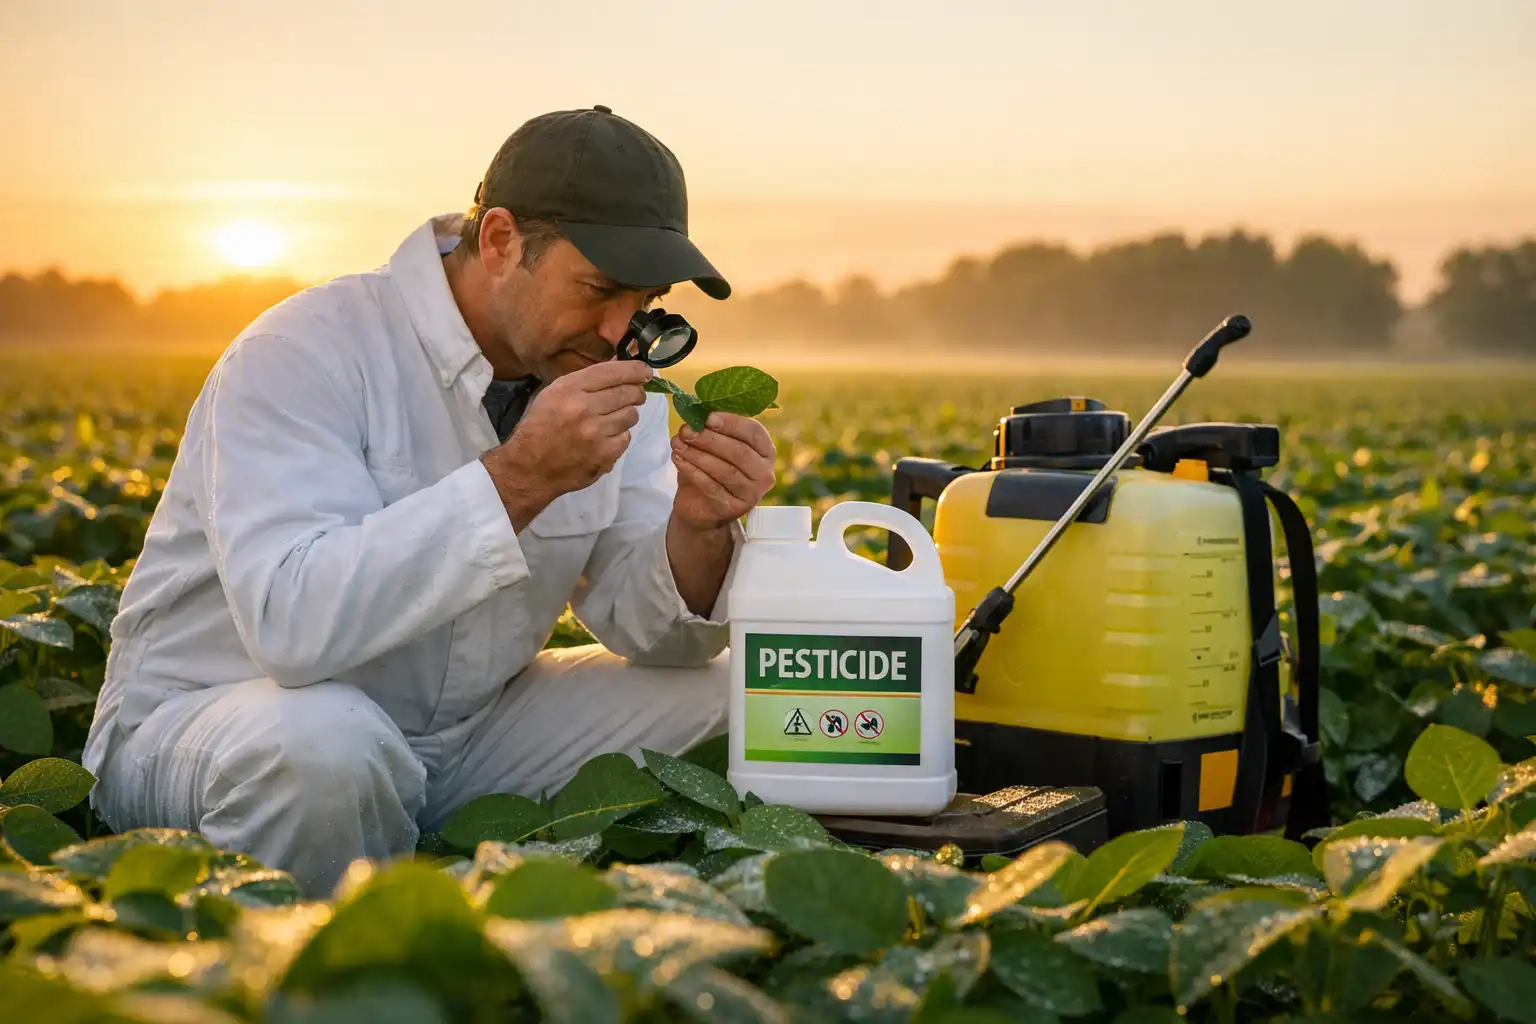
Right timing means a farmer applies the right product at the pest’s most vulnerable life stage, on a crop stage that tolerates the treatment, during weather that keeps the spray on target, and inside the label’s limits. The label sets legal directions and safety rules, so timing starts with label reading and ends with label compliance.
Solid crop growing practices start with good seedbed prep and variety choice, then follow through with timely planting, balanced fertility, and steady scouting.
When scouting shows weeds stay below threshold, I lean on farm weed suppression methods to reduce pressure before I schedule any spray pass.
When does pesticide use make sense instead of waiting or using other controls?
Pesticide use makes sense when scouting shows pest pressure near an action threshold and the expected damage exceeds the cost and risk of treatment. Integrated Pest Management aims to reduce economic, environmental, and health risks by combining multiple tactics, so pesticides stay as one tool, not the first tool.
A practical decision rule on most row-crop and vegetable farms looks like this:
- You treat when pests, disease symptoms, or weeds increase across the field and the crop sits in a sensitive growth stage.
- You delay when the pest is below threshold, natural enemies control the pest, or weather blocks safe application.
- You switch tactics when cultural controls, mechanical removal, sanitation, or resistant varieties solve the problem with less risk.
When beneficial insects and habitat work keep populations down, biological pest control for crop fields helps you delay or avoid insecticide timing that can disrupt natural enemies.
When should you decide to spray during the season?
You decide to spray after three checks: scouting, crop stage, and label schedule.
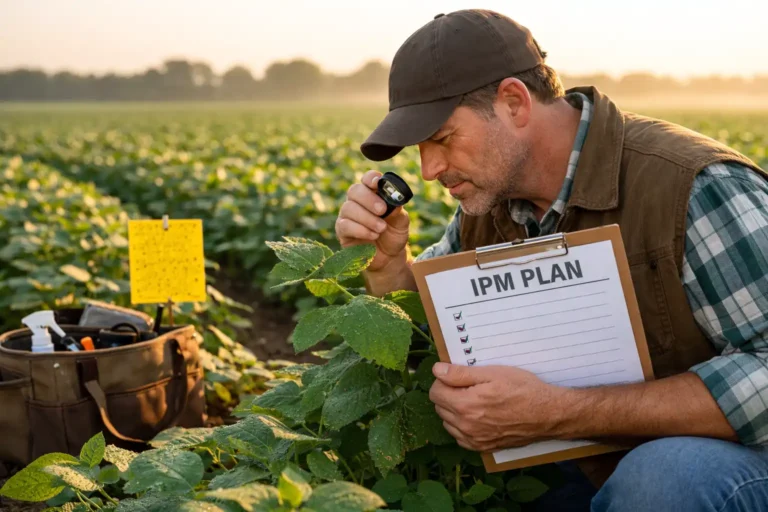
1) When does scouting tell you it is time?
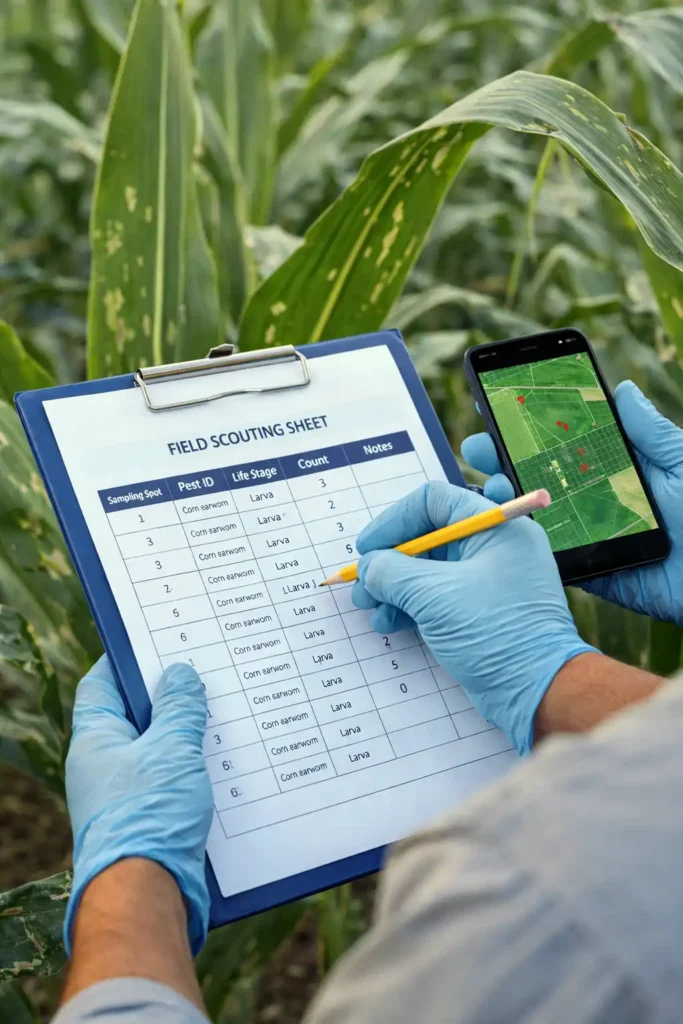
Scouting triggers spraying whege trend upward in multiple spots, not one hotspot. A simple scouting pattern uses a W or zig-zag route and notes pest counts per plant, per leaf, per sweep, or per square foot, based on the crop.
Field notes that support a spray decision include:
- Pest ID (species or best match)
- Life stage (egg, larva, nymph, adult; early lesion vs advanced lesion; seedling weed vs tillered weed)
- Location (field edge vs whole field)
- Weather trend (rain chance, heat, wind)
- Crop stage (emergence, vegetative, flowering, fruiting, preharvest)
2) When does crop growth stage make timing urgent?
Crop stage controls both risk and payoff. Flowering often raises pollinator risk. Early vegetative stages often raise crop sensitivity to competition or defoliation. Late season often raises residue risk and forces you to respect the preharvest interval.
For crop-specific stage notes, use your crop guide section as your reference point, such as corn crop guide or tomato crop guide.
3) When do PHI and REI force your timing?
PHI and REI create hard calendar limits.
- REI (restricted-entry interval) is the time after application when entry into the treated area is restricted for worker
- PHI (preharvest interval) is the minimum time between the last application and harvest.
A farm that misses PHI loses harvest options. A farm that ignores REI exposes workers. Both intervals come from the product label.
When is the best time of day to spray?
Early morning or evening often improves deposition because wind and heat-driven air movement increase around midday in many areas. Those calmer windows also reduce evaporation and off-target drift on many spray days.
Time-of-day still follows the label and local conditions. If the label requires daylight, specific temperature limits, or pollinator protections, those rules override routine habits.
When is the weather “good enough” for pesticide application?
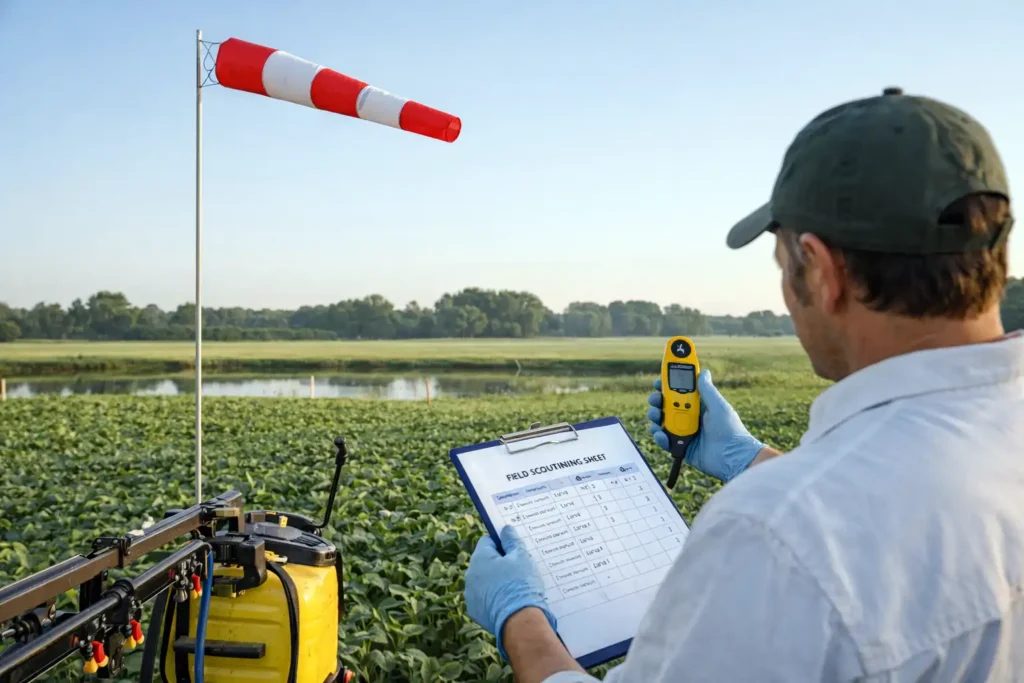
Weather is good enough when it keeps droplets on the target and protects sensitive areas. Drift risk rises with high wind, gusts, temperature inversions, and low humidity that speeds evaporation.
One practical drift benchmark, when a label does not provide stricter limits, is wind between 3 and 8 mph blowing away from sensitive areas. Wind above that range increases drift risk, and wind below that range can shift direction quickly.
Use weather as a stoplight:
- Green: steady light wind, no inversion signs, moderate temperature, no rain during required drying time
- Yellow: shifting wind, rising heat, borderline humidity, nearby sensitive crops
- Red: gusts, inversion risk, storm fronts, or wind toward homes, water, or pollinator habitat
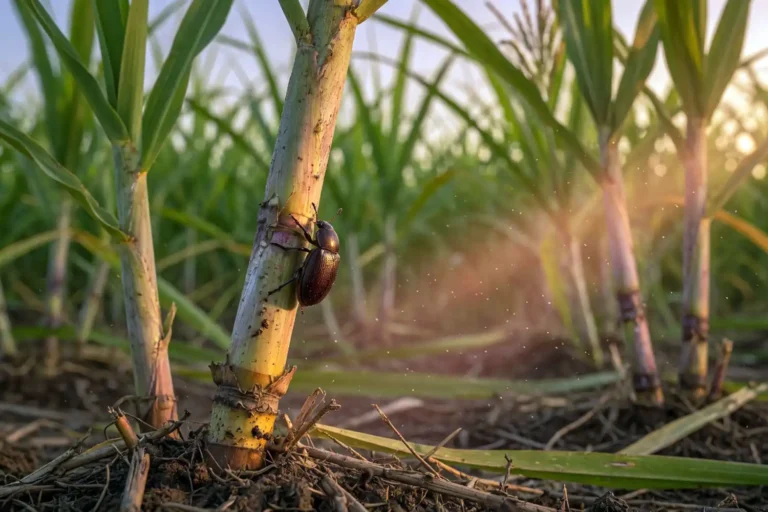
When should you target the pest life cycle instead of spraying on a calendar?
You target the life cycle when the pest has a vulnerable stage that gives the highest control per pass.
Examples that show how timing changes results:
- Insects: larvae and nymphs often die faster than adults because they feed more and have thinner cuticles.
- Plant diseases: protectant fungicides work best before infection periods; curatives work only in a short window after infection starts.
- Weeds: small, actively growing weeds take up herbicides better than large, hardened weeds, and late weeds can still steal moisture and nutrients.
Calendar spraying wastes product when pests are absent, and it accelerates resistance when the same mode of action repeats without need.
For field tool setup that supports accurate timing, review sprayers and application gear.
When should you choose a pesticide based on mode of action and resistance risk?
You choose based on mode of action when the pest has a resistance history in your area or your farm repeats the same chemistry.
A resistance-safe timing plan does three jobs:
- Rotates mode of action across applications and across seasons.
- Uses full labeled rates for the target and crop stage, because under-dosing selects survivors.
- Limits repeats of the same active ingredient or group in one season.
If the label requires tank-mix partners or limits the number of applications per season, those rules set your rotation plan.
How do you time pesticide use from start to finish?
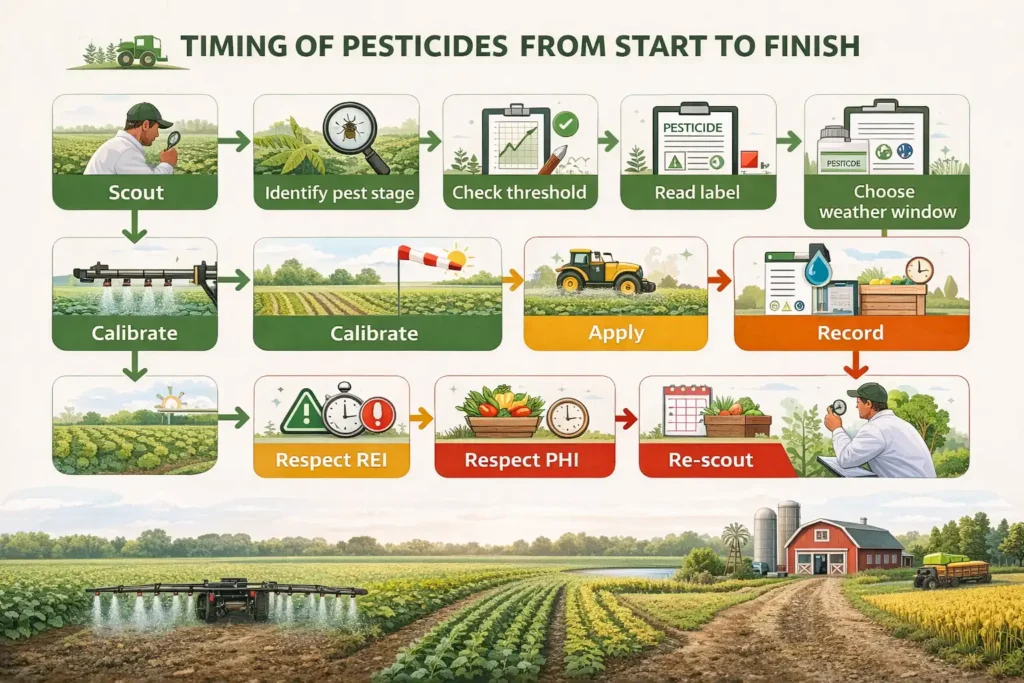
This workflow covers the full A ms use.
- Confirm the pest problem. Identify the pest, confirm the life stage, and map where it occurs.
- Set the action trigger. Use an extension guideline, crop consultant threshold, or farm history to define when treatment pays.
- Pick the least-risk option that works. Start with cultural or mechanical fixes when they meet the goal; move to a pesticide when speed and reliability matter. For weeds, see weed control practices.
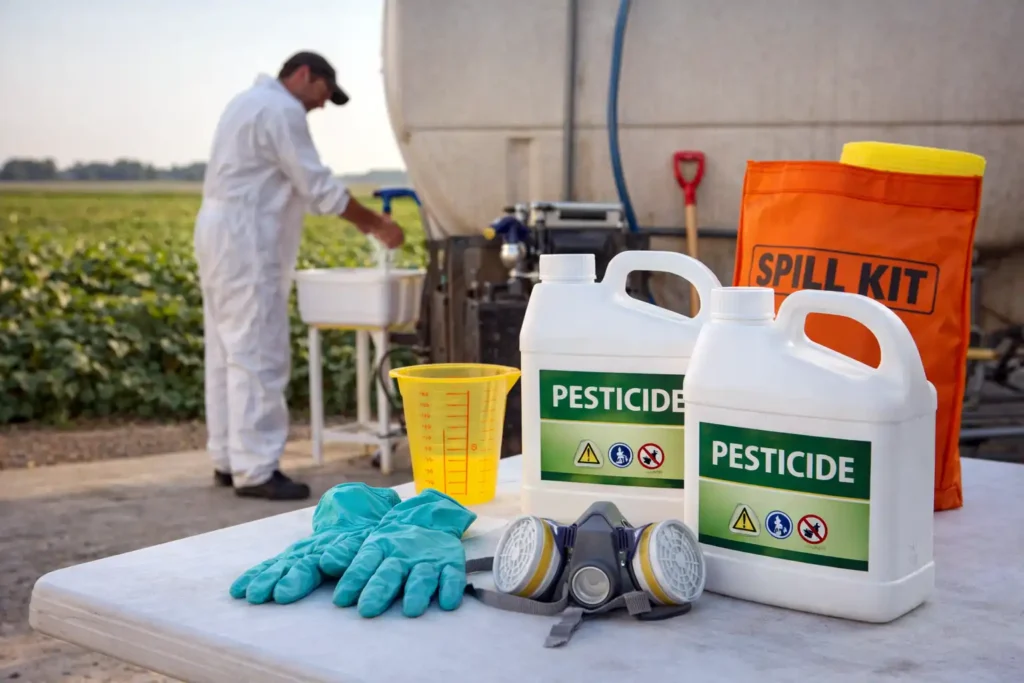
- Read the label before mixing. The label sets legal use, PPE, buffer zones, REI, PHI, and application limits.
- Plan the spray window. Choose a time that matches weather, crop stage, and pest stage. Avoid inversion risk and drift pathways.
- Wear the right PPE and protect helpers. Use the label PPE list and keep unprotected people out of the mix and spray zone. For a PPE refresher, use farm safety PPE basics.
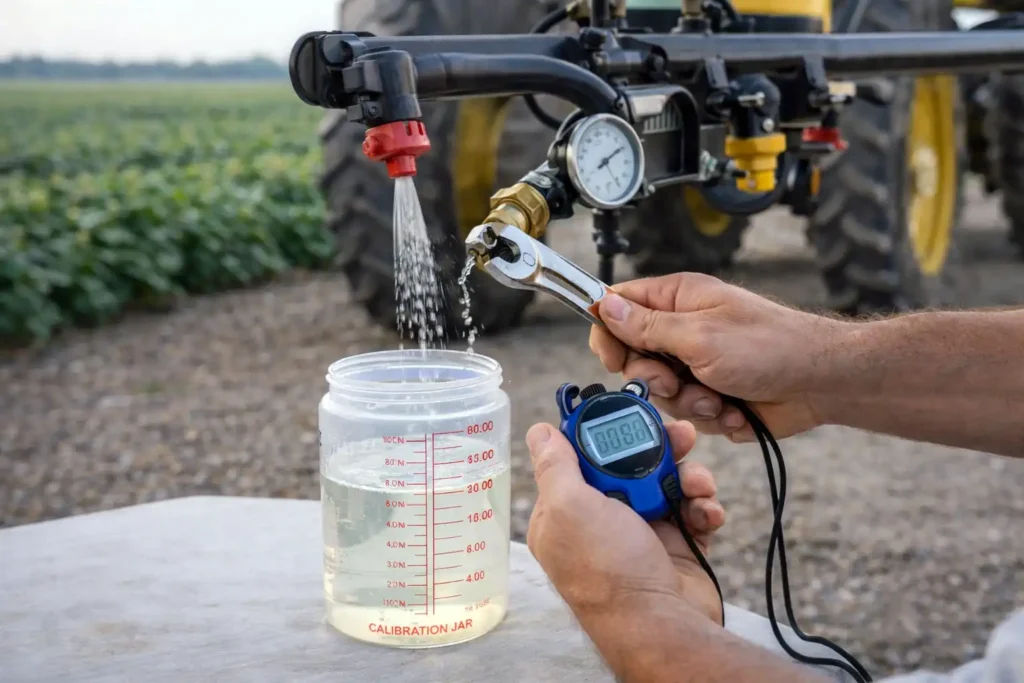
- Calibrate and apply for coverage. Match nozzle, pressure, speed, and water volume to the target. Coverage drives results for contact products.
- Respect REI immediately. Pate treated areas and times so workers follow the restriction window.
- Scout after treatment. Check control in 2 to 7 days for insects and weeds, and longer for some diseases depending on symptoms and weather.
- Record the job. Record product, rate, field, weather, start and stop time, and observed outcome. Good records improve future timing.
What safety rules control timing around people, pollinators, and water?
Safety rules control timing because exposure risk changes by hour and by activity.
Key timing rules that protect people and the crop:
- Apply when bystanders stay away. Keep kids, pets, neighbors, and untrained workers out of the area.
- Follow REI for worker tasks. Hand labor inside REI raises exposure risk.
- Follow PHI for harvest and grazing. PHI prevents residue problems at market.
- Protect pollinators. Avoid spraying blooming crops when bees actively forage, and follow label bee hazard statements when present.
- Prevent drift and runoff. Do not spray into wind toward water, homes, or sensitive crops.
FAO emphasizes that correct pesticide application reduces hazards to farmers and consumers and reduces wasted product from poor technique.
What are the most common timing mistakes that cause pesticide failure?
Timing mistakes usually fall into a few repeat patterns.
Spraying without scouting
Unscouted spraying misses the real pest stage and wastes product. Scouting also reveals hotspots that need targeted coverage.
Spraying too late in the pest cycle
Late sprays hit large insects, advanced disease lesions, or oversized weeds. Control drops and the next pass becomes more expensive.
Spraying in drift weather
Gusts, inversion risk, and high heat push droplets off target. Off-target movement also creates neighbor conflict and crop injury.
Ignoring REI and PHI
REI and PHI violations create worker risk and harvest delays. The label lists both intervals and enforces them.
Repeating the same mode of action
Repeated chemistry selects resistant survivors. Resistance shows up as “it used to work” failures, even when application looks clean.
Mixing or tank cleaning errors
Incompatible mixes, wrong mixing order, or dirty tanks create crop burn, plugged nozzles, and weak control. Time spent on clean mixing saves a lost day later.
How do you troubleshoot timing when results look weak?
Troubleshooting works best when you separate three causes: pest stage, coverage, and environment.
- If pests survive only in thick canopy: coverage or droplet size often limits control. Adjust nozzle, water volume, and travel speed.
- If survivors cluster in one corner: wind direction or missed swaths often explain the pattern.
- If weeds regrow from crowns: application occurred after the best growth stage, or the product lacks systemic action for that weed.
- If disease continues after spraying: infection may have occurred before spraying, rainfall may wash off protectants, or the interval may be too long for the weather pressure.
A post-spray scouting note that includes weather and pest stage helps you fix timing on the next pass.
What is a simple “good timing” checklist to keep in the sprayer shed?
A good timing checklist keeps decisions consistent:
- Pest ID confirmed and life stage noted
- Crop stage noted and bloom status checked
- Label read for rate, target, PPE, buffers, REI, PHI
- Weather checked for drift and rain risk
- Sprayer calibrated and clean
- Record sheet ready before you start
- Re-entry plan communicated to workers
Conclusion
Farmers get the best pesticide results when they treat based on scouting and thresholds, spray during a low-drift window, and hit the pest at its vulnerable stage while staying inside PHI and REI limits. That timing approach protects yield, protects workers, reduces off-target movement, and slows resistance, which keeps tools working season after season.