Post Harvest Handling: 9 Steps to Slash Spoilage Fast
Post harvest handling is the set of steps that protects harvested crops from heat, bruising, moisture, and microbes so they keep weight, taste, and sale grade. A good handling system removes field heat fast, keeps produce clean, controls moisture, and prevents damage during packing and transport. Grain handling focuses on drying, cleaning, and insect control. Vegetable and fruit handling focuses on gentle movement, cooling, and sanitation. When you run the same steps every load, you cut shrink and keep your best crop in the bin or the box.
What is post harvest handling, in plain farm terms?
Post harvest handling is the work you do after harvest to keep a crop safe, stable, and marketable. The crew moves the crop, cools or dries it, cleans it, grades it, packs it, stores it, and ships it. Each step controls one risk: heat drives respiration, moisture drives rot, impact drives bruising, and dirt drives contamination.
To keep quality high, train the crew to spot the signs a crop is ready to harvest so you start cooling or drying at the right maturity, not a day too early or late.
Crop farming post-harvest handling focuses on drying, cleaning, and safe storage conditions so you don’t give back profit after the crop is made.
What changes first after harvest?
Heat, moisture, and damage change first.
Field heat increases respiration in produce and speeds softening. Moisture imbalance drives rot in produce and mold in grain. Impact damage opens tissue and gives pathogens an easy entry point. Post harvest handling targets those three pressures early, before the crop sits.
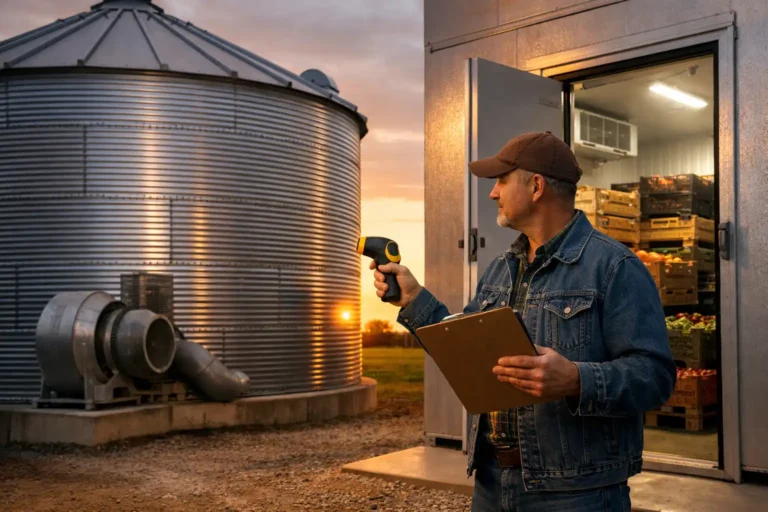
For cereals and oilseeds, follow reliable grain drying and storage practices so moisture, fines, and hot spots do not turn a good crop into shrink in the bin.
What is the A-to-Z post harvest workflow?
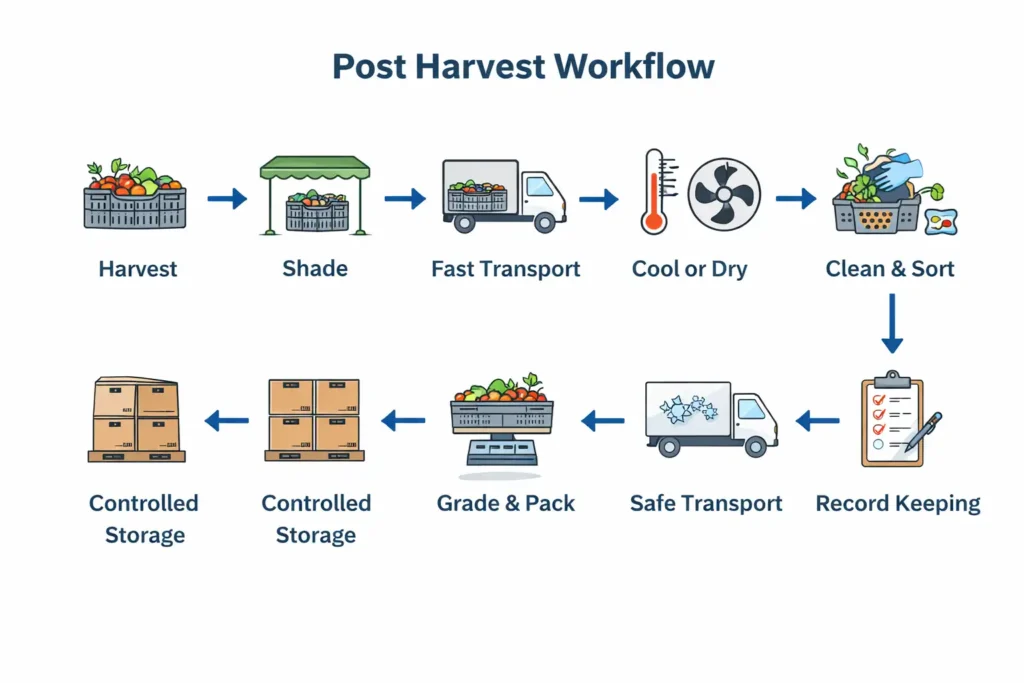
This workflow fits most crops. The settings change by crop, but the order holds.
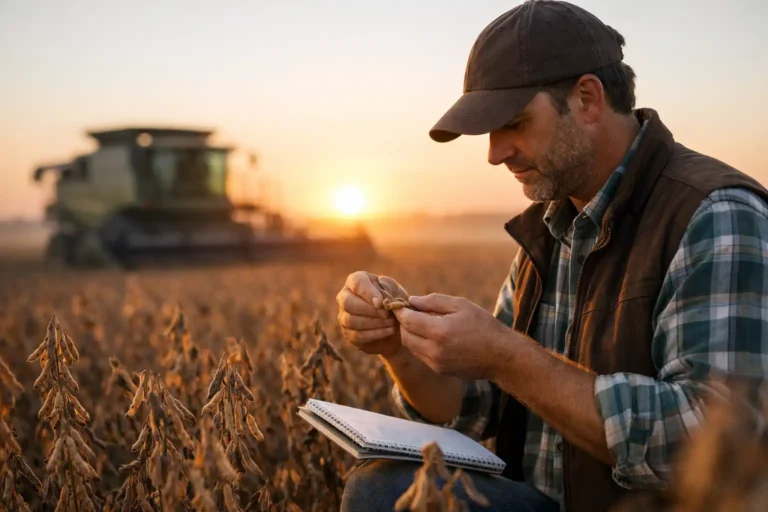
- Harvest at the right maturity. Pick at the maturity stage your buyer accepts. Maturity controls flavor, firmness, and storage life.
- Shade and protect immediately. Keep harvested containers out of direct sun. Use a tarp or canopy at the edge of the field.
- Move fast to the handling area. Shorten time from cut to cooling or drying. Time is a quality input.
- Remove field heat or remove water. Produce needs cooling. Grain needs moisture removal.
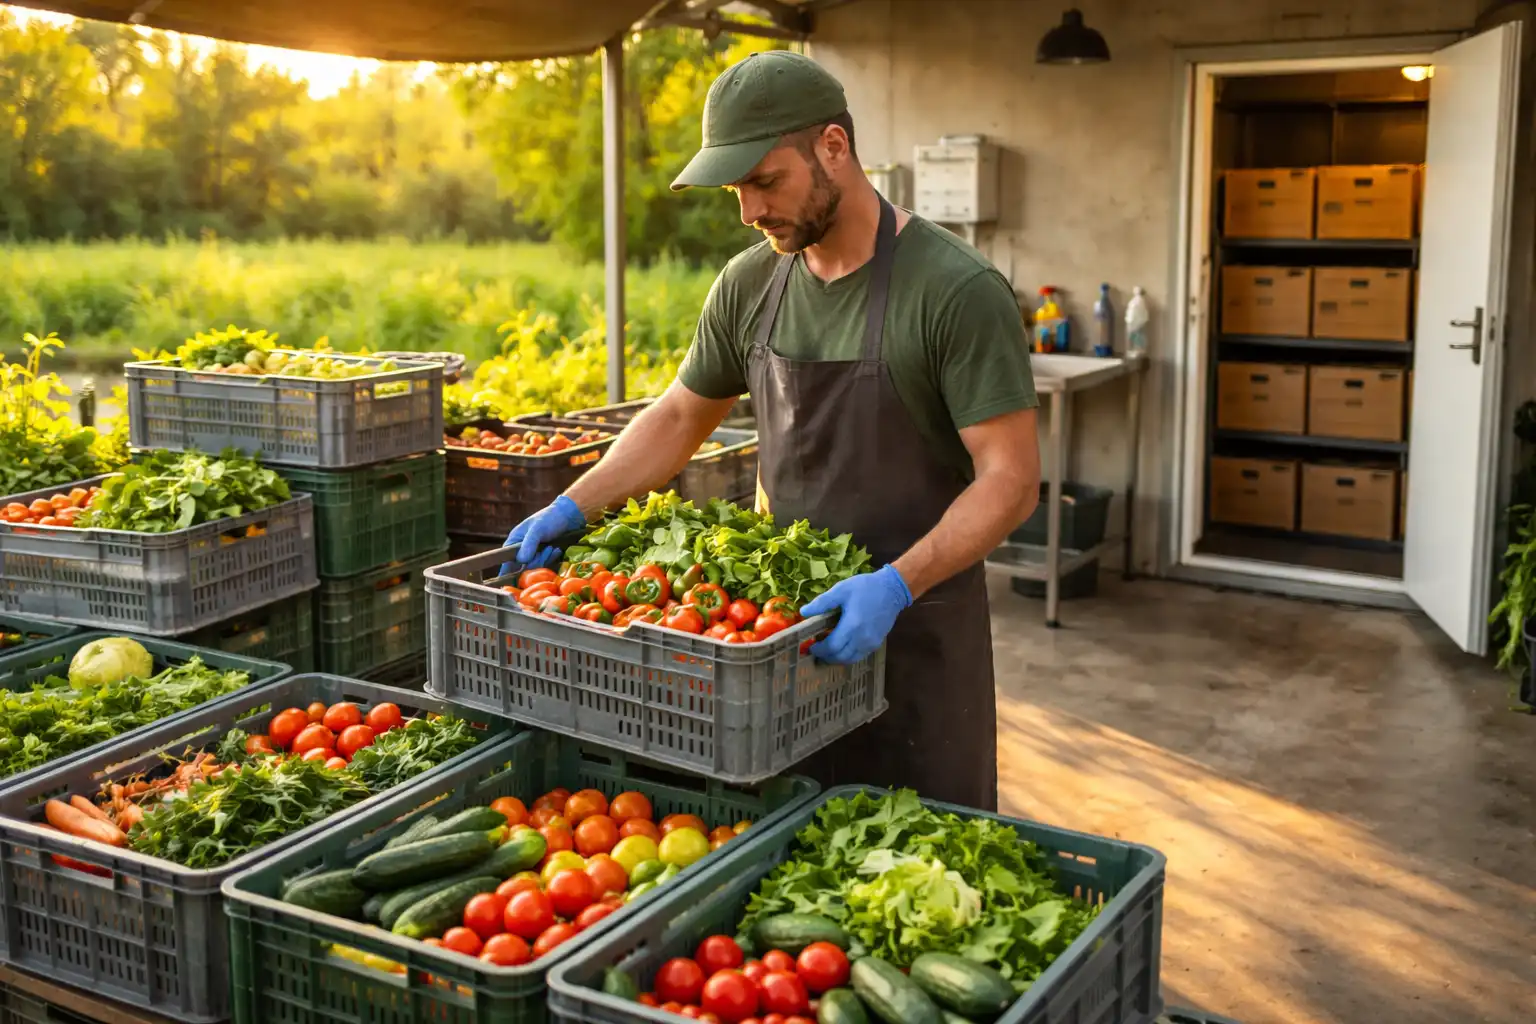
- Clean and sort. Remove soil, plant debris, and damaged units early so rot does not spread.
- Grade and pack. Match pack style to the market. Pack controls bruising and airflow.
- Store under controlled conditions. Temperature, humidity, and airflow keep quality stable.
- Transport with protection. Vibration and heat during hauling erase careful work fast.
- Record what happened. Records connect handling decisions to shrink, grade-outs, and buyer complaints.
For tool choices that fit those steps, the site’s harvesting tool guides help you match equipment to crop and scale.
How do you set up a simple handling area on a small farm?
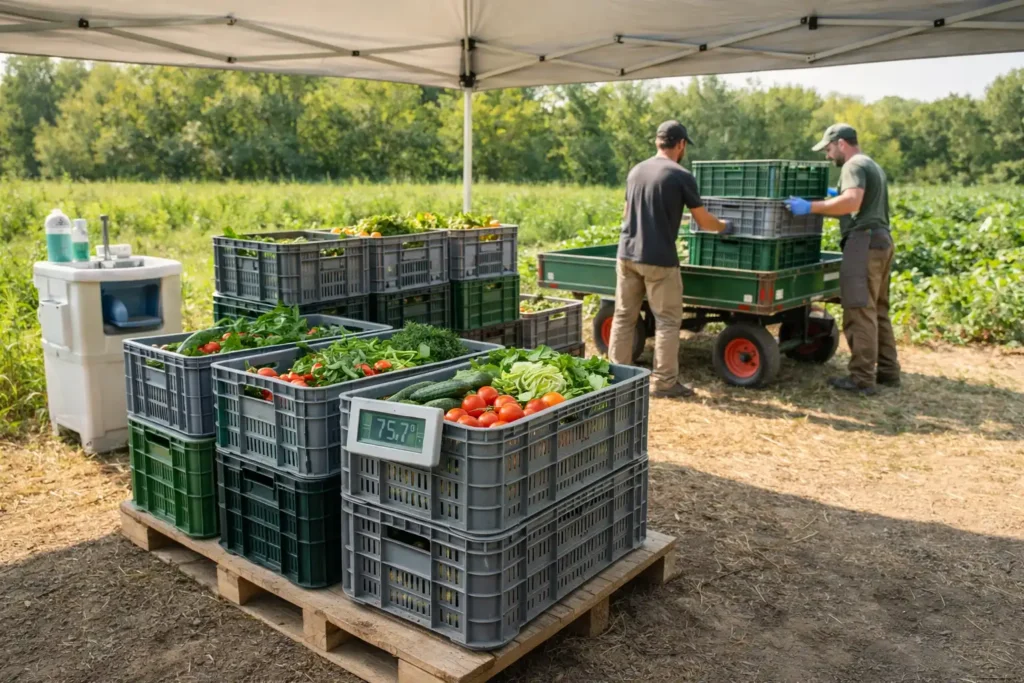
A small handling area needs shade, clean water, clean surfaces, and a clear flow path.
Place a shaded receiving zone near the field entrance. Keep washing and packing on clean tables that shed water. Separate “dirty” tasks (field totes, trimming, soil removal) from “clean” tasks (final rinse, packing, labeling). Put the cooler or drying area at the end of the line so the crop moves one direction and does not backtrack.
For storage-side basics like moisture control and bins, see the site’s drying and storage gear section.
What are the biggest causes of post harvest losses?
Most losses trace to five causes.
- Delayed cooling or drying that lets heat or moisture do damage first
- Rough handling that bruises, cracks, or skins the crop
- Dirty water and dirty contact surfaces that spread microbes
- Poor packaging fit that crushes product or blocks airflow
- Storage swings in temperature or humidity that trigger sweating, sprouting, or mold
How do you reduce bruising and mechanical damage?
Damage control comes from gentle movement and the right container.
Use shallow containers for tender crops. Avoid overfilling. Keep drop heights low during dumping and packing. Cushion hard contact points with food-safe padding. Train the crew to set containers down, not toss them. For mechanized lines, slow belts and reduce transfer points.
What cleaning and sanitation practices protect food safety?
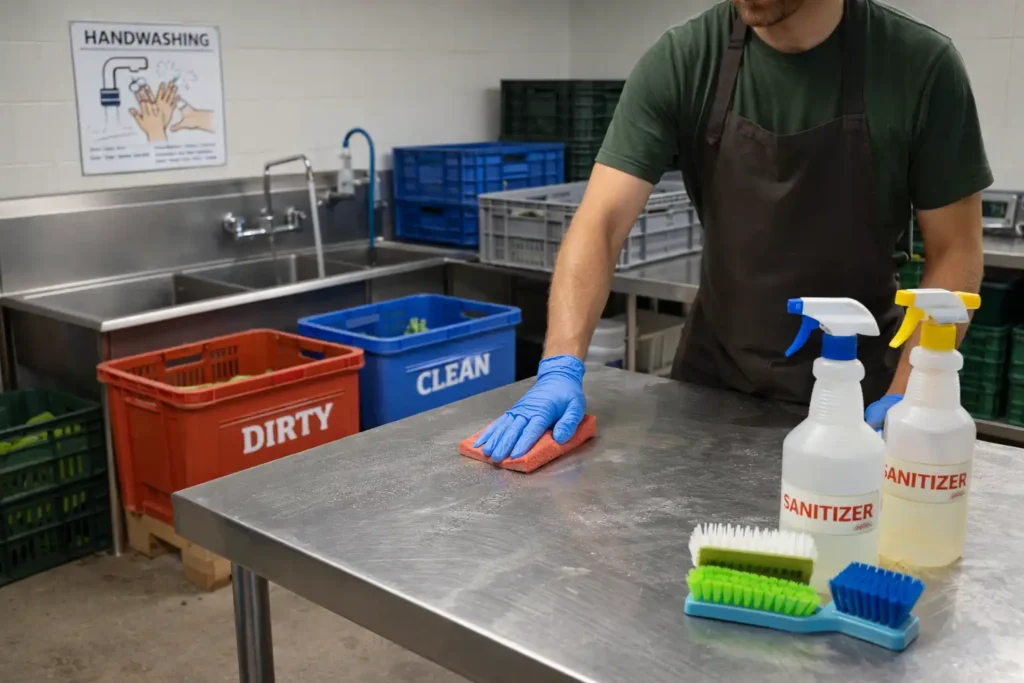
Sanitation protects buyers and protects your farm’s reputation.
Start with clean harvest containers. Wash and sanitize packing surfaces daily. Use potable water for washing and ice. Change wash water when it gets dirty. Keep animals out of the handling zone. Train workers on handwashing and glove use. Store chemicals away from produce.
For crew protection and safe handling habits, lean on a solid PPE plan like the one covered in farm safety and PPE guidance.
When do you wash produce, and when do you keep it dry?
Wash when soil and contamination risk stays high, and when the crop tolerates washing.
Leafy greens and many vegetables take a wash step when water quality stays controlled and surfaces dry fast. Some crops store better dry. Onions and garlic store best when cured dry and kept dry. Potatoes can get a light dry brush for soil, then hold dry with good airflow. If a crop goes into storage wet, rot risk increases.
What is curing, and which crops need it?
Curing is controlled drying that heals skins and reduces storage rot.
Curing thickens skins and closes small wounds on storage crops. Onions cure to dry necks and outer scales. Potatoes cure to set skins after harvest damage. Curing needs airflow and controlled warmth, plus protection from sun and rain.
If you grow storage crops, crop-specific pages like the potato guide and the onion guide help you line up handling with crop traits.
How does cooling work for vegetables and fruit?
Cooling slows respiration and slows decay.
Produce cools through airflow and cold surfaces. Forced-air cooling pulls cold air through packed cartons. Room cooling works when product is not stacked tight and airflow stays open. Hydro-cooling uses cold water on crops that tolerate it. Ice cooling works for crops that handle direct ice contact and clean meltwater.
Cooling starts with shade, then fast movement to the cooler. Cooling ends with stable storage temperature and steady humidity.
If you raise salad crops, the lettuce guide pairs well with a cooling-first handling plan.
How do you dry grain safely after harvest?
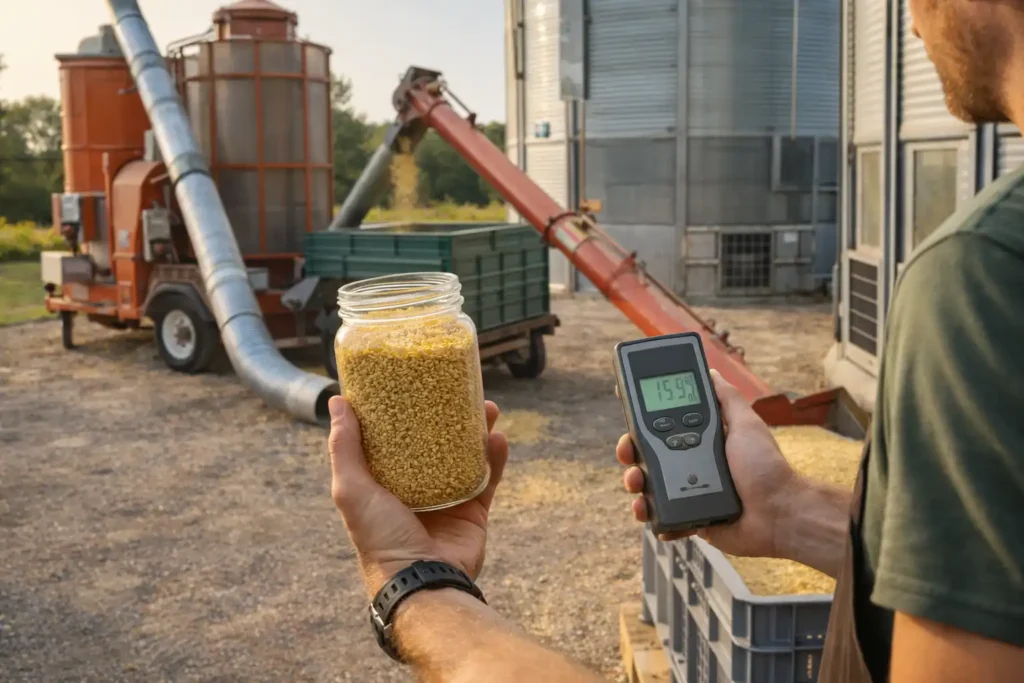
Drying removes water that drives mold and insect growth.
Harvest grain at safe combine settings to reduce cracked kernels. Clean grain to remove fines and broken material. Move grain into a system that provides airflow and consistent drying. Monitor moisture and temperature during drying and storage. Keep grain dry and cool once it reaches storage condition.
Crop pages like the corn guide and the rice guide help you think through harvest timing and post-harvest risks by crop.
What packaging and labeling choices prevent shrink?
Packaging protects the crop and helps airflow.
Match the container strength to stacking height. Use vented packaging when cooling depends on airflow. Avoid smooth, airtight liners on crops that sweat. Use clean, dry packaging. Label by lot or harvest date so you trace issues back to a field and a day.
For tender crops like slicers, the tomato guide supports pack decisions that reduce bruising.
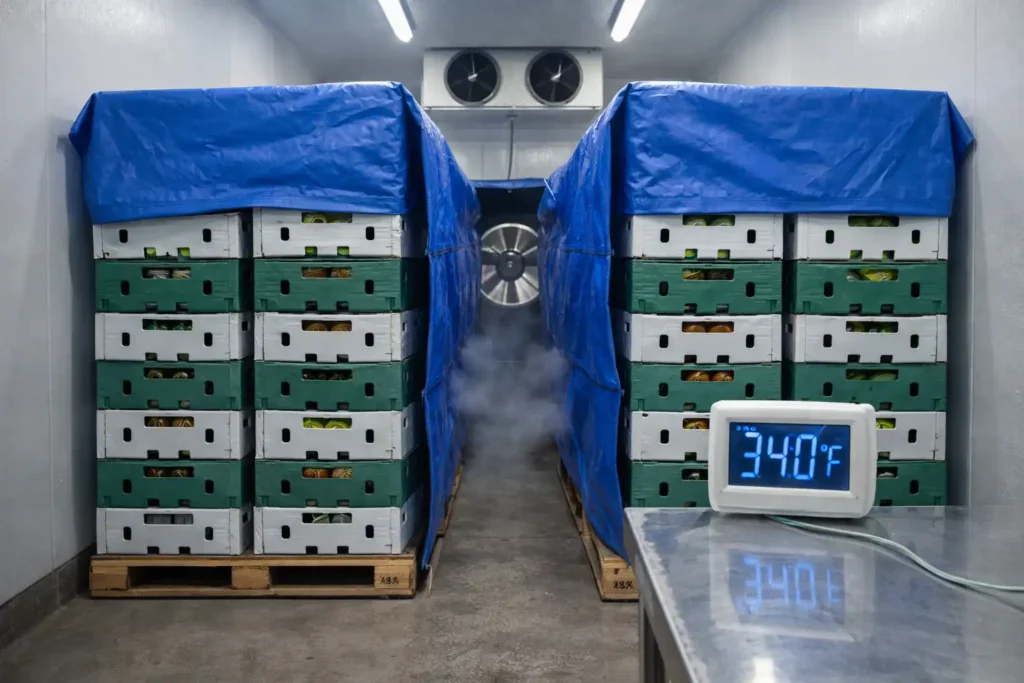
What storage conditions matter most?
Three storage levers control most outcomes: temperature, humidity, and airflow.
Stable temperature limits respiration and condensation. Relative humidity controls shrivel in produce and moisture migration in stored crops. Airflow prevents hot spots and removes moisture. Clean storage rooms reduce pest pressure. Tight doors and screens reduce rodents and birds.
How do you transport crops without losing quality on the road?
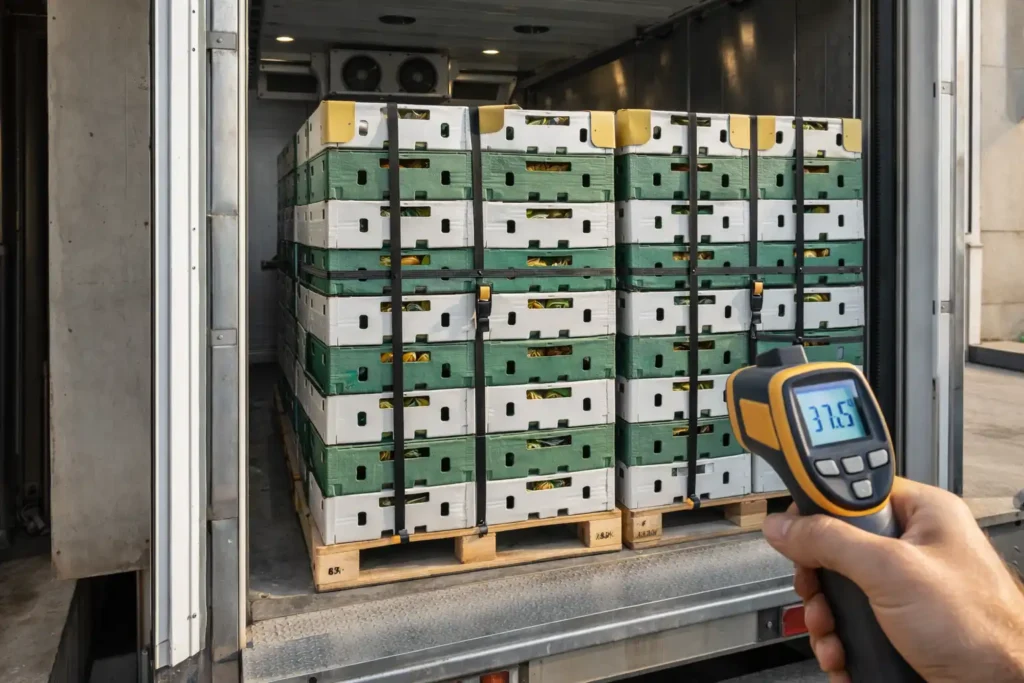
Transport protects temperature and reduces vibration damage.
Pre-cool loads when possible. Use shade during loading. Stack to prevent shifting. Strap and block pallets. Avoid long stops in direct sun. Keep airflow paths open in refrigerated loads. For bulk crops, reduce drop height during loading and unloading.
What records make post harvest handling easier to improve?
Records turn guesswork into decisions.
Track harvest date, field, crew, weather, container type, cooling or drying start time, storage location, and buyer grade feedback. Add notes on issues like bruising, rot, mold, or insects. After a few loads, patterns show up fast.
Troubleshooting: what do common symptoms mean?
- Wilting and weight loss points to low humidity, high airflow, or delays before cooling.
- Soft fruit and short shelf life points to slow cooling, high temperature storage, or overripe harvest.
- Surface rot spreading in a tote points to damaged units left in the pack or wet storage conditions.
- Grain heating points to moisture pockets, fines, or airflow problems.
- Condensation on cartons points to temperature swings and warm air hitting cold product.
A practical checklist you can run every harvest day
Use this when you want the basics done right.
- Shade set before harvest starts
- Clean containers staged and labeled by field or lot
- Handling line set for low drops and minimal transfers
- Cooling or drying system ready before the first load arrives
- Wash water quality protected and changed when dirty
- Packing surface cleaned and sanitized
- Storage temperature and humidity checked
- Transport plan set for time, shade, and load stability
Bottom line
Post harvest handling protects the crop you already paid to grow. Fast cooling or drying, gentle movement, clean contact surfaces, and stable storage conditions preserve grade and reduce shrink. Build a simple flow, train the crew on the same steps, and keep records that tie handling choices to outcomes.