Farm Layout Planning: 7 Smart Moves for Roads, Water, and Storage
Farm layout planning turns a property map into a working system for crops, equipment, water, and people. A good layout places fields, lanes, storage, and utilities so you move grain, seed, fuel, and labor with fewer trips and fewer pinch points. It protects soil structure by keeping traffic in predictable paths, and it keeps runoff moving where you want it. This guide explains how to collect site facts, zone your farm, design traffic flow, plan water and drainage, and sketch a layout you build in phases.
A clean farm layout follows a simple sequence: boundaries and water set the limits, access and utilities set the routes, and buildings and field shapes fill the remaining space.
What is farm layout planning?
Farm layout planning is the process of placing farm zones, lanes, buildings, and crop blocks so daily work follows a short, safe route. A solid plan reduces dead-end driving, protects wet areas from ruts, and keeps storage close to loading points. It also reserves space for expansion and maintenance access.
Layout planning starts with how you operate, not with where the barn looks nice. A crop farm moves seed in, inputs around, and grain out. Your layout needs clear entry points, dependable all-weather lanes, and turning space where trucks and equipment meet.
This crop farming guide walks you through the field decisions that matter most, from soil prep and planting to harvest and storage.
If you are still defining your operation, start by listing what you grow, what you store, and what equipment you run. That planning step pairs well with my guide on how to start a crop farm, because a layout changes once you lock in crop mix, markets, and labor.
What information belongs on your base map before you draw anything?

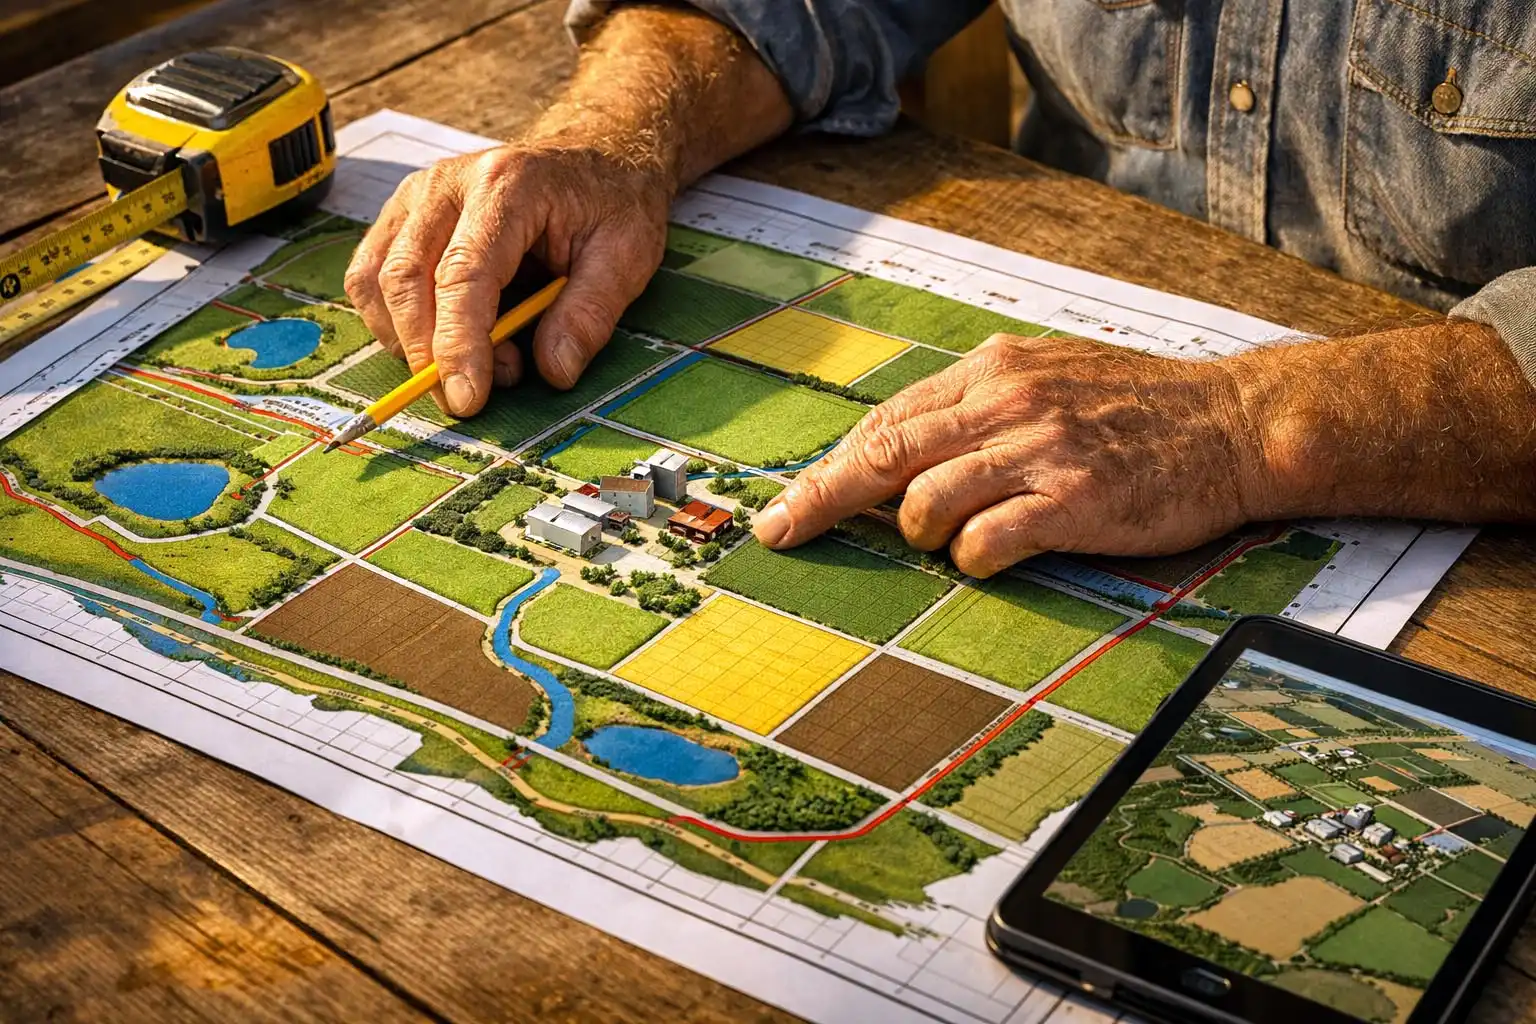
A base map holds the fixed facts that shape every layout decision. Good maps include property boundaries, slope and drainage paths, soil patterns, and legal constraints. When you sketch on top of those facts, your layout fits the land instead of fighting it.
Start with these inputs:
- Boundary lines, easements, and right-of-way areas (from a survey or deed map)
- High and low spots, waterways, ditches, terraces, and wet pockets
- Existing drives, gates, culverts, fences, wells, and utility lines
- Soil type changes, hardpan areas, and fields with compaction history
- Prevailing wind exposure, snow drift zones, and dust travel paths
- Neighbor edges, public road access, and sight-line concerns at entrances
Soil and slope drive field performance. When you confirm soil zones with sampling and field notes, you set up better rotation blocks and more consistent input rates. If you need tools for that mapping work, keep soil testing and measuring tools in your kit, because accurate measurements prevent crooked lanes and mismatched headlands.
Also know: Guide to Crop Farming Basics
How do you zone a farm so work stays organized?
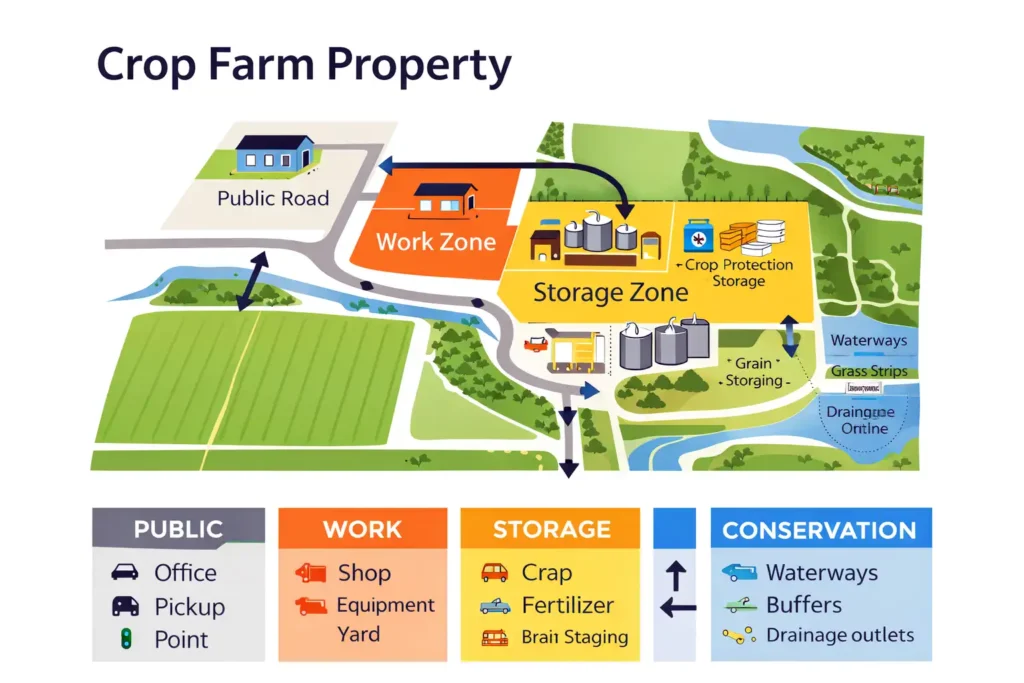
A practical farm layout uses zones that separate clean access, heavy work, and sensitive areas. Zoning reduces traffic through tight spots and keeps high-risk materials away from water sources. It also makes it easier to train help, because every area has a clear purpose.
A crop-focused zoning plan usually includes:
- Public zone: driveway, visitor parking, office pickup point
- Work zone: shop, equipment yard, loading pads, turning loops
- Storage zone: seed, fertilizer, crop protection storage, grain staging
- Production zone: fields, field entrances, headlands, turn rows
- Conservation zone: waterways, buffers, grass strips, drainage outlets
Place the public zone near the road and keep it out of your work loop. That separation cuts the chance of a pickup meeting a sprayer or a grain truck in a blind corner.
See more: Complete Crop Rotation Plan
Where do you place the farmstead core for fast, safe work?
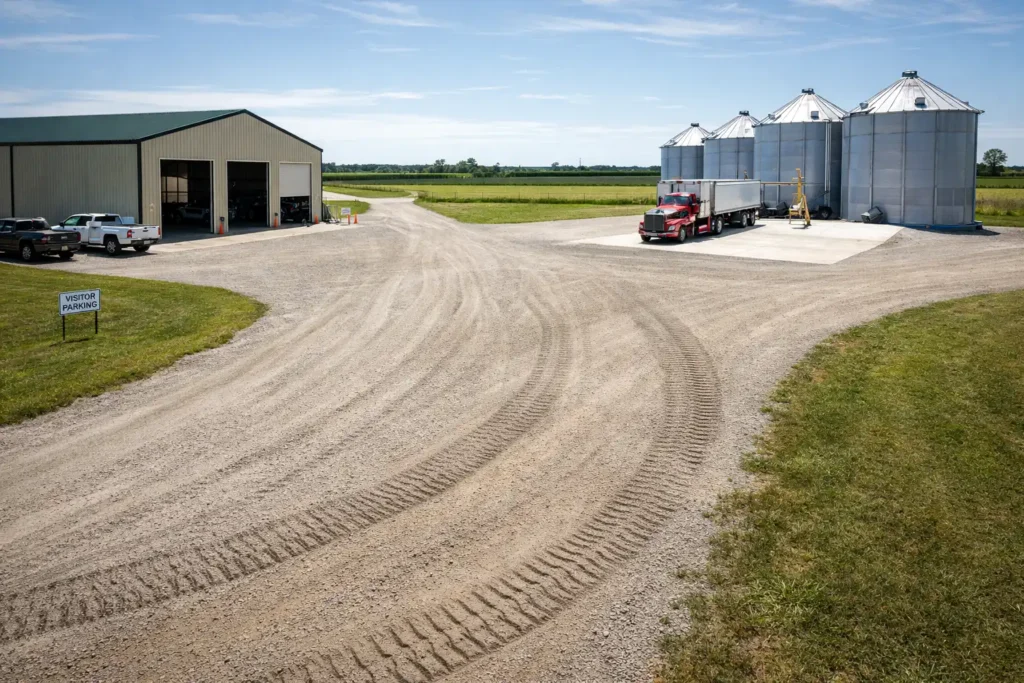
The farmstead core belongs where traffic enters easily, drains well, and connects to utilities without long runs. That placement reduces mud, protects buildings, and keeps loading and repair work close to the road. A good core includes a shop area, an equipment pad, and a storage cluster that supports harvest and input handling.
Use these placement rules:
- Put heavy traffic areas on stable ground with a clear, wide approach.
- Keep the main work yard out of natural drainage channels.
- Separate chemical storage and fuel handling from wells and surface water.
- Leave room for snow storage and for trucks to turn without backing long distances.
- Build a simple loop that lets trucks enter, load, and exit without reversing through the yard.
If you are building from scratch, my guide on how to establish a crop farm helps you think through infrastructure timing, because the best layout still needs a build order that matches cash flow and labor.
How do you design roads, lanes, and gates that equipment fits?
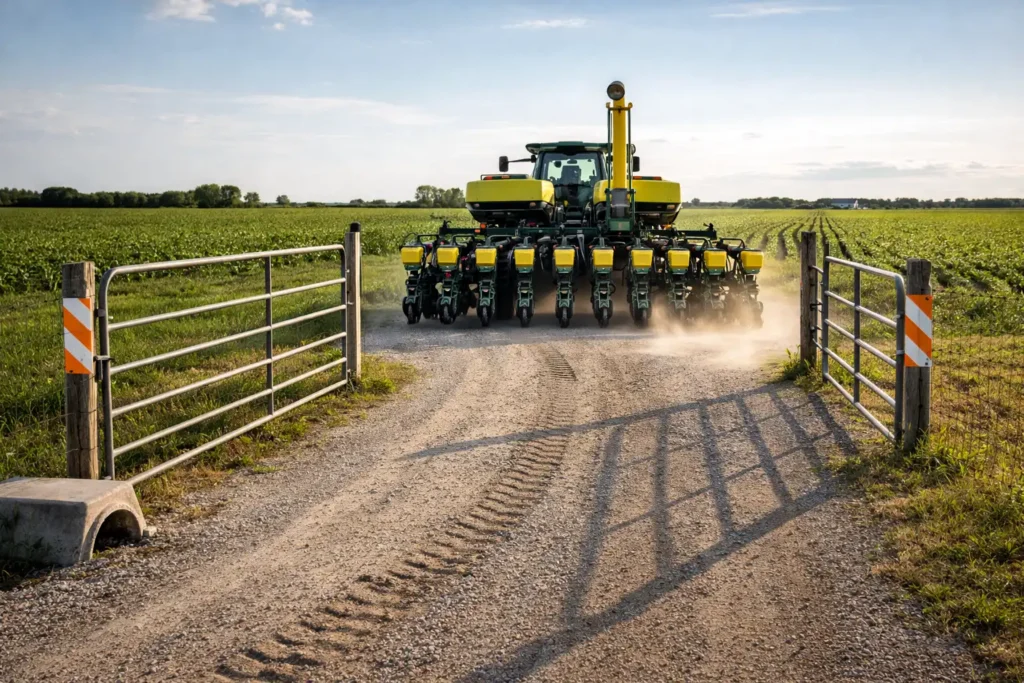
Farm roads work when they support a predictable flow and handle weight in wet seasons. A layout with clear main lanes, short spurs, and wide gates reduces fence damage and field-edge ruts. It also keeps trucks out of soft corners that turn into yearly repair jobs.
Design your traffic system with three lane types:
- Main lane: road to yard to primary fields
- Field spur: short access to a specific block or pivot corner
- Service path: access for mowing waterways, checking irrigation, and fixing tile outlets
Keep intersections simple. A T-intersection with good sight lines beats a five-way meeting of lanes. Put gates where equipment approaches straight, not on a curve or a slope break. When you route lanes along field edges, you also create a controlled traffic path that limits compaction in the crop area.
How do you plan water movement, drainage, and irrigation in the layout?
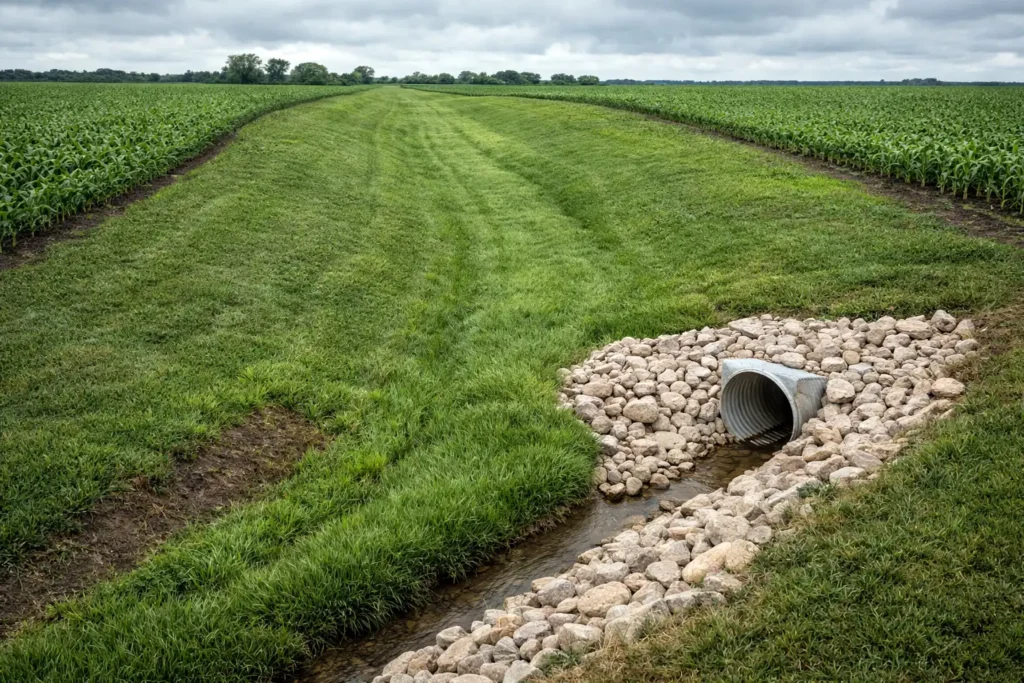
Water planning comes before building placement because gravity never negotiates. A farm layout that respects drainage lines keeps yards drier, reduces erosion, and protects field entrances from washing out. It also makes irrigation routing cleaner, since pumps, intakes, and mainlines follow a planned corridor.
Start by marking how water exits the farm during a heavy rain. Then protect those paths.
- Keep buildings and storage pads off low channels and swales.
- Reserve space for grassed waterways and buffer strips.
- Place culverts and crossings where you already have a stable outlet.
- Avoid routing main lanes across the lowest point of a field.
If irrigation is part of your operation, plan the layout around access to water, pump service space, and mainline routes. A dedicated corridor for pipe and service access prevents repeated trenching in high-traffic areas. For irrigation planning details, use this irrigation and water management section to match your layout to water source limits and maintenance needs.
How do you lay out fields for planting, spraying, and harvest efficiency?
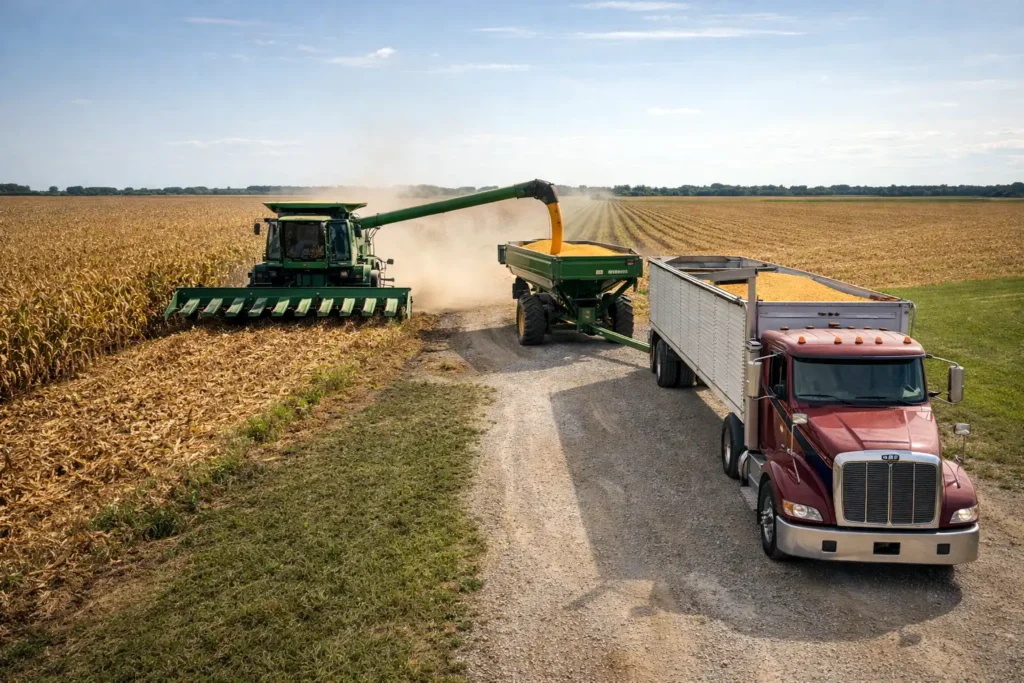
Field layout works best when equipment runs long, clean passes and turns in a predictable space. A well-shaped field reduces overlap, reduces operator fatigue, and keeps headlands from becoming compacted messes. It also supports cleaner guidance lines for planters and sprayers.
Use these field-shape principles:
- Favor long runs over short, chopped-up angles.
- Align rows with practical access and erosion control, not only with the road.
- Keep headlands consistent so every implement turns the same way.
- Put field entrances where trucks and carts approach on firm ground.
Planting and harvest both depend on predictable staging. If your layout puts the grain cart path across the wettest draw, harvest turns into rut repair. Build a firm approach to each main field entrance and keep a turnout area nearby for stopping and checking loads.
For equipment-specific planning, match headland space and entrance locations to how you plant and seed. The planting and seeding practices guide helps you think through implement flow, refill points, and field entry timing.
Spray logistics also affect layout. A sprayer needs a safe mix/load area, a rinse plan, and a route that avoids crossing busy public driveways. If you set up your application area with containment, clean water access, and clear traffic flow, the whole season runs smoother. For setup considerations, see sprayers and application gear.
How do you build crop rotation and soil health into the plan?
A rotation-friendly layout groups fields by soil behavior, water access, and pest risk. That grouping supports consistent planting windows and improves nutrient planning. It also reduces the spread of crop-specific disease pressure when you keep high-risk blocks separated by distance or buffers.
Design rotation blocks around:
- Similar soil texture and drainage class
- Similar access to irrigation or dryland constraints
- Similar harvest windows and storage needs
- Known weed pressure zones and field history
When you keep a field block consistent in shape and access, you also make it easier to run cover crops, manage residue, and apply amendments with less backtracking. If you want a deeper dive on matching field plans to nutrient strategy, use soil fertility practices as a companion reference.
What safety checkpoints belong in a farm layout plan?
A safe layout separates people from traffic and separates high-risk materials from water and living areas. It also gives emergency access to the shop, fuel, and storage zones. Safety planning reduces injury risk and reduces the chance of a spill reaching a ditch or well.
Add these safety features to the map:
- A dedicated mixing and loading pad for crop protection work
- A PPE station near chemical handling and wash areas
- A spill kit location marked on the map for quick access
- Fire access lanes and clear space around storage and shop doors
- Lighting zones for night loading and winter work
- Visitor parking that stays out of equipment lanes
Personal protective gear only helps when it is close to the task and easy to grab. If you are standardizing your farm’s safety setup, farm safety PPE provides a solid checklist to match to your layout.
Local rules vary for setbacks, storage, and drainage work. Treat your plan as a starting document, then confirm details with your county, utility providers, and insurers before construction.
What step-by-step process produces a farm layout plan you can build?
A repeatable planning process turns a rough sketch into a layout you can stake out and build. The key is to lock in constraints first, then refine traffic, then place infrastructure. That sequence prevents expensive rework, because you avoid placing buildings where water or access later forces changes.
- Draw the boundary map and mark fixed limits. Add easements, right-of-way, and no-build areas.
- Mark water movement. Sketch slopes, channels, wet pockets, and outlets after a rain.
- Define your zones. Block out public access, work yard, storage, and crop production areas.
- Route the main traffic loop. Place entry, exit, and the shortest safe path between yard and fields.
- Place utilities corridors. Plan routes for power, water, and data where equipment does not cut them up.
- Place the farmstead core. Put shop, pads, and storage where drainage and access stay reliable.
- Shape field blocks and entrances. Align rows, headlands, and access points with your traffic plan.
- Stress-test the plan. Walk through planting, spraying, harvest, and winter access on paper.
- Stake it out in the field. Use flags and paint to confirm turns, sight lines, and wet spots.
- Build in phases. Start with lanes and drainage fixes that protect every later investment.
Which farm layout mistakes cost labor every season?
Most layout problems come from putting buildings first and solving access later. Those decisions create long drives, wet entrances, and tight turns that never disappear. A quick review of common mistakes helps you spot issues before you pour gravel or concrete.
- Putting the main yard in a low spot that collects runoff and snowmelt
- Routing the only lane through the busiest work area instead of around it
- Placing gates on curves or slopes where equipment swings wide
- Creating dead ends that force trucks to back long distances
- Splitting fields into odd angles that waste passes and increase overlap
- Ignoring service access to tile outlets, waterways, and irrigation hardware
- Mixing public parking with work traffic near the shop or loadout
Closing thoughts
Farm layout planning works when it matches your daily route, your water flow, and your equipment footprint. Start with fixed constraints, then design traffic flow, then place the farmstead and shape the fields. Keep safety and water protection on the map, not in your head. A clear plan on paper saves gravel, fuel, and time once the season starts.