Integrated Pest Management for Beginners: 11 Quick Scouting Tips
Integrated Pest Management (IPM) is a practical way to protect crops by preventing pests first, scouting often, and choosing the lowest-risk control that still works. A beginner succeeds in IPM by learning pest life cycles, tracking field conditions, and acting only when pest pressure reaches a clear action point. This guide walks you from preseason planning to harvest: how to scout, how to decide when to treat, and how to pick cultural, mechanical, biological, and chemical tools in the right order.
What is Integrated Pest Management (IPM)?
IPM is a decision system that reduces crop loss by combining prevention, monitoring, and targeted control. Farmers use IPM to match the tool to the pest, the crop stage, and the risk level. IPM treats pesticides as one option, not the first option, and it relies on field observations and records to improve outcomes each season.
In short, Integrated Pest Management (IPM) is a practical, step-by-step approach that prevents and controls pests by combining scouting, action thresholds, and targeted tools, using the lowest-risk option that still protects the crop.
If you stay ahead of pest and disease control in crops, you protect yield early and avoid expensive rescue sprays later in the season.
What problems does IPM solve for beginners?
IPM solves three common beginner problems: spraying without a clear target, missing early pest buildup, and repeating the same control until it stops working. IPM replaces guesswork with scouting notes, pest identification, and planned steps. That structure protects yield, reduces wasted passes, and lowers risk to beneficial insects, people, and nearby water.
Weeds often act as pest “bridges,” so tightening up weed management on crop farms helps your IPM plan cut hiding spots and reduce early-season pressure before it spreads.
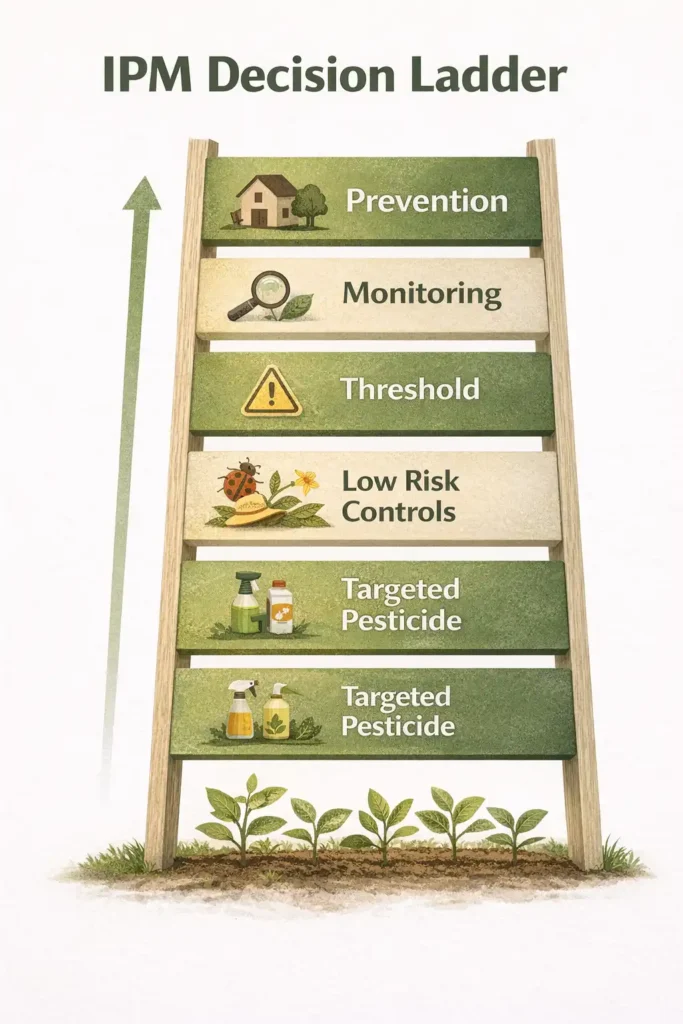
What are the core principles of IPM?
IPM follows a simple ladder: prevent pests, monitor fields, set action thresholds, choose low-risk controls first, and review results with records. Each rung supports the next rung. Prevention reduces pest pressure, monitoring finds problems early, thresholds keep decisions consistent, and records improve timing and tool choice next season.
When scouting, learn the most frequent plant diseases in crops in your area so you can separate disease symptoms from insect damage and choose the right control at the right time.
How do beginners start an IPM plan from scratch?
Beginners start IPM by building a one-page plan that lists the crop, likely pests, scouting method, action points, and the first three control options in order. This plan turns a season into repeatable field checks. Use the workflow below as your start-to-finish path.
Step 1: Define your crop, field, and risk map
Write down field history, last crop, weed pressure, irrigation method, and problem areas like borders and low spots. Pests cluster in patterns. A simple map helps you scout the right places first.
Step 2: List likely pests, diseases, and weeds
Use last year’s notes, neighbor history, and crop-specific guides. Match each pest to the crop stage it damages. Keep the list short at first. Add more as you learn.
Step 3: Choose a scouting schedule and method
Set a scouting day and stick to it. Beginners improve fast with consistent timing. Use the same route, count method, and notes format each visit.
Step 4: Set action thresholds you will follow
An action threshold is the point where damage risk outweighs the cost and risk of control. Beginners keep thresholds practical: plant stage, percent stand loss, damaged leaves per plant, pests per row-foot, or disease presence in a key area.
Step 5: Stack control options from lowest risk to highest risk
Build a control ladder for each pest: cultural prevention first, then mechanical and physical controls, then biological tools, then targeted pesticides when needed. This order protects beneficials and reduces resistance risk.
Step 6: Record results and update the plan
Write down what you saw, what you did, and what happened next. Records turn one season into a better next season.
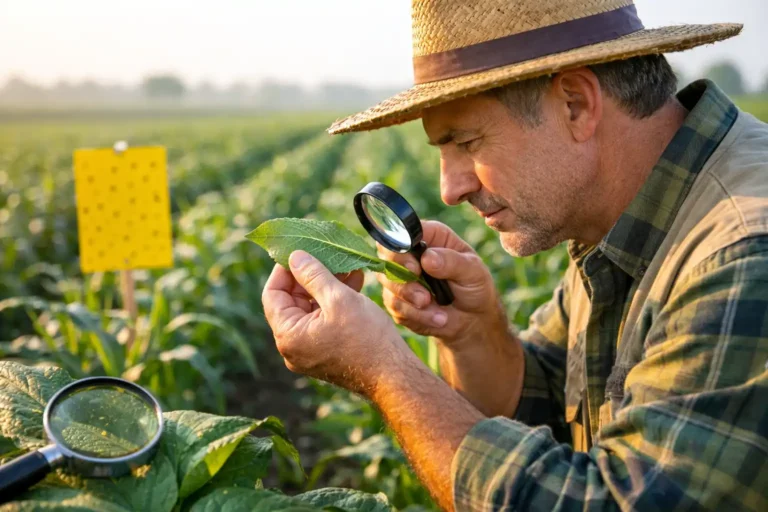
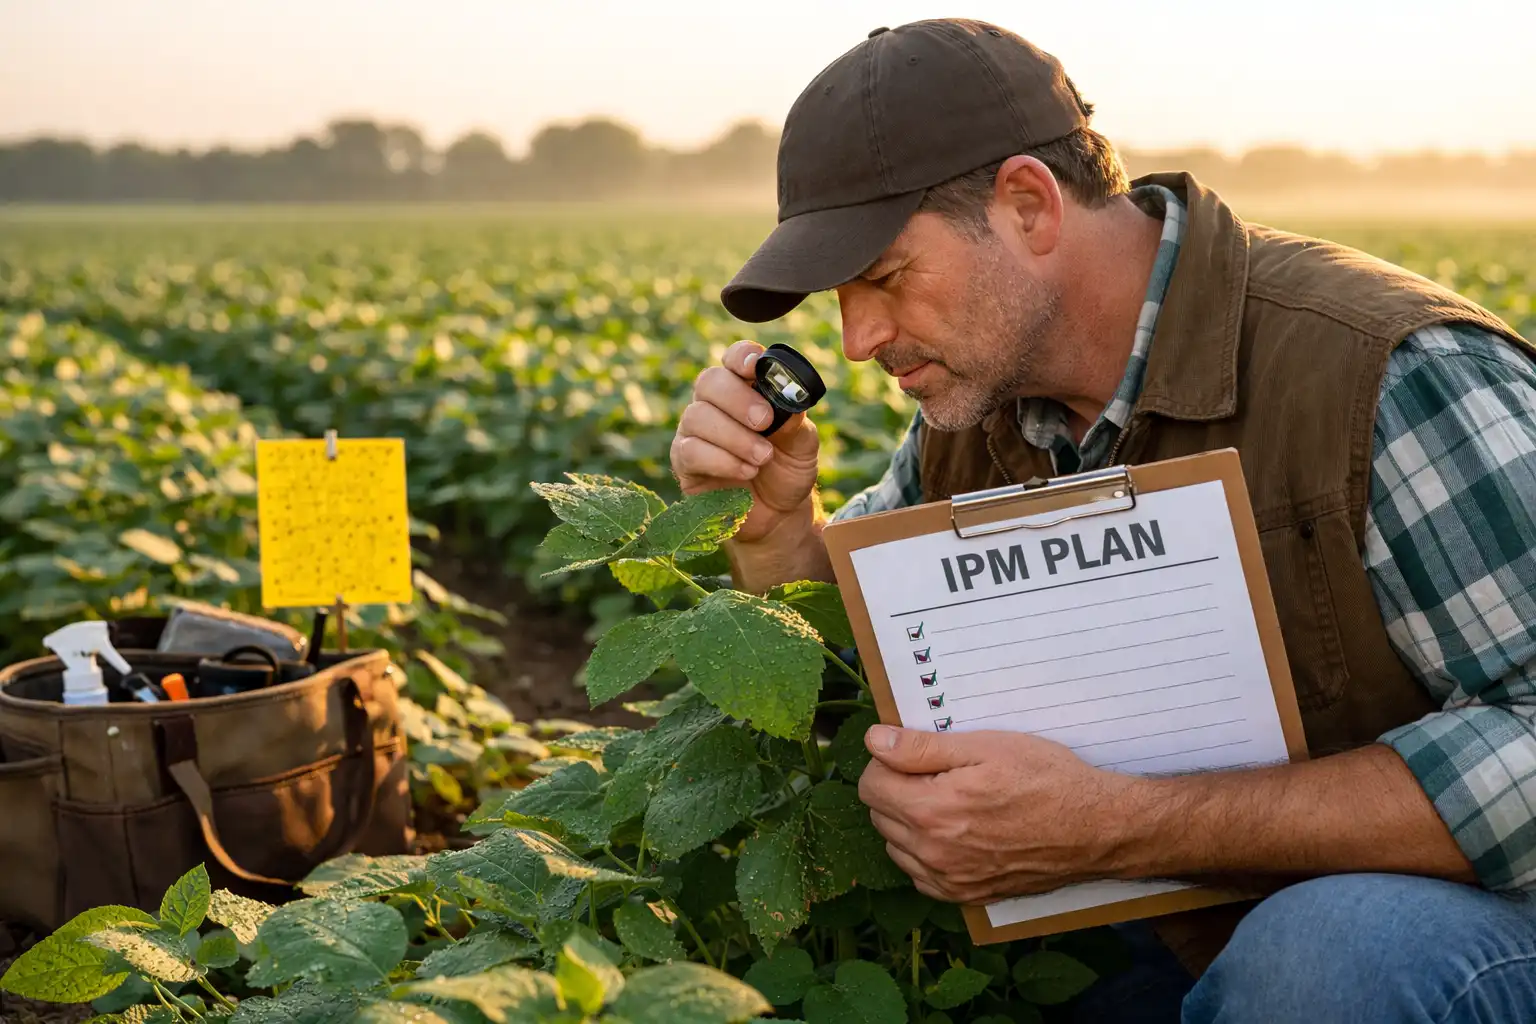
How do you scout a field the right way?
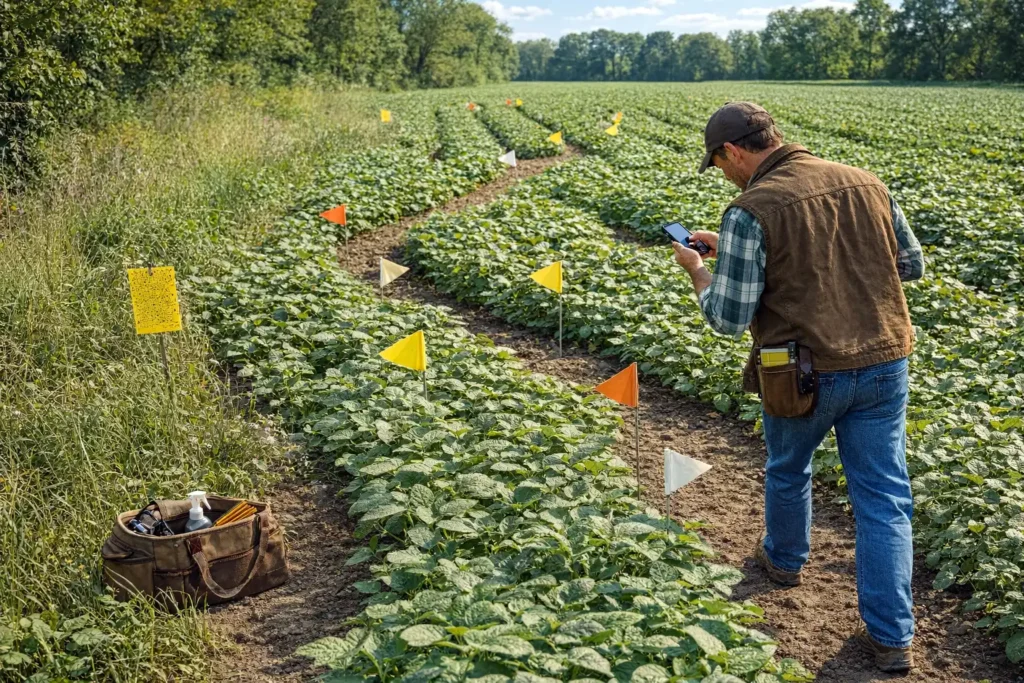
Good scouting uses a repeatable route, a consistent sample size, and clean notes that separate observation from decision. Walk into the field, not just the edge. Check borders, low areas, and spots near shelterbelts. Look at the underside of leaves, growing points, and the soil line, because early pests hide there.
A simple scouting routine beginners can run every week
- Pick 5 to 10 stops per field, spaced out.
- At each stop, check a fixed number of plants and write counts.
- Note crop stage, weather, irrigation events, and recent field work.
- Take clear photos of unknown insects and symptoms for later ID.
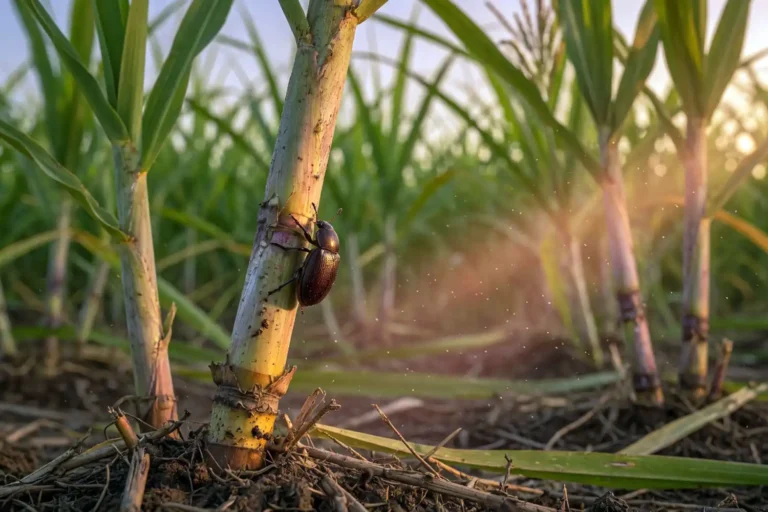
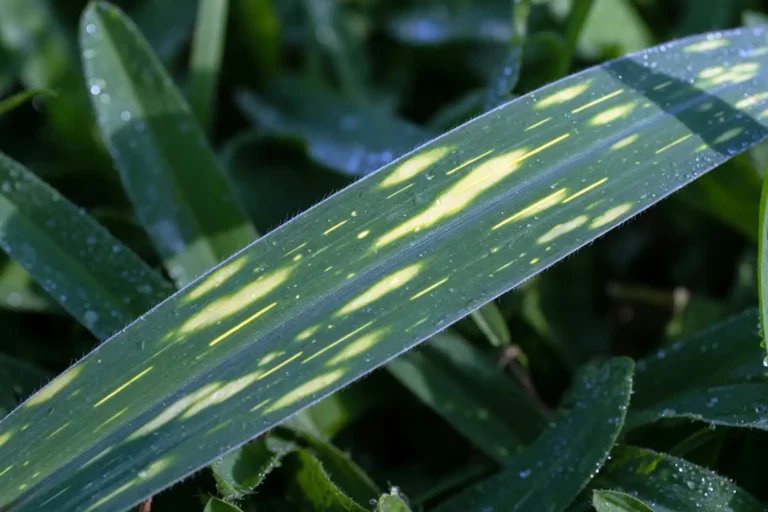
How do you identify pests without guessing?
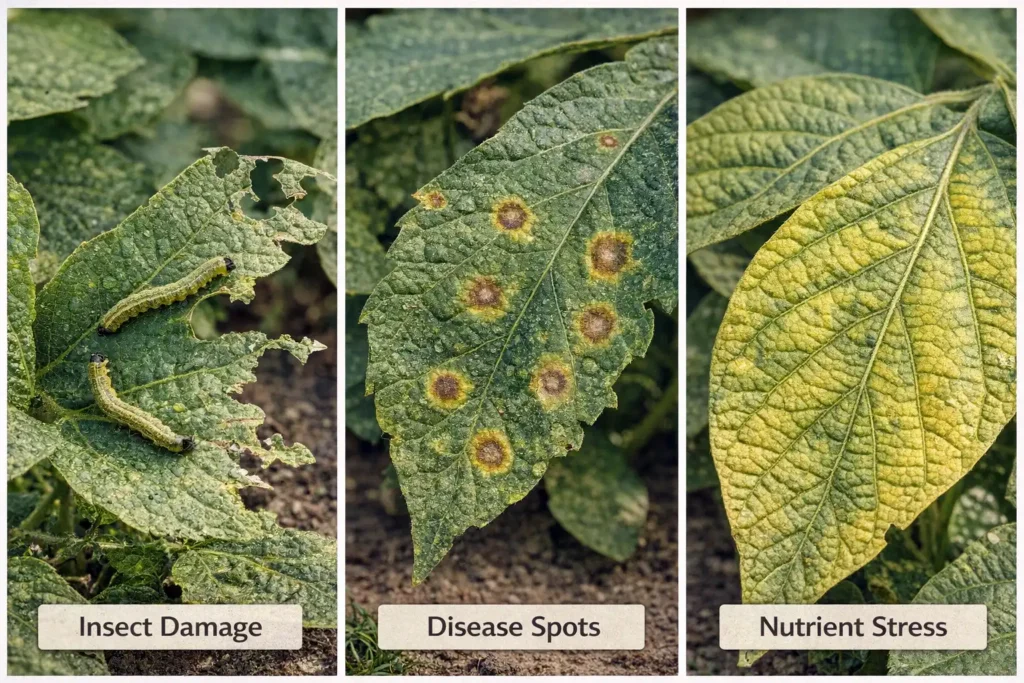
Correct identification starts with separating insect feeding, disease symptoms, and abiotic stress like herbicide injury, heat, or nutrient issues. Insects leave patterns like chewing holes, stippling, or honeydew. Diseases create spots, blights, wilts, or molds that often follow humidity and leaf wetness. Abiotic stress often shows uniform patterns tied to equipment passes or field zones.
If you spray without identification, you can miss the true cause and lose time. When you do need to treat, match the tool to the pest life stage that is present in the field.
What prevention practices reduce pest pressure the most?
Prevention reduces the number of pest problems you need to “fix” later. Beginners get the biggest payoff from rotation, sanitation, planting decisions, and habitat management.
Crop rotation and field history
Rotation breaks pest life cycles that depend on one host crop. Field history tells you which pests overwinter, which weeds dominate, and where disease carries over.
Variety selection and healthy starts
Resistant varieties reduce disease pressure and cut the number of rescue treatments. Healthy transplants and clean seed reduce early infections.
Planting date, spacing, and canopy management
Timing and spacing change humidity and leaf wetness. Dense canopies trap moisture and support disease. Balanced spacing and airflow reduce pressure.
Irrigation and moisture control
Overhead irrigation raises leaf wetness and can spread some diseases. Drip irrigation keeps foliage drier and reduces splash spread in many systems.
Field sanitation and equipment hygiene
Remove volunteer plants, destroy heavily infested crop residues when appropriate, and clean tools that move between blocks. Sanitation reduces carryover and slow spread.
When do mechanical and physical controls work best?
Mechanical and physical controls work best when pest pressure stays low to moderate and when timing is early. These controls include cultivation, mowing field edges, row covers, traps, hand removal in small plots, and exclusion screens in protected culture. The key is early action and consistent follow-through.
Weed pressure drives insect and disease pressure in many fields, so mechanical weed work supports IPM across the season. CropFarming’s weed control tools section helps you match tools to field size and crop system.
How do biological controls fit into IPM?
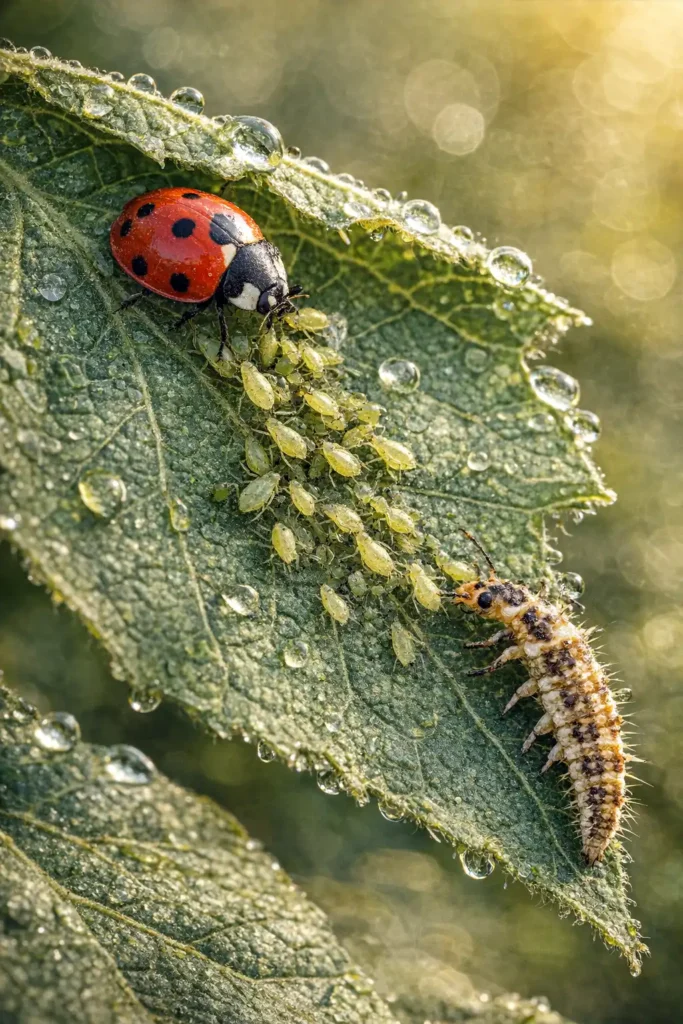
Biological control uses living organisms or biological products to suppress pests. Farmers support biological control by protecting natural enemies, using selective products, and providing habitat like flowering borders when it fits the farm. Beginners succeed by learning which beneficials are present and by avoiding broad-spectrum sprays when pest levels stay below action thresholds.
Examples of natural enemies include lady beetles, lacewings, parasitoid wasps, predatory mites, and ground beetles. Your job is to keep them working by limiting unnecessary disruption.
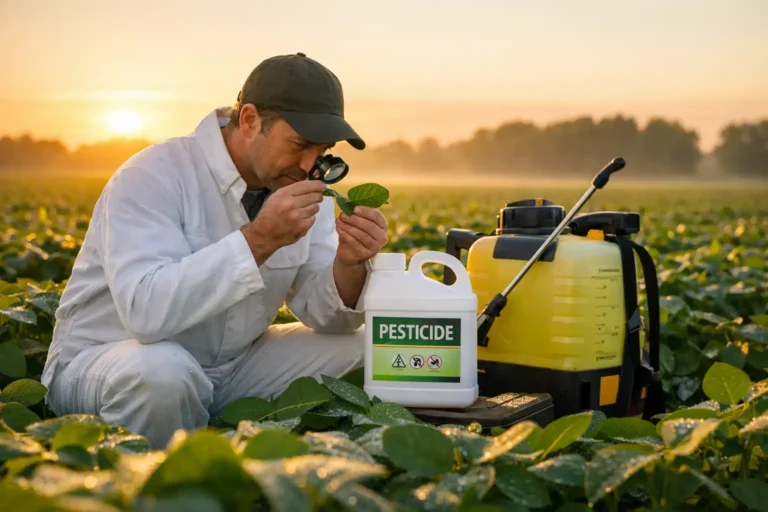
How do pesticides fit into IPM without overusing them?
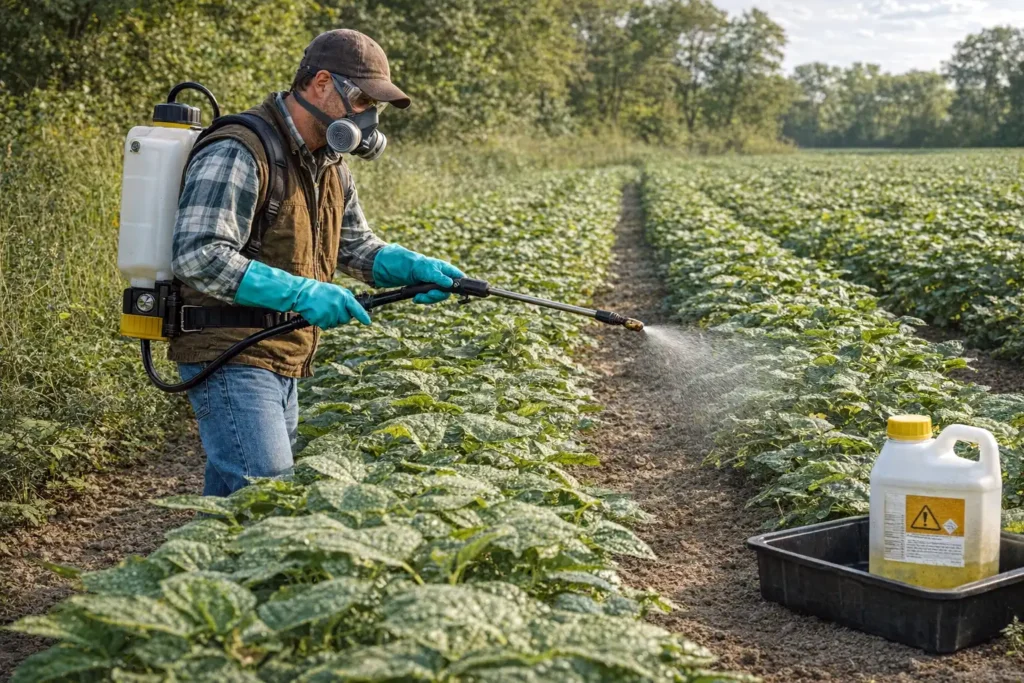
Pesticides fit into IPM as a targeted tool used after monitoring confirms a need and after lower-risk options no longer meet the threshold. When you use pesticides, product choice and application timing control both performance and risk. A well-timed, well-targeted application often beats repeated “insurance” sprays.
Basic pesticide decision rules for beginners
- Treat the pest you identified in the field, not the symptom you fear.
- Treat the life stage that the label and biology support.
- Use the lowest-risk effective option for beneficials and pollinators.
- Rotate modes of action across the season to reduce resistance pressure.
- Re-scout after treatment to confirm the result.
For application planning and equipment fit, review CropFarming’s guide to sprayers and application gear.
Safety comes first in any pesticide plan
Read the full label, follow the restricted-entry interval, and use the PPE the label requires. Store products securely and keep mixing and loading away from wells and water. CropFarming’s farm safety PPE section helps beginners build a practical, compliant kit.
What does an IPM “action threshold” look like in real life?
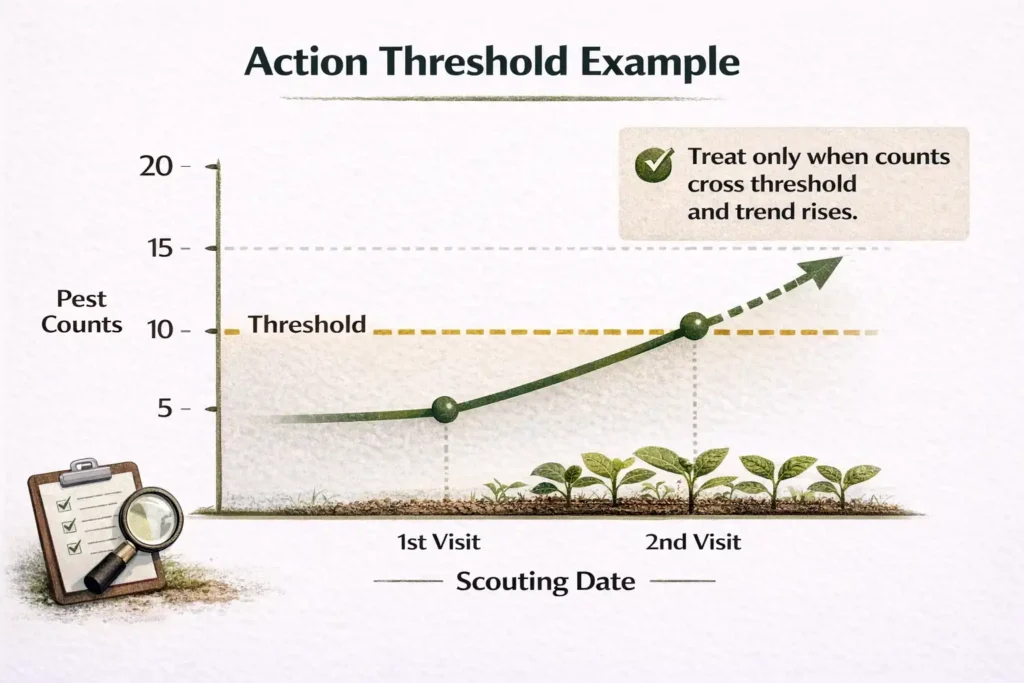
An action threshold is a written trigger that turns scouting counts into a decision. A threshold can use pest density, crop stage, and damage trend. For example, a beginner can write: “Treat if pests increase across two scouting visits and damage reaches the plant part that drives yield at this stage.” The exact threshold varies by crop, market, and local risk, so the habit matters more than the perfect number early on.
How do you keep IPM records that actually help?
Useful records stay short and consistent. A beginner record answers five questions: what you saw, where you saw it, how bad it was, what you did, and what happened after. Add weather notes and crop stage because both change pest growth rates and disease spread.
A simple record format
- Date, field, crop stage
- Pest or symptom ID
- Counts or severity notes
- Action taken and product or method
- Follow-up result at the next scouting
What is a beginner-friendly seasonal IPM calendar?
A seasonal IPM calendar is a checklist that matches scouting and prevention to crop stages. Use this structure and adjust to your crop.
Preseason
Calibrate equipment, clean storage areas, review last season records, and set your pest list. Plan rotation and sanitation. Fix drainage problems that keep fields wet.
Planting to early vegetative
Scout for stand issues, cutworms, early weeds, and seedling diseases. Protect seedlings with clean starts and good moisture management.
Rapid growth and canopy closure
Increase scouting frequency. Watch for aphids, mites, caterpillars, and foliar diseases that track humidity. Improve airflow where the system allows.
Flowering and fruit or grain fill
Protect pollinators and avoid disruptive treatments when possible. Scout for pests that directly damage yield parts and for diseases that infect reproductive structures.
Preharvest
Scout for late-season flare-ups and avoid treatments that risk residues or harvest delays. Prioritize sanitation, harvest timing, and storage hygiene.
What common mistakes slow down IPM results?
Beginners usually stumble in the same few spots.
Mistake 1: Treating symptoms instead of causes
Yellow leaves can come from insects, disease, nutrient issues, water stress, or herbicide injury. Identification comes first.
Mistake 2: Scouting only the field edge
Edges can overstate some pests and miss others. Walk into the crop and sample the whole field.
Mistake 3: Changing methods every visit
If the method changes, the data stops comparing. Use the same counts and route, then adjust only after you learn a pattern.
Mistake 4: Using broad-spectrum sprays by default
Broad-spectrum products can remove beneficials and trigger secondary pests. Selective tools protect the system.
Mistake 5: Skipping follow-up scouting
A treatment without follow-up teaches nothing. Re-check the field and record the result.
How do you troubleshoot when IPM “does not work”?
IPM failures usually come from three causes: wrong ID, wrong timing, or weak coverage.
Check identification
Confirm the pest, disease, or stress factor with clear signs, life stage, and location on the plant.
Check timing
Many pests have a short window where control works well. Late applications often reduce visible pests but do not protect yield parts already damaged.
Check application quality
Coverage, nozzle choice, droplet size, water volume, and wind conditions change results. Calibrate, use the right speed, and keep boom height steady.
Check resistance risk
If one product class repeats, performance drops over time. Rotate modes of action and use non-chemical controls to reduce selection pressure.
FAQs about Beginners Integrated Pest Management (IPM)
Is IPM only for organic farming?
Do I need special tools to start IPM?
How fast do IPM results show up?
Closing checklist for your first IPM season
Start with a one-page plan, scout on a schedule, write action thresholds you follow, and use a control ladder that puts prevention first. Keep your notes clean and short. When a problem shows up, slow down long enough to identify it, then act with the lowest-risk tool that meets your threshold. That routine turns IPM into a habit, and habits carry farms through tough years.